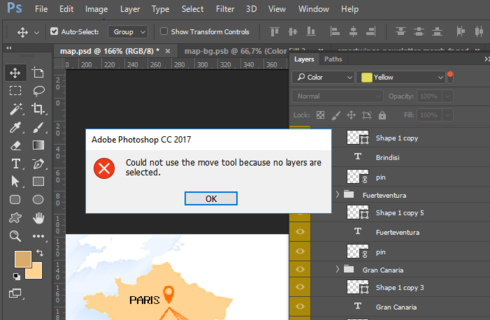
Could not use the move tool because no layers are selected. This article will show you how to Get rid of the “Could not use the move tool because no layers are selected” message that pops up when you click anywhere with no layer selected. Moving in Photoshop is a series of actions that include moving objects, moving files, moving layers, and groups. So how are the moves in photoshop done? What are some caveats about moving objects in PS?
How to move objects in photoshop
Moving in photoshop is a very general saying. This means that we have an infinite number of “different moves” examples. Move a character in the image to a new location; move the layer… Because of its complexity, cusc.edu.vn also doesn’t know how to share about this topic. So here are some situations that you might encounter with moving objects in photoshop.
How to move an object in photoshop to a new position
Moving an object in an image to a new location is a special case, combining moving and deleting objects. That means that Photoshop software will calculate to move an object in the image to a new position and delete the object in the old position. This is of course the case for quick use with photos with simple or uniform backgrounds. With photos with complex backgrounds you have to do it manually. The steps to move objects in the image are done as follows:
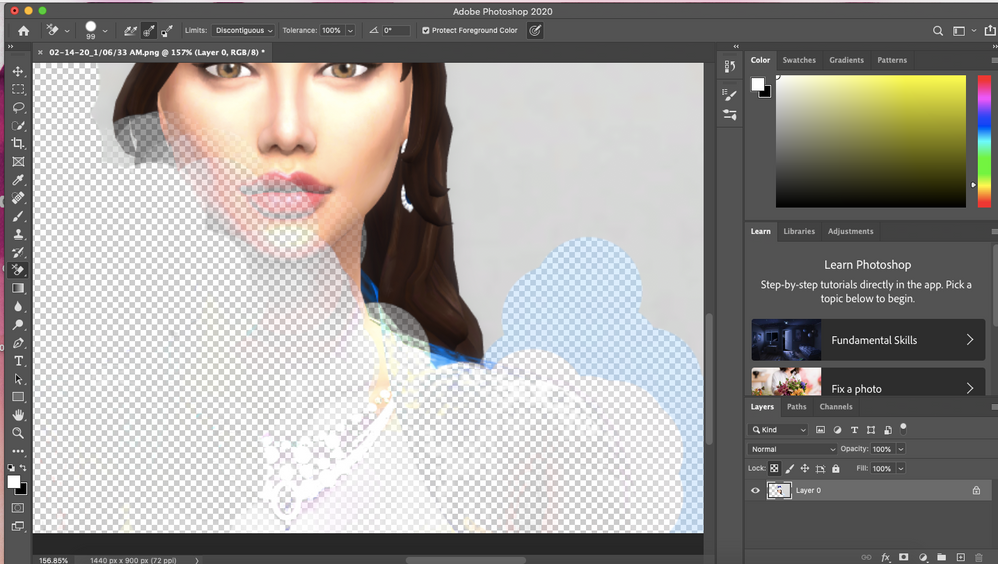
Step 1: Add photos to photoshop.
Before performing Move in Photoshop you need to insert the image into photoshop . There are many different ways to do this. In which, the traditional way of inserting images is done by: From the menu bar -> Select File -> select Open. -> Select the folder containing the photos -> Select the image to add -> Select open to open the image. It should be repeated that moving objects in the image only works for photos with a not too complicated background.
Move change layer position
Changing layer position is another form of Photoshop movement that we want to cover. This is actually a way to help you change the way layers are stacked. Thereby using display or mask the corresponding images in your working file. To be able to change the layer position in Photoshop you have 2 ways to do it.
Change layer position with keyboard shortcut
Step 1 Select the layer: In the layers panel (f7) You need to select the layer that you want to change the layer position. Then you use the corresponding key combinations to rearrange the position of this layer relative to other layers:
Ctrl + < The key combination allows you to bring the selected layer below another adjacent layer. Ctrl + > Key combination allows you to select layer on top of another layer adjacent to it. Ctrl + Shift + < The key combination allows you to bring the selected layer to the bottom of the layers palette.
Ctrl + Shift + > Key combination allows you to bring the selected layer to the top of the layers palette. Change the layer position with the mouse.
Changing layer position with the mouse is a form of manual photoshop movement. To be able to do this you do the following: In the layer panel (F7) -> Select the layer to move -> Hold left mouse button on the layer. -> Drag and reposition the layer above or below other layers.
Move objects from one file to another
Moving images from one working file to another is a special form of moving in Photoshop. This often causes you a lot of confusion. However, moving this object is extremely simple. I will share with you how to do it with the mouse as follows: In the first working file -> Select the object you want to move. -> Hold the mouse on the object + Drag and move the object to the name of the 2nd working file. -> Continue to move the mouse to the working area of the 2nd working file -> Release the mouse to finish the command. You should note that the whole process of moving you have to hold the left mouse button. If you let go of the mouse, you cannot move the object.
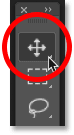
How to use the move tool
To auto-select layers, you first need to have the Move Tool selected. You can select the Move Tool from the top of the toolbar, or by pressing the letter “V” on your keyboard:
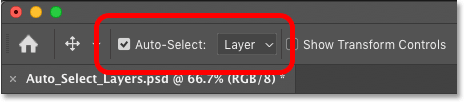
How to turn Auto-Select on
With the Move Tool active, Auto-Select is found in the Options Bar. In the most recent versions of Photoshop CC, Auto-Select is turned on by default. In earlier versions, you can turn Auto-Select on by clicking inside the checkbox:
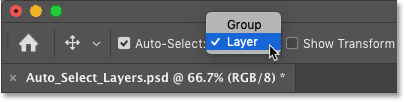
How to switch Auto-Select between Layer and Group
Notice that by default, Auto-Select is set to automatically select layers. But you can also auto-select entire layer groups. Just click in the box beside the words “Auto-Select” and choose either Layer or Group from the list.
How to disable this popup warning message
Now it works, without any Error message.
Adobe guys obviously fixed this issue.
We hope this article helps you! Visit Macwintips.com to update the most practical and useful tips for Mac and Windows.