How to select a layer in Photoshop. When you want to select an object in Illustrator to design vector drawings, you just need to click on it and it will be directly selected, then you can move and edit it as you like. However, with Photoshop how to select a layer? Read this article below for answers.
What are layers? What are layers in photoshop?
Layers are a component in the Photoshop graphics software. Layers are used to describe different levels of arrangement of objects on the design. In Photoshop design software, many layers can be stacked, the object on the layer can be partially obscured or appear blurry inside another image. Layers are used to combine two or more images to form a new image. Working with layers, designers can easily edit, draw, paste, etc. elements on one layer without affecting other layers.
Operations with the layer palette in Photoshop
In Photoshop, designers need to know how to work with the layer palette and perform layer organization operations to manage objects and support the design process. Layer operations such as selecting, moving, creating folders, searching and arranging layers are guided below:
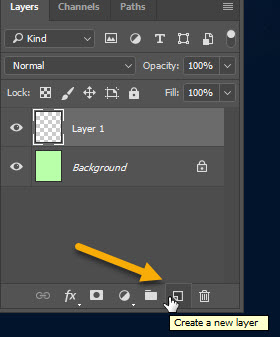
Create a new layer
At the layers panel, left click on the “create new layer” icon.
Select a layer
While designing, when you want to manipulate an object, you select the layer containing that object.
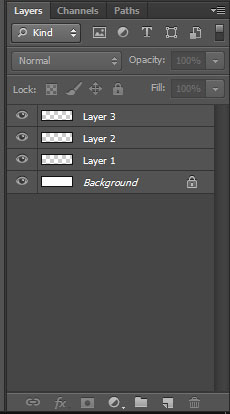
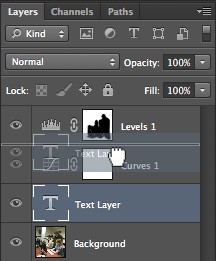
- How to select any layer: On the layer panel, left click on the layer you want to select. When the layer turns blue, it’s already selected.
- To select multiple consecutive layers at the same time, select the first layer then hold the shift key and select the last layer.
- Select multiple selected layers at the same time, hold Ctrl to click to select more layers you want to select.
Move layers
The order of the layers will make a difference to the composition of the image, which objects are visible, which objects are hidden. Therefore, to make the design work easy, you need to know how to move layers to arrange them when needed.
The way to move the order of a layer is very simple:
- Hold the left mouse button on the layer to be repositioned and drag and drop to the desired new position.
- Alternatively, you can move layers with keyboard shortcuts:
- Bring the layer above the layer before it: Ctrl + ]
- Move the layer below the layer after it: Ctrl + [
- Bring the layer to the top: Ctrl + Shift + ]
- Bring the layer to the bottom: Ctrl + Shift + [
Find layers
Working with a Photoshop design file, most of which have a very large number of layers, so you need to control the layer panel to manipulate the design easily and avoid confusion. When you want to manipulate an object on the design, you need to select the correct layer containing that object. Therefore, finding the layer is extremely important.
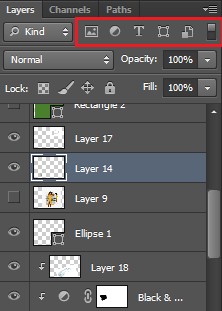
The designer chooses the Search Dropdown menu to choose a method to search for layers by criteria such as type, name, effect, mode, color, properties, etc. After you have marked the search method, use it. options to the right of the Search Dropdown to select additional properties to return layer search results.
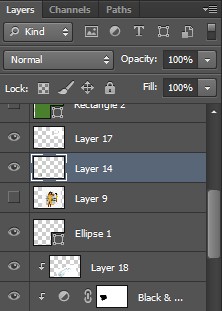
Create layer groups
- To manage and use layers intelligently, Photoshop has the ability to arrange layers into groups and subfolders. Adding layers to the same group the way you want to use when designing smoothly will help you not to miss the object.
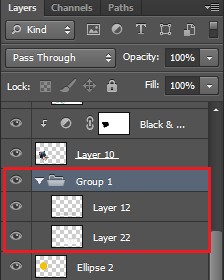
- To create a layer group, select the layers you want to create and then use the keyboard shortcut Ctrl + G. When you need to ungroup the layer, use Ctrl + Shift + G. Or create a new folder by pressing Create a new group in the bottom right corner of the layers panel, and then drag the layers to add them to the same group. Quickly double-click the folder to rename the group.
Lock and Unlock Layers in Photoshop
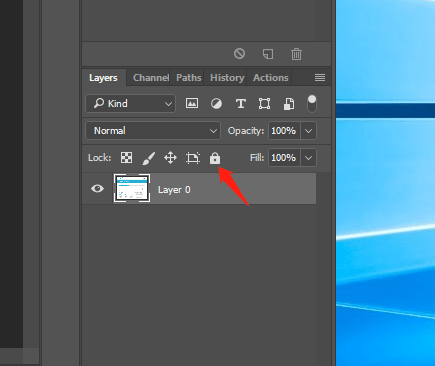
Lock the layer by selecting the layer to lock, and then clicking the padlock in the layers panel. Similarly unlock the layer by clicking on the padlock to unlock the layer again.
Conclusion
Every time we want to select a layer, we have to use one of the following ways:
Click the layer name directly on the layers palette.
Hold Ctrl + right click on the layer, it will show a list of layers for you to choose
Press the shortcut Ctrl + Alt + right click on the position of the image you want to edit, it will automatically select the layer containing that image in the layer panel.
Remember, these ways can be difficult if you previously arranged the layers in an out of order. There is a very simple trick to help you manipulate Photoshop layer selection just like selecting objects on Illustrator. That is, you choose the Move tool (the shortcut is the letter V), then look up the Option bar, click on the Auto-Select option, in the drop-down next to it, there are 2 options: Group and Layer, depending on the item. The intended use that you choose Group or Layer to manipulate. In this example case, I choose Layer. Now, when you click on any shape on the working window, the layer containing that shape will automatically be selected and you can move it around easily. However, it only selects those layers that are not locked, and you want to freeze other layers so that you don’t click by mistake, you can lock those layers.
We hope this article helps you! Visit Macwintips.com to update the most practical and useful tips for Mac and Windows.