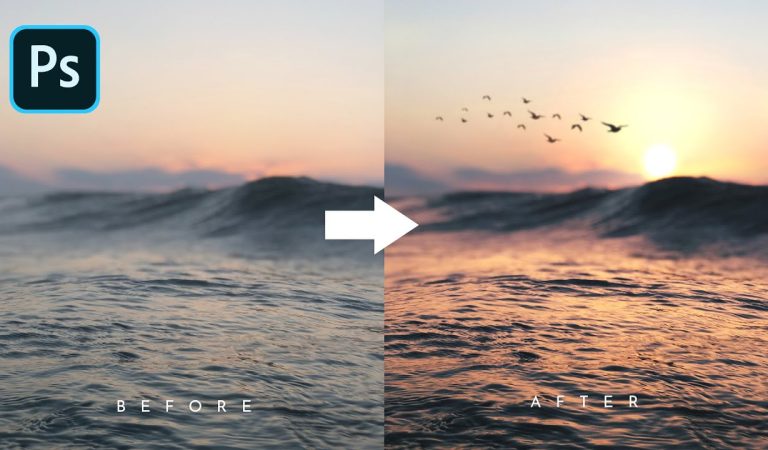
How to Make sunlight in Photoshop. A beautiful background is an indispensable element for virtual living works, right? This article will detail how to create a beautiful and simple sunlight effect in Photoshop that you definitely won’t want to miss! The article is done on HP EliteBook laptop running Windows 10 operating system and using Adobe Photoshop version 2021. You can perform the same operation on computers and laptops running Windows and MacOS operating systems that use the following tools. Other versions of Adobe Photoshop .
I. How to Make sunlight in Photoshop
1. Quick Guide
Preparation stage: Open Photoshop > Open the image you want to add the sun effect > Select the Gradient tool > Adjust the Gradient color and OK when you like it > Select Window > Layers and click the add new layer icon > Select the layer you just created.
Start creating the sun: Hold the mouse at the center of the sun you want to draw and drag to the desired level > Go to Blending Mode in the Layers window and select Screen > Select the Elliptical Marquee tool > Hold Shift and draw a circle around the sun > Select the Layer Mask icon > Click on Layer Mask > Increase Feather in the Properties window > Click on the sun layer, press Ctrl + T to adjust the size if desired and Enter.
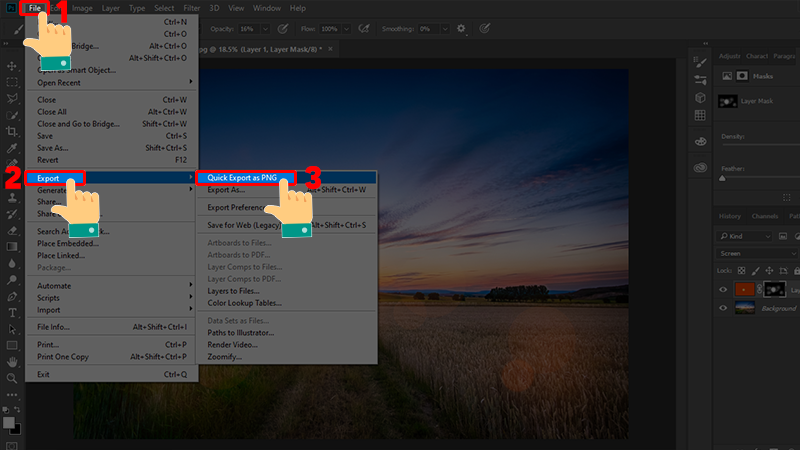
Adjust the details: Select the Brush tool > Reduce brush Opacity > Click Layer Mask, change the foreground color to white > Click random on the image to create a shining effect > Choose File , Export , Quick Export as PNG > Name image and select Save > Done
2. Detailed instructions
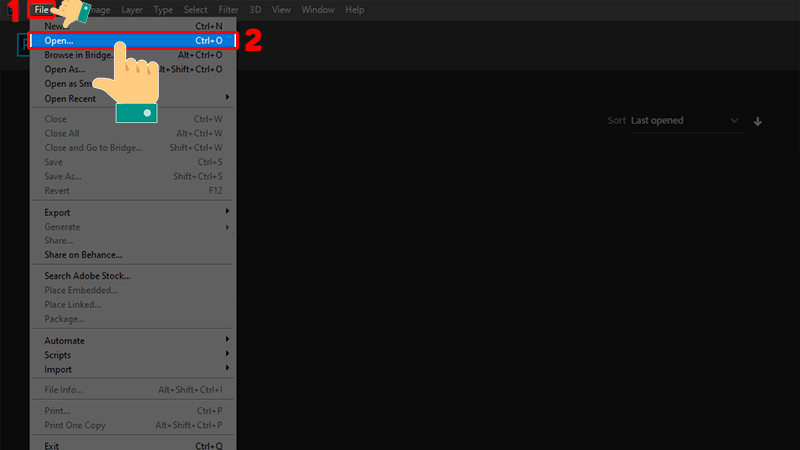
Step 1: Open Photoshop > Choose File > Open to open the photo you want to add the sun effect to.
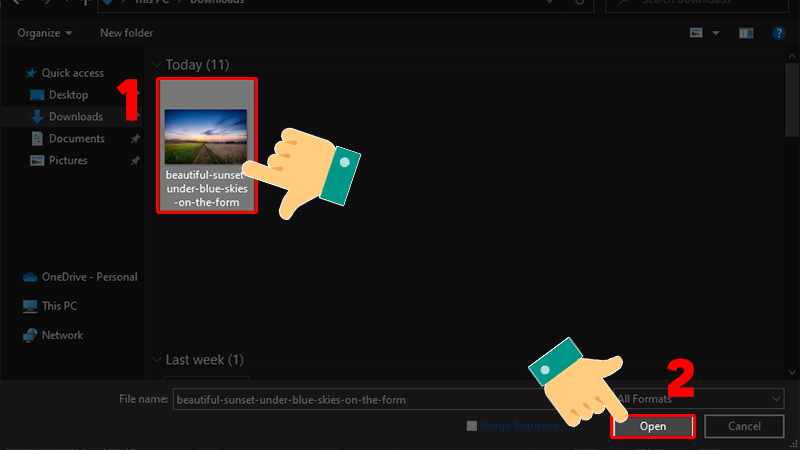
Step 2: Select the image you want to edit and click Open to get started.
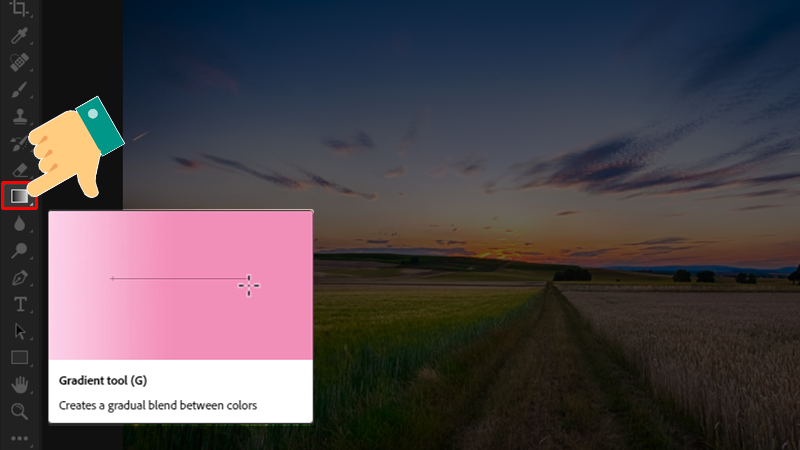
Step 3: Select the Gradient tool to proceed to create the sun.
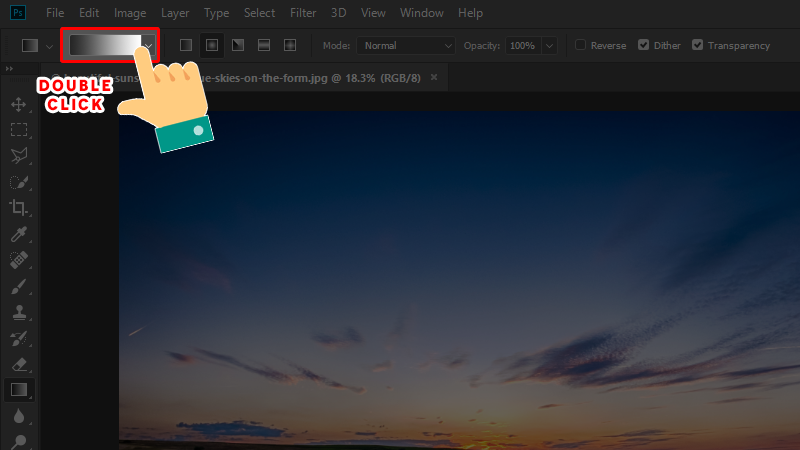
Step 4: Double click on the position as shown to customize the color for your sun.
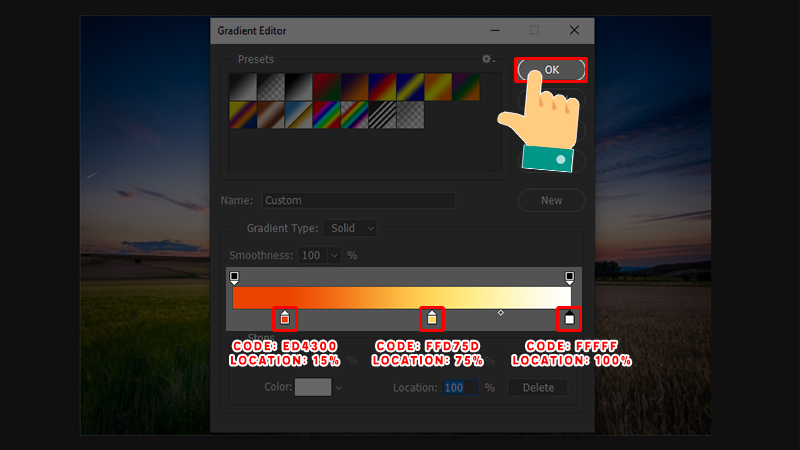
Step 5: Double click on the card to change the color for that card, or click any empty position just below the color bar to add a card.

Step 6: You can refer to how to choose colors and arrange them as shown ( Color code in order from left to right: ed4300, ffd75d, ffffff). After adjusting the color to your liking, click OK .
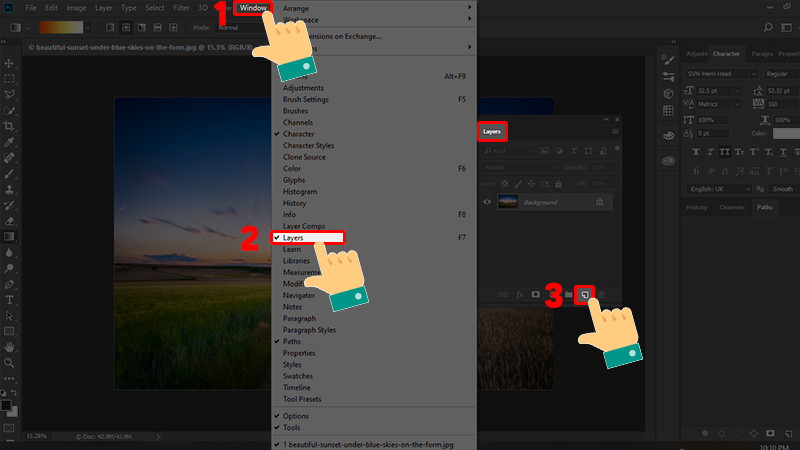
Step 7: Go to Window > Open the Layers window > Select the icon to create a New Layer > Click on the newly created layer, so that the sun that is about to draw will be on the layer above the original image, making it easy to edit without affecting to the original image.
Step 8: Find the position with the most light in the sky of the image, click and hold the mouse at the center of that position and drag to create the sun.

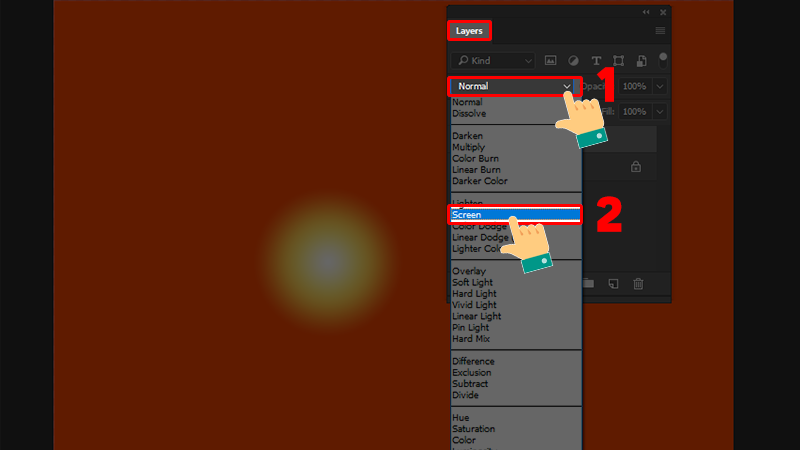
Step 9: Now the sun you just drew will be in the form of a rectangular shape filled with the Gradient you just created. Click on the Blending mode as shown and select Screen, this time the sun layer will be blended with the original image layer below and look more realistic.
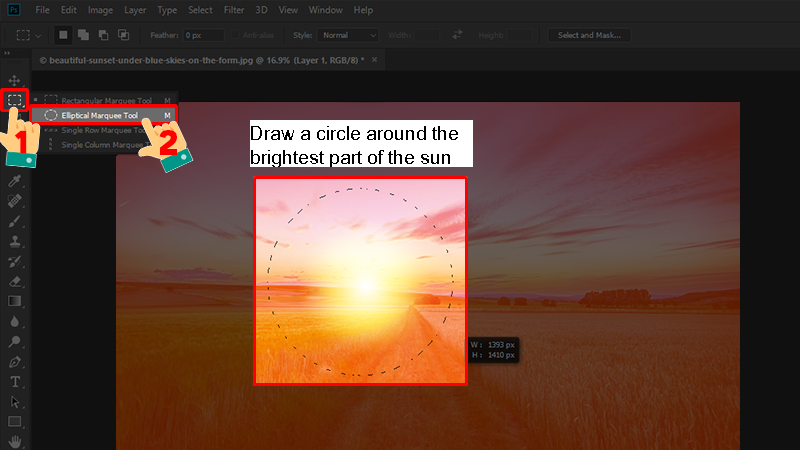
Step 10: Right click on the Rectangular Marquee tool and select Elliptical Marquee tool > Hold Shift, drag a circle around the sun’s brightest area.
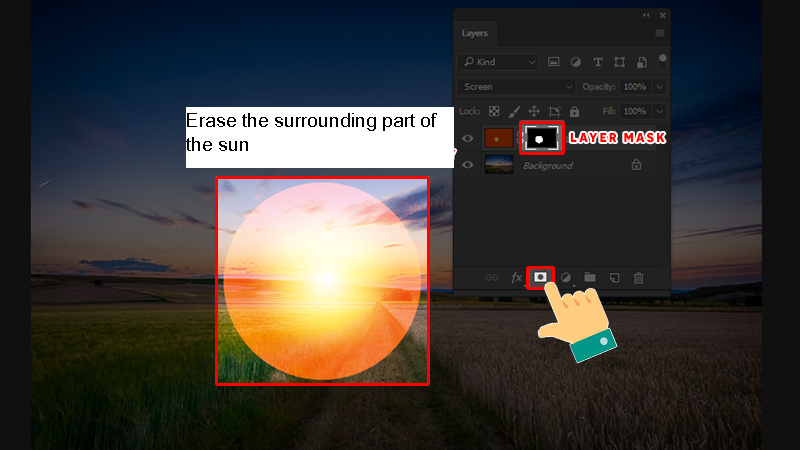
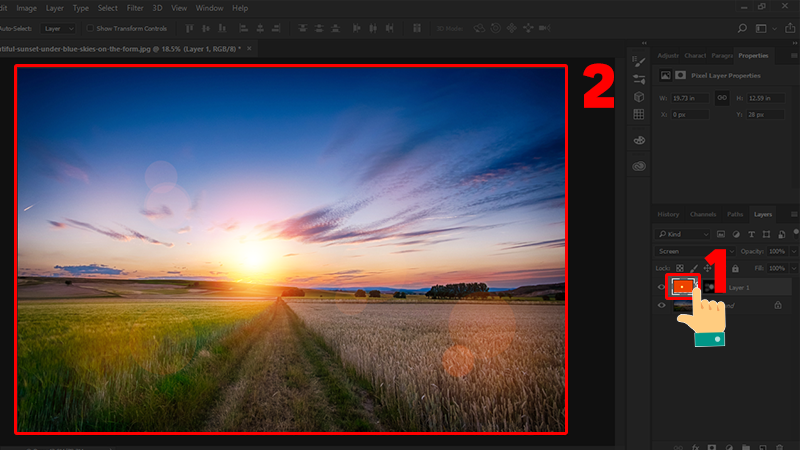
Step 11: Select the Layer Mask icon to erase the surrounding part of the sun.
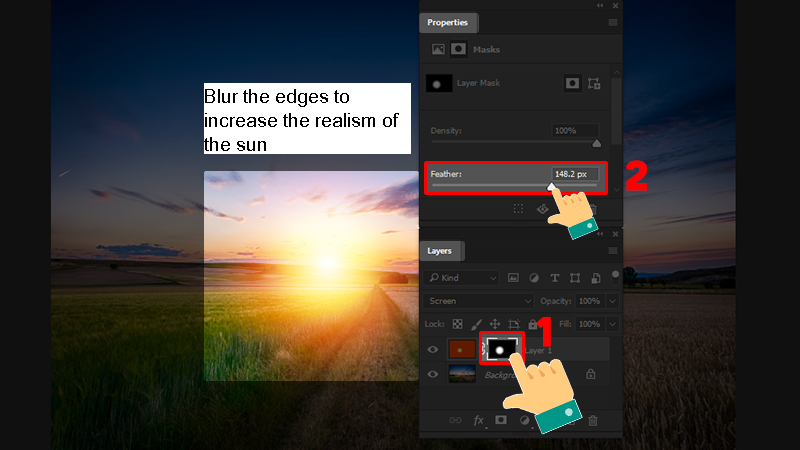
Step 12: Click Layer Mask > Increase Feather in the Properties window to make the circle border fade and become more realistic.
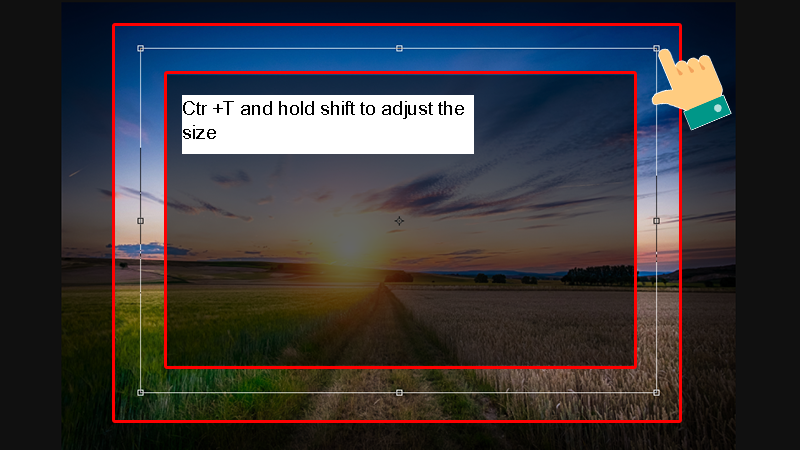
Step 13: You can click on the sun layer and press Ctrl + T to adjust the size to your liking > Press Enter when you like (but then click on the Layer Mask again).
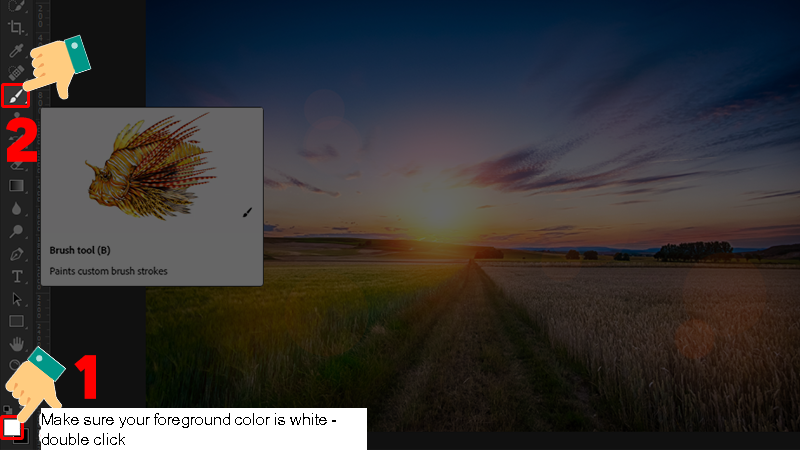
Step 14: Make sure your foreground color is white > Select the Brush tool and proceed to add details to make the sun look vivid and realistic.
Proceed to more details
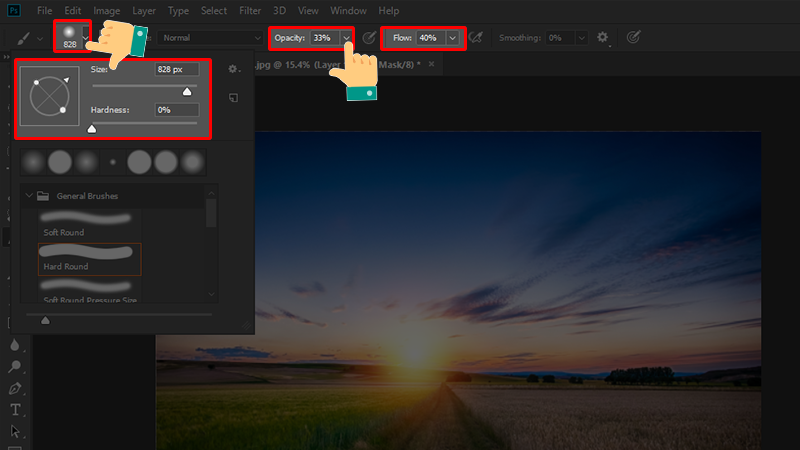
Step 15: Reduce the Opacity of the Brush, other factors like Size, Sadness, Flow you can adjust to your liking.
Step 16: Click arbitrarily around the sun to create a radiating light effect. That’s it, you have a picture with a beautiful sun effect!
Step 17: Choose File > Export > Quick Export as PNG to save the file.
Step 18: Name the file as you like and select Save. So you have created the sun effect yourself in Photoshop already!
Congratulations on your completion!
We have just introduced you how to create beautiful sunlight effects in Photoshop that anyone can do. Hope this article will help you and don’t hesitate to message in the comments section if you have any questions! Good luck!
Hope this article helps you!
Visit Macwintips.com to update the most practical and useful tips for Mac and Windows.