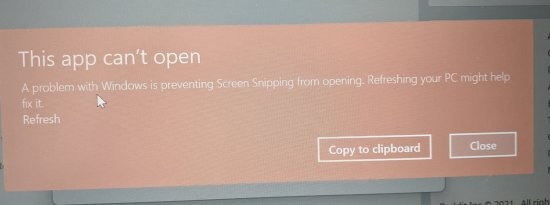
How to fix Snipping Tool error Windows 11. Snipping Tool has been a longstanding important addition to Windows, which has had many early versions that were not well received by the general public. If you are someone who takes a lot of screenshots then you are probably familiar with the Windows + Shift + S keyboard shortcut. Sadly, Snipping Tool hasn’t been working for many users lately especially those who just updated to Windows 11 from Windows 10 because they are getting this long error: ‘This app can’t open. A problem with Windows is preventing Screen Snipping from opening. Refreshing your PC might help fix it.’ Theartcult will provide you some fixes that will help you get the Snipping Tool back up and running on your system.
How to fix Snipping Tool error Windows 11
Here’s how you can fix the Snipping Tool on your Windows 11 PC. You can use the first two fixes found by the community, or use the last method suggested by Microsoft.
Change date and revert
Finally, a properly working fix is available – all thanks to Microsoft Tech Community member, Ged_Donovan. Obviously, to fix the Windows + Shift + S shortcut not working, you need to change the date in your PC’s Settings to October 30, use Windows + Shift + S to take a screenshot, then revert the date to the latest date. Here’s how to do it:
Tap Windows+ion your keyboard to open the Settings app. Or click the Settings icon in the Start Menu .
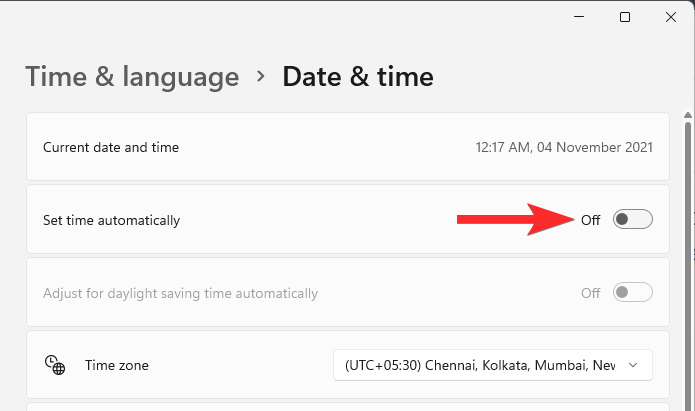
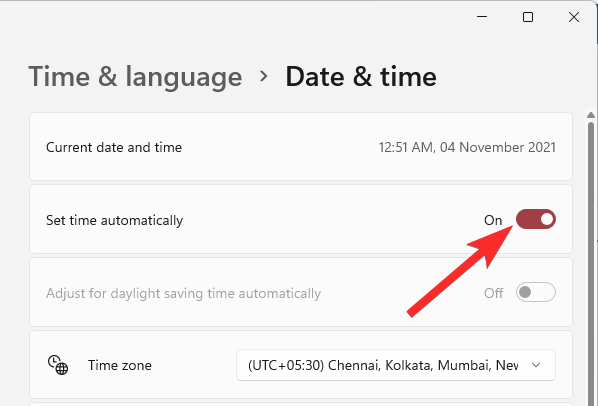
Click Time & language, then click Date & time .
In the ‘Set time automatically’ option, click the toggle on the right to disable it.
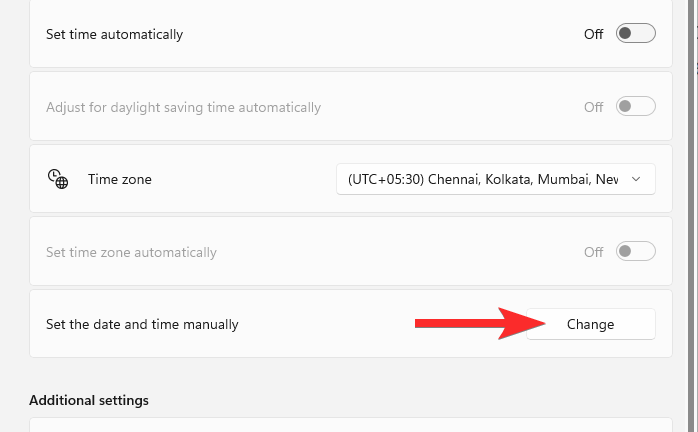
Click Change under ‘Set the date and time manually’.
Change the date to “October 30, 2021”. You do not need to change the time.
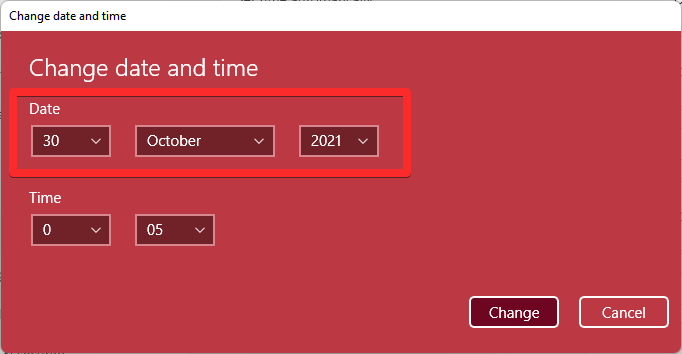
Click Change to save the date as “October 30, 2021”.
You will now see that the date shown at the top in Settings is now “October 30, 2021”.
Try Windows + Shift + S to take a screenshot now. It will work.
You can change the date back to being set to automatic. Open the Settings app again and go to Time & language > Date & time.
In the ‘Set time automatically’ option, click the toggle on the right to enable it.
You will see that the now date has returned to today’s date.
Try the shortcut Windows + Shift + S now, it will still work.
Using an older version of the app
If you recently updated from Windows 10 then you can use the old version of Snipping Tool which will be available in the Startup Driver. Windows stores the previous installation for the first 10 days from the date you update. You can take advantage of this to use an older version of the Snipping Tool on your PC.
Navigate to the following link to get you started.
C:/Windows.old/Windows/System32/
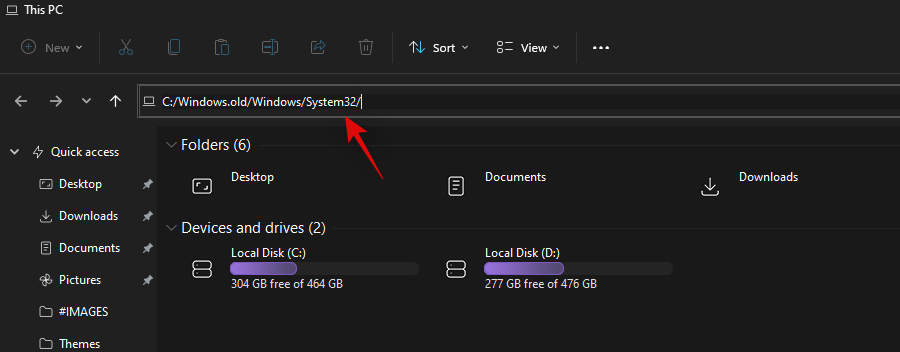
Find ‘SnippingTool.exe’ in the current directory and copy it to the clipboard.
Navigate to the following path now.
C:/Windows/System32/
Paste the file you copied to the clipboard earlier.
Then copy the file named SnippingTool.exe.mui from the path below.
C:\Windows.old\Windows\System32\en-US\
Paste the copied file into the following folder.
C:\Windows\System32\en-US\
Replace any and all files if you are prompted.
Try using Windows + Shift + S it now and click + New. The Snipping tool should now work as expected and you will no longer receive the ‘This app can’t open’ message. A problem with Windows is preventing Screen Snipping from opening. Refreshing your PC might help fix it.’
Uninstall security update KB5006674
Security update KB5006674 might not be the culprit causing the Snipping Tool to malfunction, but removing it will definitely revert some changes and the main app seems to fix the Snipping Tool on all devices. system. However, this does have some downsides as you will lose Windows 11 specific features, which can be a pain point for some users. This is what you will lose by uninstalling Security Update KB6006674.
- Right click on Windows 11 context menu
- Windows 11 File Explorer
- Menu Display & Personalization
In case you are comfortable with using older versions of these features for a while or updating them manually, then you can use the instructions below to uninstall the Update version. security updates from your system.
Uninstall security updates:
Tap Windows + iand click Windows Update on the left.
Now click ‘Update history’.
Scroll to the bottom and click ‘Uninstall updates’.
Find Security Update KB5006674 in this list and click and select it.
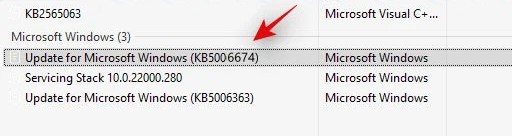
Click ‘Uninstall’ at the top.
Confirm the selection and the selected security update will now be removed from the PC.
We recommend that you restart your PC at this point and try using the Snipping Tool again. You will no longer face any problems using the Snipping tool in Windows 11.
Make sure clipboard history is enabled
This is an older solution but worth a try as the Snipping Tool is also about to be deprecated. Clipboard History allows Windows to remember all the elements, images, and text copied to the clipboard, which comes in handy when you’re trying to move or copy a lot of things at once. .
Since the Snipping Tool relies on its keyboard shortcut to copy the screenshot to the clipboard, disabling history can sometimes hinder this process. Therefore, you can try enabling clipboard history to get Snipping Tool working again.
Tap Windows + iand click ‘Clipboard’ on the right.
Turn on the toggle for ‘Clipboard History’ at the top of the screen.
Once enabled, we recommend restarting your PC and using the Snipping Tool as intended. The app will now work on PC if Clipboard history is the cause of the problem.
Reset and repair the app
You can also try resetting and repairing the Snipping Tool from within Windows 11. If the app installed properly and you are having trouble using certain features of it, then you can use Use the instructions below to repair the app first and if that happens. doesn’t work, then reset it to start from scratch.
Press Windows + ion the keyboard and click ‘Apps’ on the left.
Click ‘Apps & features’.
Find the Snipping Tool in the current list and click the 3-dot menu icon next to it.
Select ‘Advanced options’.
Scroll down and click ‘Terminate’ to terminate any currently running instances of the application.
Click ‘Repair’.
After the process is finished, try launching the Snipping Tool again.
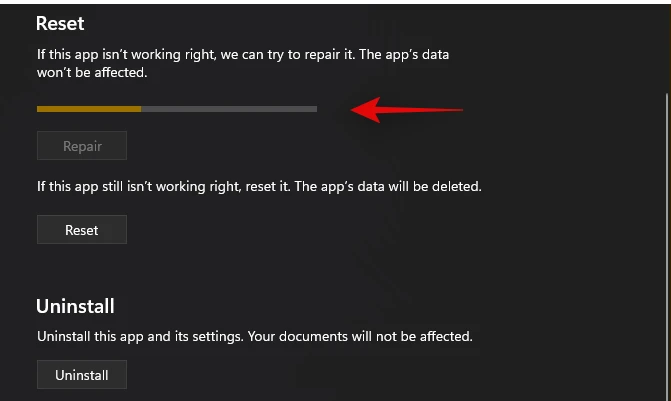
If the app works as intended then the problem is fixed for you, otherwise click ‘Reset’ to start over.
Confirm the selection by clicking the same button again.
The app will now be reset. Once the process is complete, launch the application again and try to use the Snipping Tool as intended. The app should be fixed for most users to have it properly installed on their PC.
Reinstall Snipping Tool
If the above fix doesn’t work for you, you can try reinstalling the Snipping Tool. Follow the instructions below to get you started.
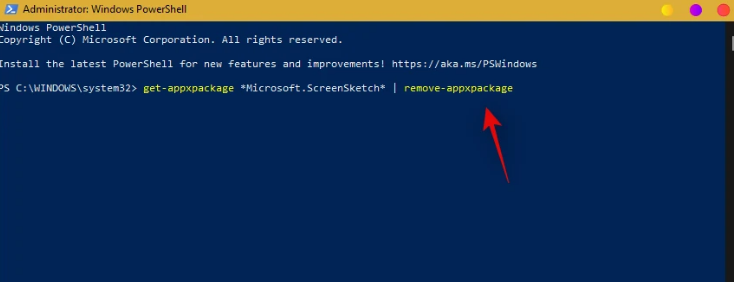
Press Windows + Son your keyboard, search for PowerShell and click ‘Run as administrator’.
Now type the following command and press Enter on the keyboard.
get-appxpackage *Microsoft.ScreenSketch* | remove-appxpackage
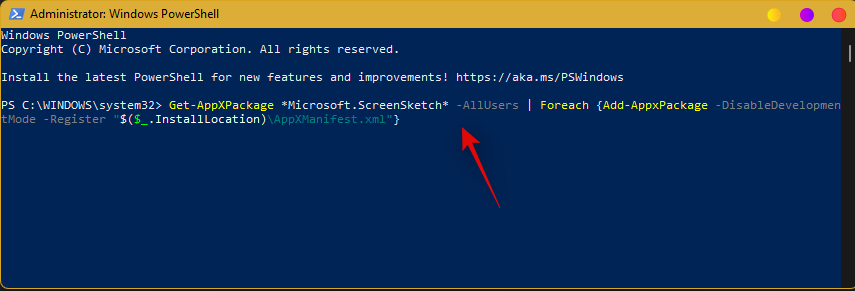
The Snipping Tool will now be removed from the PC. We recommend restarting your PC at this point. After rebooting, relaunch PowerShell as administrator and execute the following command.
Get-AppXPackage *Microsoft.ScreenSketch* -AllUsers | Foreach {Add-AppxPackage -DisableDevelopmentMode -Register "$($_.InstallLocation)\AppXManifest.xml"}
Once the application is installed, you can close PowerShell and use the Snipping Tool as intended. The app should now work as expected on the PC.
Scan for SFC and check for DISM
You should also run an SFC scan and a DISM check on your system to ensure that all system files are properly configured and installed on the system. Faulty programs and system files identified by these scans are automatically replaced, which should fix most system problems. Use the instructions below to run the SFC scan and DISM check on the system.
Press Windows + S, search for CMD and click ‘Run as administrator’ when it shows up in the search results.
Now type the following command to run the SFC scan.
sfc /scannow
Then, run the following command to perform a DISM check on the system.
DISM.exe /Online /Cleanup-image /Restorehealth
Use another tool to take screenshots
If by this point the Snipping Tool has not worked for you, we recommend that you choose an alternative. We recommend trying the Xbox Game stick as it is already installed on most systems. This way you won’t have to choose a third-party app.
However, if you are looking for add-ons with the ability to automate tasks, upload photos, record videos and more, then third-party apps can be an alternative. better for you. Follow the instructions below to use the Xbox Game stick, or skip to the next section if you want to use a third-party app.
Using the Xbox Game bar
Press Windows + Gon the keyboard to launch the Xbox Game bar. If the Game Bar is not available to you, then you can use this link to download it to your PC. Now just click on the Camera icon at the top left to take a screenshot.
You can also use other icons to capture your screen, and you can also use it Windows + Alt + PrtScto take screenshots instantly using the Xbox Game Bar.
Use of Third Party Alternatives
- ShareX
- Greenshot
- SnagIt (paid)
- Screenpresso
- Snipaste
Reset PC
Surprisingly, this is the official fix released by Microsoft to get Snipping Tool back up and running again on the system. Follow the instructions below to refresh your PC.
Tap Windows + iand click ‘Windows Update’.
Click ‘Advanced Options’.
Now click ‘Restore’.
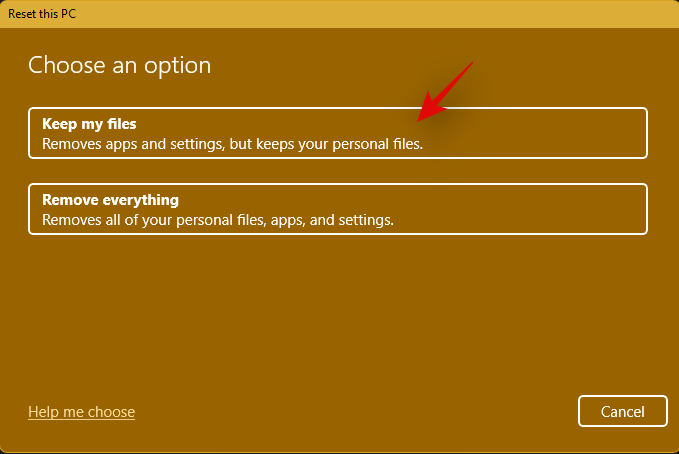
Click ‘Reset PC.

Select ‘Keep my files’ and follow the on-screen instructions to refresh your PC.
We hope this guide helped you get Snipping Tool back up and running again on your PC. If you run into any issues or have any questions, feel free to post them in the comments section below.