How to fix red eyes Photoshop. When we take pictures in low light and use the flash, it is easy to see the red color of the people in the image, which is quite scary. In the article below, Theartcult will guide you to remove red-eye effect and correct low-light photos with Photoshop very simply. In this article, we will use Photoshop CS6 Portable.
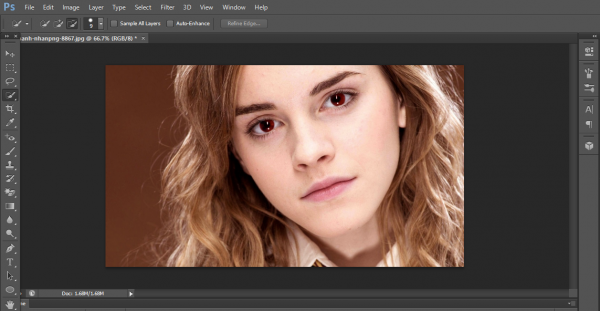
Step 1: Open the red-eye photo in Photoshop by choosing File -> Open or pressing Ctrl+O.
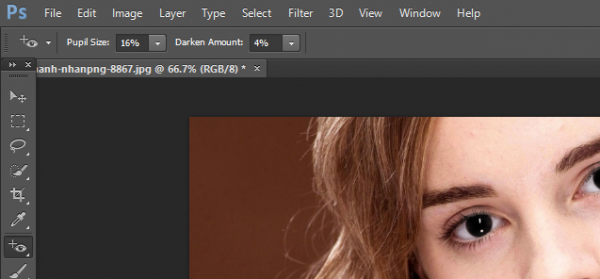
Step 2 : Right-click on the Spot Healing Brush Tool and select the Red Eye Tool , then the mouse pointer will have an eye-shaped icon.
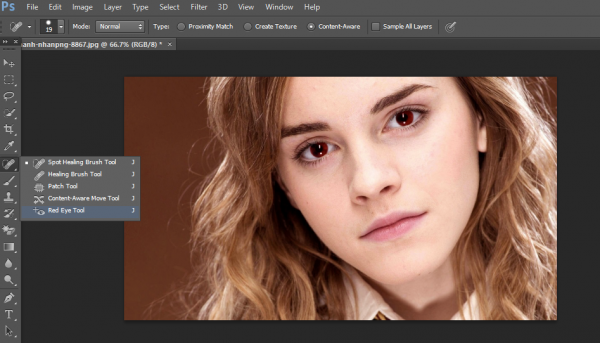
Please note to adjust the two parameters Pupil and Darken as shown below so that the eye color is not too black and more real.
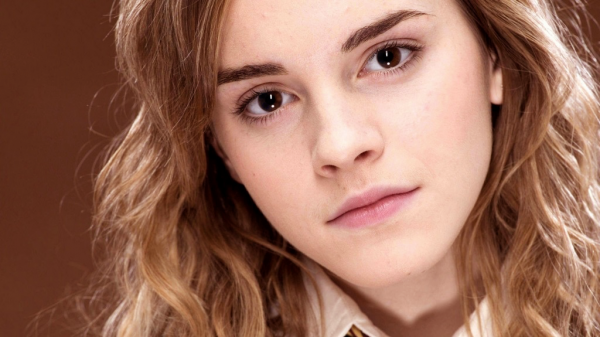
Step 3: Click on the red area of the eye, then the eye color will automatically change to black. Here, I have adjusted the brown eyes a bit to be more natural.
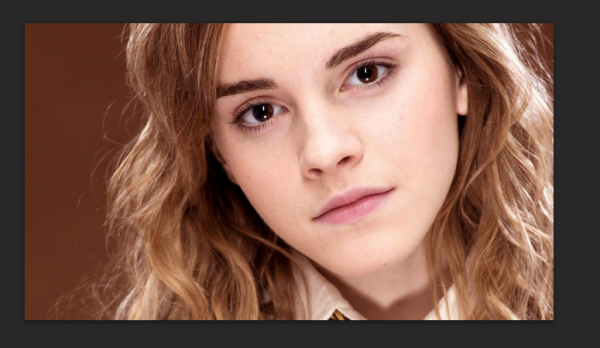
You do the same with both eyes and here is our result:
Correct low-light photos with Photoshop
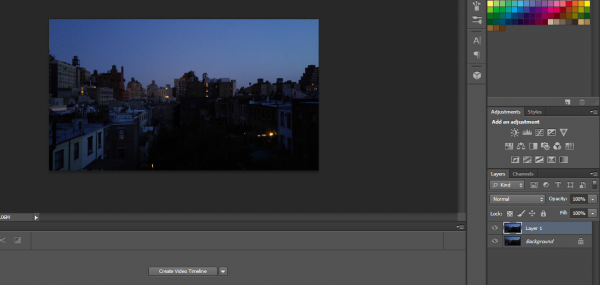
Step 1: First, open the underexposed photo in Photoshop by pressing Ctrl + O or choosing File > Open and then pressing Ctrl + J to duplicate the layer.
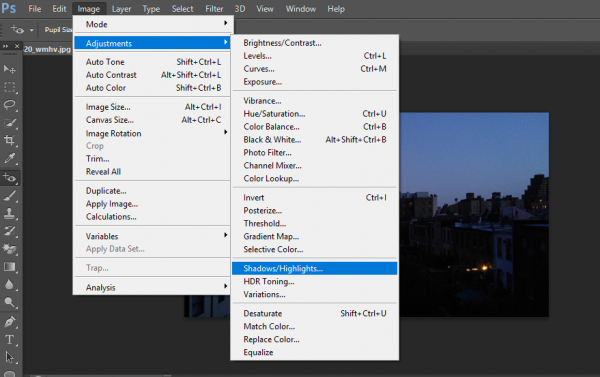
Step 2: Select Image -> Adjustments -> Shadows/Highlights…
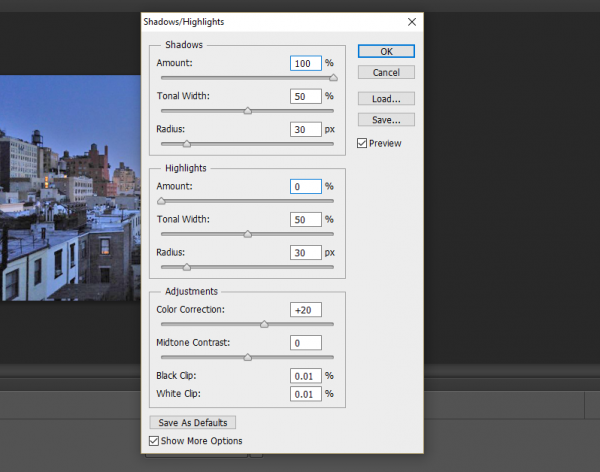
Step 3: The Shadows/Highlights window will appear. Notice that the Shadows section has 3 bars of Amount, Tonal Width and Radius, please adjust these 3 bars to have the appropriate brightness, then click OK.
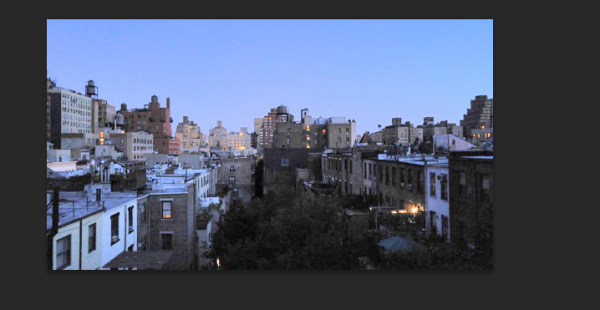
The image is now brighter than before, but the bright areas are not uniform, so we need to continue to do the following steps.
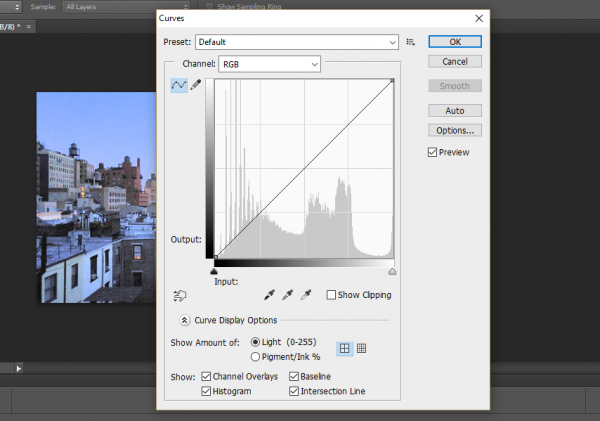
Step 4 : We will use the Curves tool to control the tonal range and increase the light. You choose Image > Adjustments > Curves.. The histogram window will appear, to increase the light, please drag the middle curve up a bit to get the right brightness.
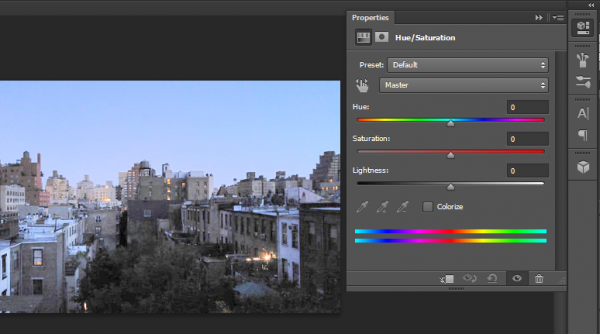
Step 5: In this step we will use the Hue / Saturation tool to correct the color tone for the image to not be pale. You choose Image > Adjustments > Hue/Saturation. The Hue/Saturation window pops up, adjust the following two Hue and Saturation bars for the right color.
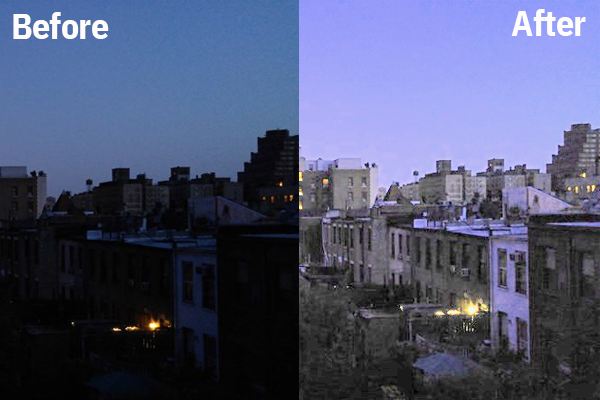
And this is the result after completing the brightening process for the image:
Above is a very simple guide to removing red-eye effect and correcting low-light photos in Photoshop. Good luck and don’t forget to share this Photoshop trick with your friends!
Hope this article helps you!
Visit Macwintips.com to update the most practical and useful tips for Mac and Windows.