Windows Print Screen not working Windows 10/11. The Print Screen (or PrtScn) key on the keyboard is one of the shortcuts that allow you to quickly take a screenshot of your computer screen on Windows operating systems. However, sometimes the function of this Print Screen button encounters some unexpected problems. So today Theartcult will share with you the most effective ways to fix the Print Screen key not working.
Why Windows Print Screen not working Windows 10/11?
But first, make sure that the Print Screen key is not broken, you can see the article on how to check the keyboard error to test it.
If there is a physical error with the Print Screen key, then you don’t need to do anything else, just change the keyboard but don’t worry anymore.
In addition, you check your keyboard has keys to turn on / off the secondary functions of the keys F1, F2…. or not. If so, try turning it off.
How to fix Windows Print Screen not working Windows 10/11
1. Turn off background processes
Many background processes can be the reason why the Print Screen key does not work. Applications like OneDrive, Snipping Tool are often the ones that cause the above error.
If the above error started happening after you installed some new software, then try to remove them and check if the problem is resolved.
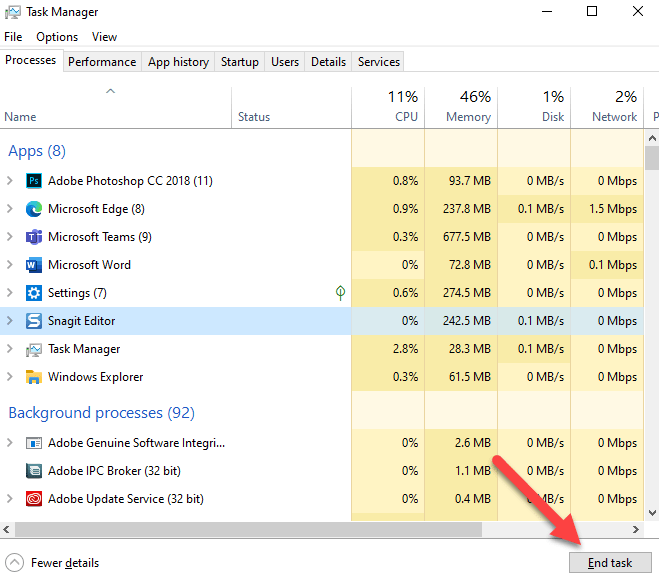
Implementation: To stop a certain process, you press the key combination Ctrl + Shift + ESCto launch Task Manager => then in the tab Process=> you right-click on the process to be stopped => and select End Taskto turn off.
2. Update the keyboard driver to a newer version
If your keyboard driver is outdated or has problems, it may also be the cause of the Print Screen key not working error. To update the driver, do the following:
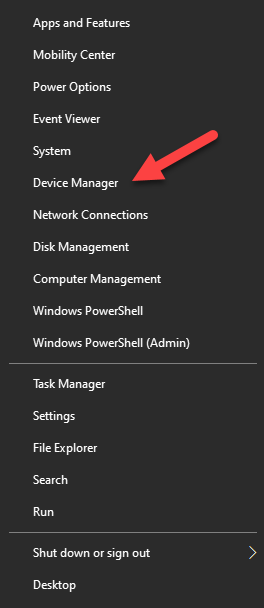
+ Step 1: Press the key combination Win + X=> then click Device Managerto launch the Device Manager tool on Windows.
Or another way to open Device Manager (applies to all versions of Windows) is: Open the Run dialog box (Win + R) => enter the command devmgmt.msc => and press Enter .
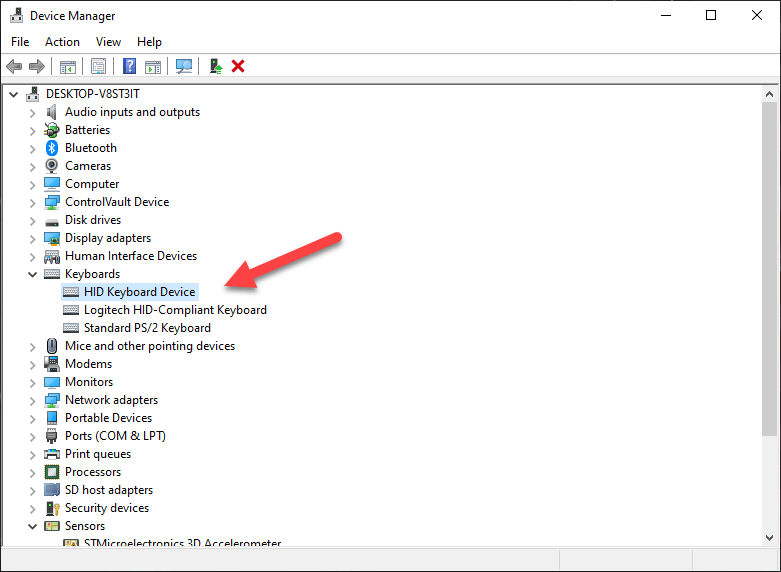
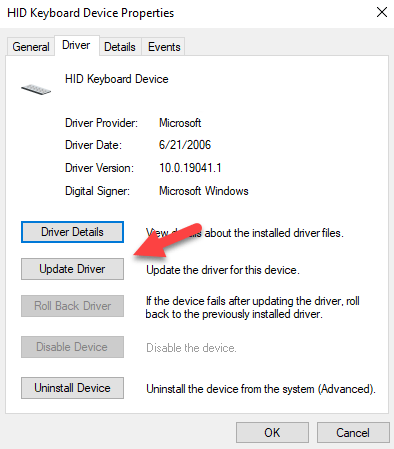
+ Step 2: After the window appears, find the Driver you need to update, double-click it.
+ Step 3: You click on the tab Driver=> then click on Update Driver.
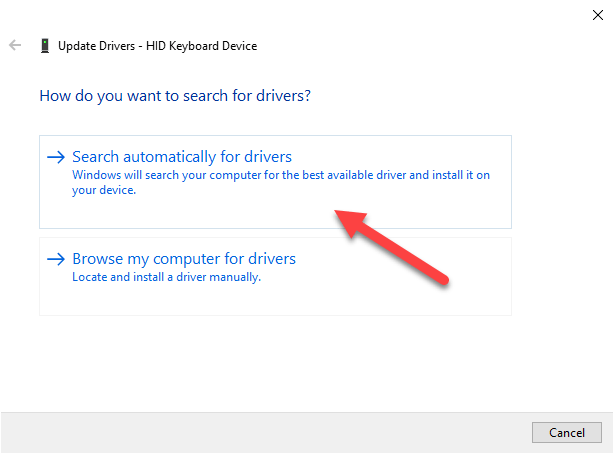
+ Step 4: Next you choose Search automatically for drivers.
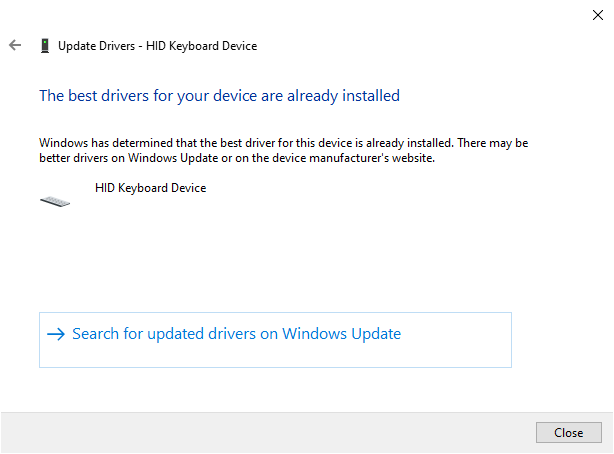
+ Step 5: After the update is complete, restart your computer to apply the update. In this field, I do not have any new updates, so the following message will appear.
Once done, you can restart the computer to check if the Print Screen key is working.
NOTE: If you cannot update the Driver through Device Manager, then you can completely use professional hardware driver upgrade software such as DriverEasy Pro , WanDriver , .
Or to ensure the safest and most stable, you can go to the hardware manufacturer’s homepage to download and install the Driver (see instructions on how to install the genuine driver for your computer ).
Or a simpler way is to upgrade the operating system for the computer , upgrading the operating system also means upgrading new drivers for devices..
3. Using the Windows Troubleshooter
If you know the error is coming from your keyboard but have not identified the problem, you can use the built-in error diagnostics on Windows 10 to check.
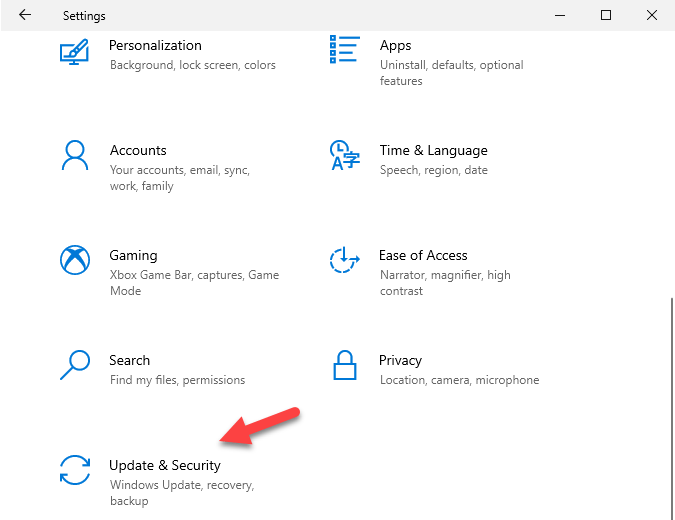
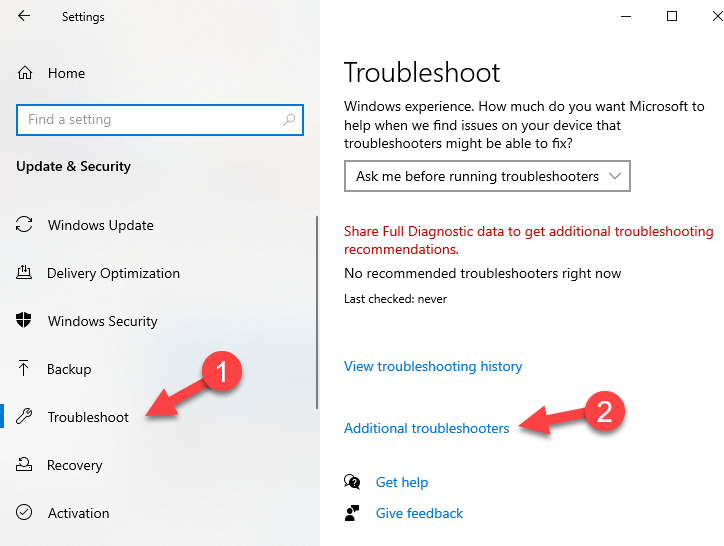
+ Step 1: Press the key combination Win + Ito start Windows Settings => then select Update & Security.
+ Step 2: Next, you select the item Troubleshootin the left window => and click Additional troubleshootersin the right window.
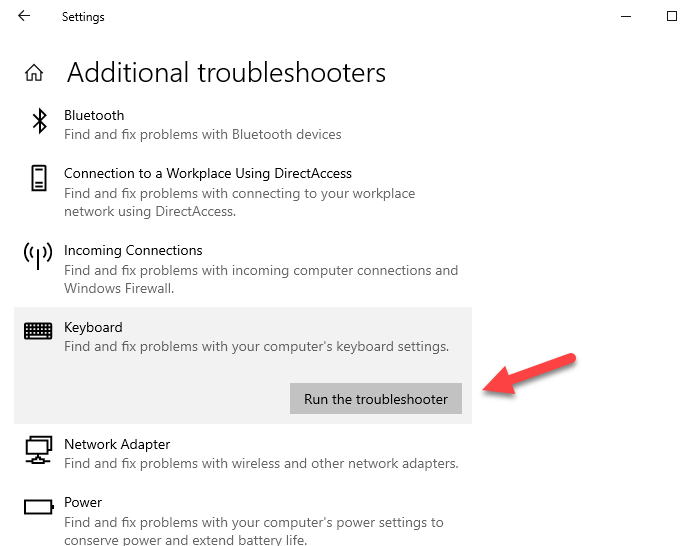
+ Step 3: You click on the item to diagnose, in this case Keyboard=> Then select Run the troubleshooter.
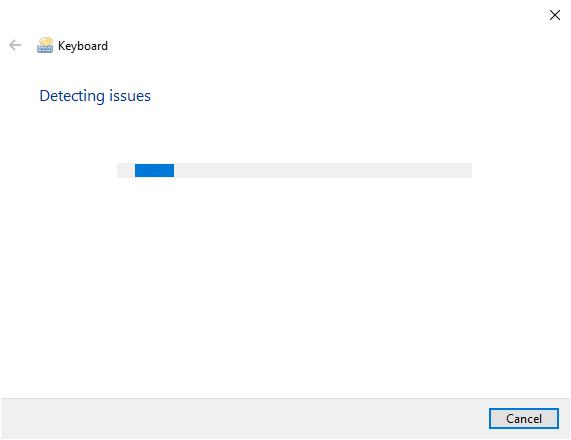
+ Step 4: You wait a moment for the error diagnostics to launch.
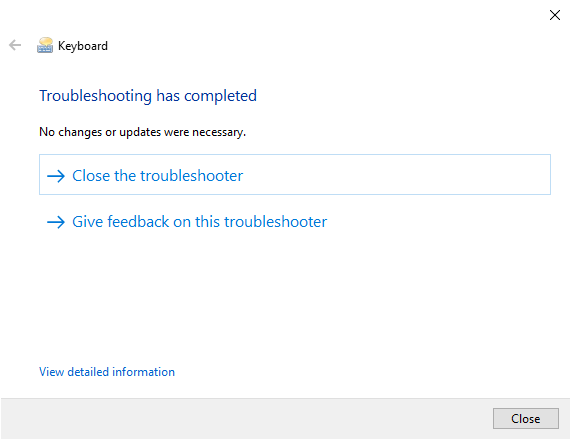
+ Step 5: After completion, it will report an error, if there is no error, you will see a dialog box as shown below.
4. Perform Clean Boot for the computer
If the above methods do not work, you can try using the Clean Boot feature for your computer.
This means turning off all 3rd party services, that is, the computer will restart Windows but only allow the necessary and available services to be launched on Windows, and disable all services from the software. third party software.
This will help you narrow down whether or not the problem is caused by third-party services. To perform Clean Boot, we will do the following:
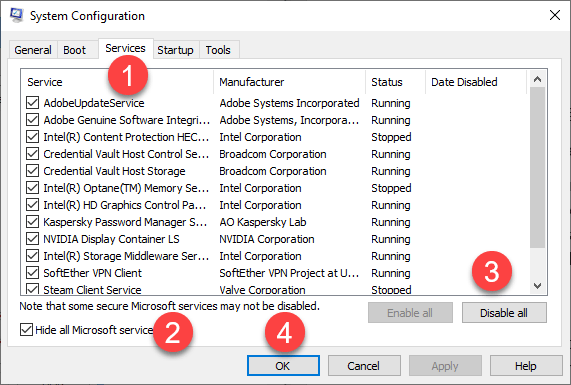
+ Step 1: Press the key combination Win + Rto launch the Run dialog box, then enter msconfig=> and press OKto launch the tool System Configuration.
+ Step 2: After the System Configuration dialog box appears, click the tab Services. Next check the box Hide all Microsoft service=> then you click the button Disable allto disable all services coming from third-party software.
=> Finally press OKto finish.
NOTE: Remember to check the box Hide all Microsoft service, otherwise the computer won’t boot up.
+ Step 3: In addition, you press the key combination Ctrl + Shift + Escto start Task Manager.
+ Step 4: You go to tab Startup=> then disable all unnecessary startup items by clicking each item and pressing Disable. You should only keep software like Unikey, anti-virus software.
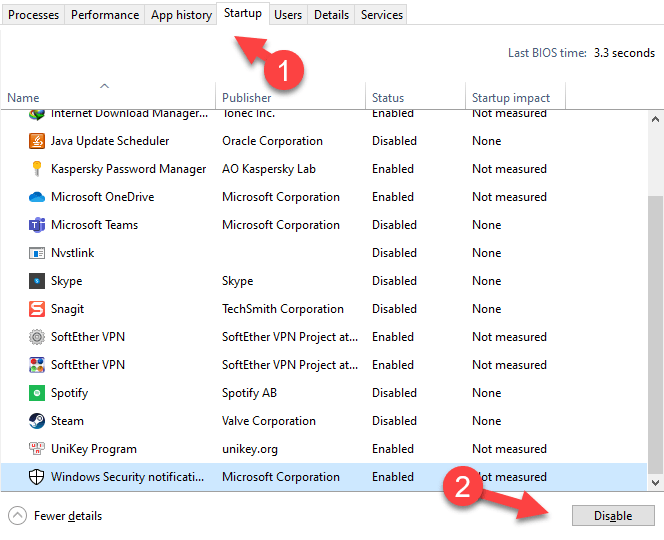
+ Step 5: Finally, restart the computer and check to see if the above problem has been fixed or not.
5. Turn off Auto save feature on OneDrive
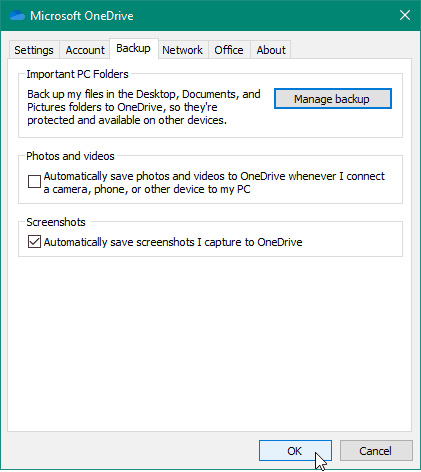
If you are using the OneDrive app on your computer, try turning off the Automatically save screenshots i capture to onedrive feature of the OneDrive app.
Do: Right-click on the OneDrive icon on the Taskbar => then select Settings => then switch to the Backup tab
6. Settings in Registry Editor
NOTE: You should back up Regedit before doing so to avoid unnecessary errors.
+ Step 1 : You open the Run dialog box (Win + R) => enter the regedit command => click OK to open the Registry Editor.
+ Step 2 : Then you access the following path:
HKEY_CURRENT_USER\Software\Microsoft\Windows\CurrentVersion\Explorer
Read more: Quick trick to open any path in the Registry – 1 Click
+ Step 3 : Right click in the folder Explorer=> click select New=> select DWORD (32-bit) Value.

In the DWORD dialog box, set the following:
- At the school
Value name, change the name toScreenShotIndex. - In the field
Value data, please change it to the value4. - Done and then press
OK.
+ Step 4 : Continue, you access this path:
HKEY_CURRENT_USER\Software\Microsoft\Windows\CurrentVersion\Explorer\User Shell Folders
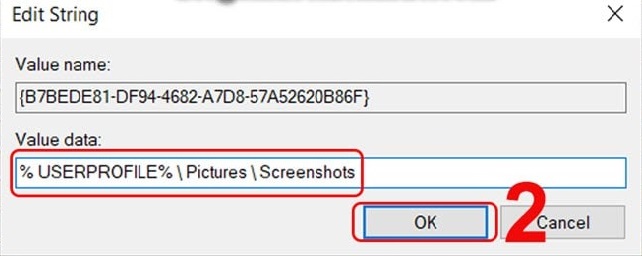
+ Step 5 : Then find and select the string with the name {B7BEDE81-DF94-4682-A7D8-57A52620B86F}(in the right column, guys)=> and double click to open it.
NOTE: If you can’t find a string with such a name, create one with such a name by right-clicking on any empty space on the right => select New=> select String Value.

Step 6 : Then double click on the string with such name => then changeValue datato%USERPROFILE%\Pictures\Screenshots
NOTE: in case the above method does not work, you can change the value in Value data for DWORD ScreenShotIndex from 4 to 695 . That is, in Step 3 above, guys!
7. Use a different method to take pictures
Use the key combination Win + Shift + Sto select the image capture area => after you select the image capture area, the tool Snip & Sketchavailable on Windows will be started with the selection image you selected.
In addition, you can refer to more software that supports computer screen capture. Lots for you to choose from!
8. Epilogue
Ok, so I have detailed instructions for you how to fix the Print Screen key not working on Windows operating system.
Hope this article will be useful to you. These are just the ways that I have collected and applied successfully. In addition to the ways above, if you have successfully applied in another way, don’t forget to share by commenting below.
Good luck!
Visit Macwintips.com to update the most practical and useful tips for Mac and Windows.