How to create reflection in Photoshop. Creating mirror shadows in Photoshop is one of the advanced techniques to edit images more vividly and professionally. If you know how to perform mirror shading for objects in the image, you can help you create works of art with very high aesthetics. And to help you better understand this issue, let’s explore through the information in the article below.
There are many ways to create reflections in Photoshop such as with drop shadows. However, this method still has certain limitations in its application. Especially the creation of mirror shadow with shape objects, great blur in the process of image collage.
There are cases where you need to perform mirror shadows, also known as reflection shadows. At this point, Dropshadow will not be able to respond. Therefore, you need to know how to create shadows in Photoshop with more professional techniques.
Shading in Photoshop is an advanced image editing skill that makes your photos look more realistic and vivid.
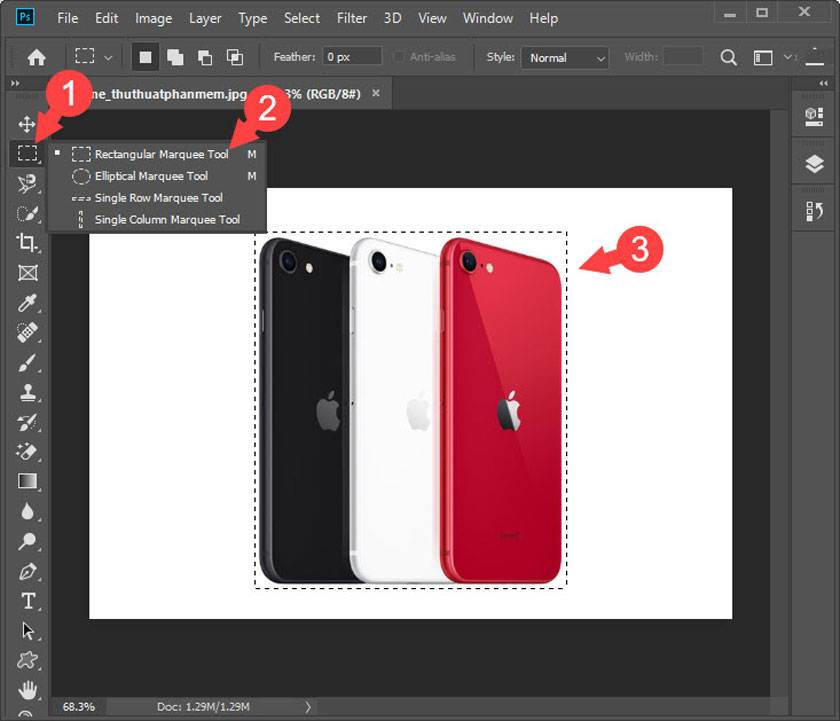
Step 1: Rectangular Marquee tool
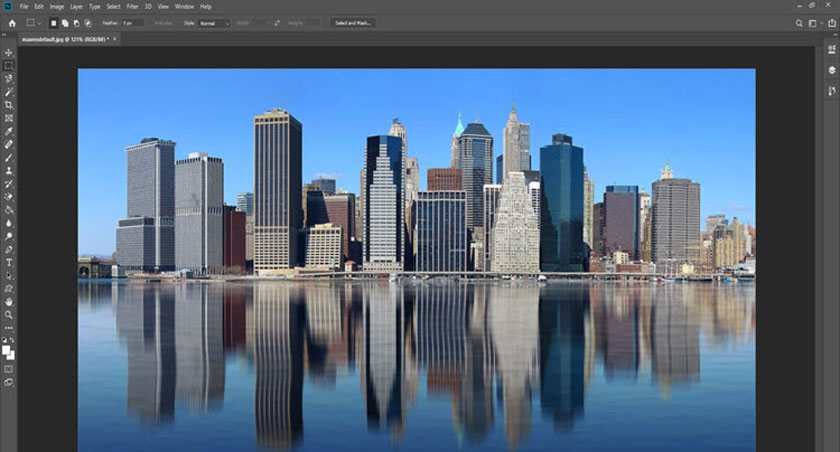
You open the image you need to edit in Photoshop. Then, click on the Marquee Tool (1) => Rectangular Marquee tool (2) => Circle the object that needs to be shading (3) with this tool.
Step 2: Free Transform
You use the Ctrl + C and Ctrl + V commands to copy the area of the object you just created. Next, click on the newly created layer (1), press the keyboard shortcut Ctrl + T to select the Free Transform command and move that layer below the original layer (2).
Step 3: Flip Vertical
Right-click on the layer you just edited and choose Flip Vertical
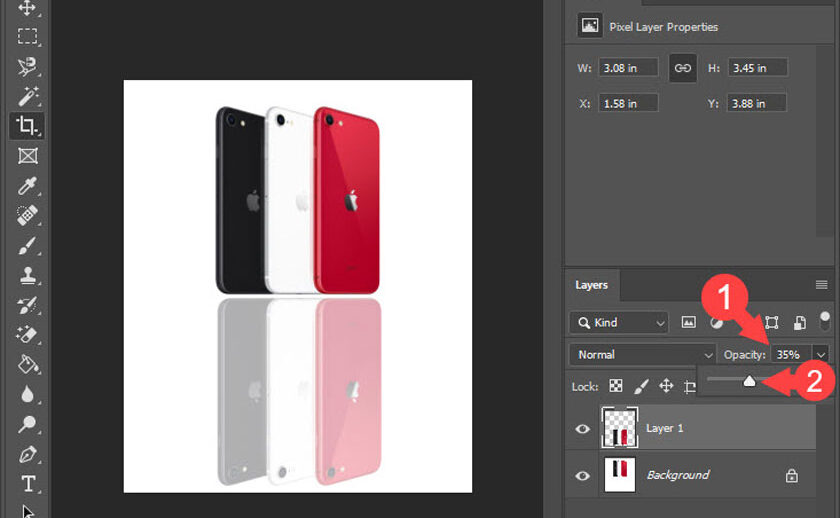
Step 4: Reduce Opacity
You click on the Opacity (1) and reduce it to 30-40% (2) as shown below.
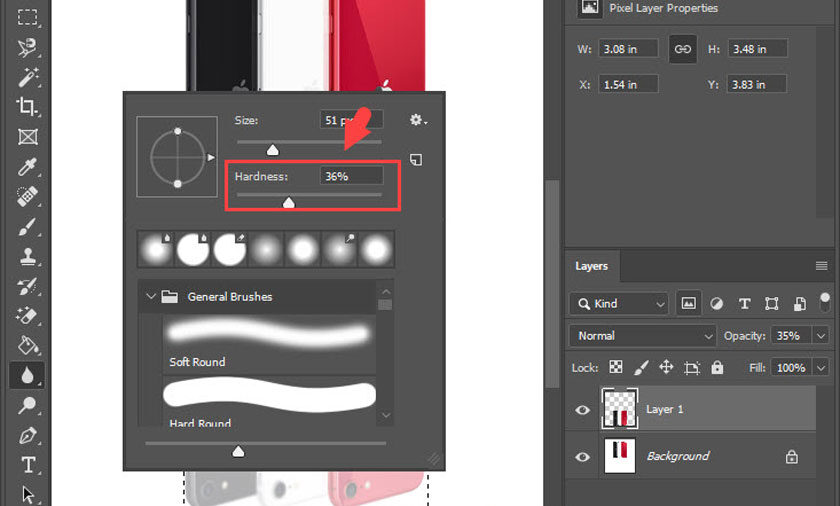
Step 5: Blur tool
You make the object area as shown with the Rectangular Marquee tool (1) => Blur (2) => Blur Tool (3).
Then you continue to right click on the screen and set Hardness at 30-40%. Next, you left-click and hover to blur all the areas of the image you have selected.
Step 6: Gradient Tool
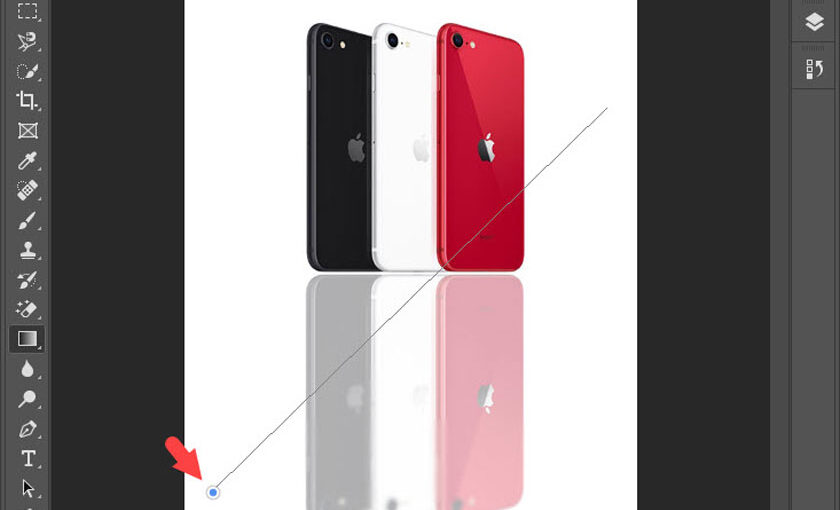
You click on the fill tool (1) => Gradient Tool (2) => select the black and white gradient style (3). After that, you can choose different Gradient color type depending on the object and image object you use, but you should set the gradient color to a maximum of 2 colors to ensure light harmony. .
Next, click the left mouse button and draw a line from the bottom to create a light fill.
Note: In order to fill in the best color, you need to see which direction your subject is directing the light from, and then decide to apply the color fill operation in that direction. If you don’t know much about gradients and how to fill them with eye-catching colors, please refer to other tutorial articles.
After successfully pouring the color, your image will now be “magical” a little more light-dark effect like being illuminated by light.
Step 7: Add border, background color,…
Please add a few small details such as border, background color… As shown below, I use the Brush tool to draw more contours to the sides and blur with the Blur tool to create the feeling that the object is in progress. Place on a very shiny surface.
Note, in addition to the tips on the mirror effect, Photoshop is also the best photo editing software, making it easy to turn old photos into newer ones. It also reduces red-eye when shooting under Flash light, removes makeup from your face… and there are many more innovative features that you need to explore to improve your skills even further.
Video – How to create reflection in Photoshop in 1 minute
Theartcult hopes that this article has helped you with how to create reflection in Photoshop. If you have any questions or suggestions on this topic, don’t hesitate to leave us a comment below. Thanks for reading!