How to blend two animals in Photoshop. For those who are new to Photoshop, mastering the skill of cutting and combining images is very important because this is a basic skill. With extremely simple instructions, Theartcult will show you how to combine photos of 2 animals that we share today will help you practice this skill. Let’s get started with this Photoshop trick.
How to blend two animals in Photoshop
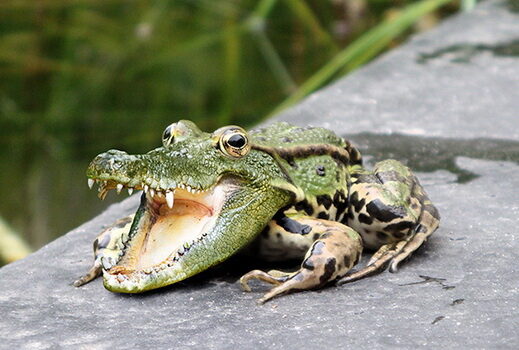
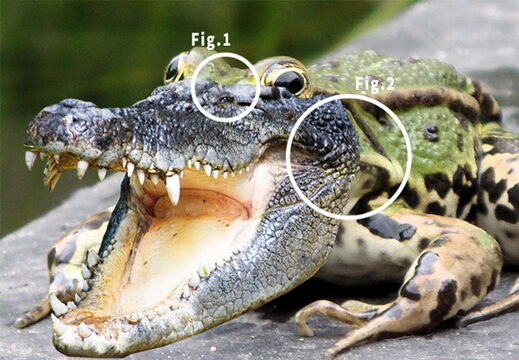
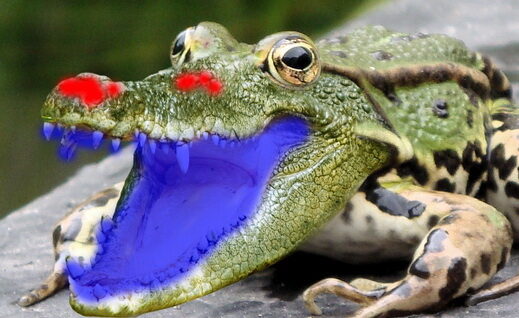
The image above is the final result we will get after successfully performing the steps of the Photoshop trick to combine images of 2 animals.
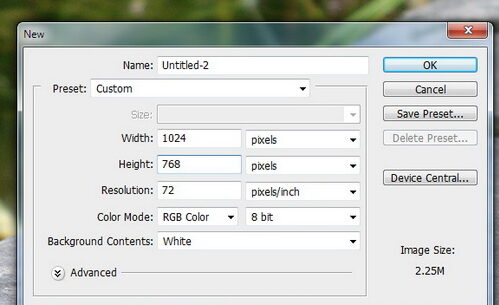
Step 1 . Open the frog image you downloaded in Photoshop. Resize the image (Image > Image Size…) to 1024×768 and name this layer Frog.
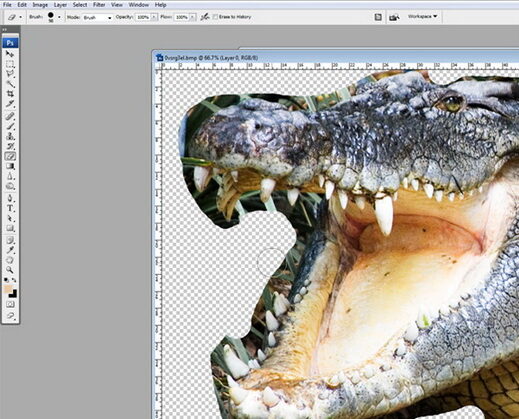
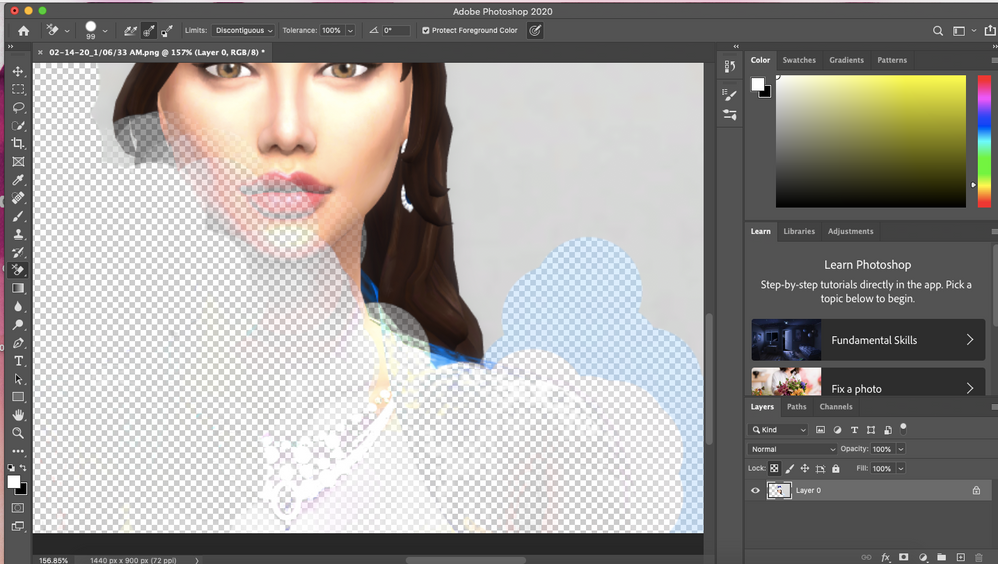
Step 2. Next you need the crocodile’s head. Open the crocodile image separately in Photoshop. Before cutting the crocodile out of the scene, delete the background layer below the crocodile’s head so that you get a transparent background. Use the Eraser Tool to perform this step. It will take a long time to cut the crocodile’s head perfectly, so be patient.
Step 3. Once you have the carefully cut crocodile head, duplicate the layer and paste it on top of the Frog layer, name it Croc Head layer. You will need to try and resize the alligator’s head to fit in the position that you find most appropriate. After this step, we will need to make the crocodile’s eyes disappear and adjust the colors accordingly.
Note: When performing the Photoshop trick of stitching two animals together, we need to pay attention to certain factors that can be combined. For example here, this frog and alligator are not too different in color and have the same head and body positions, so they will blend together in a very natural way. If you are not sure if the 2 animals you selected can be combined, place their 2 shapes on top of each other, change the Opacity of the layer above (if necessary use the Transform Tool (Command/Ctrl + T) to adjust the image size) and see if they can “fit” together.
Step 4 . Use the Clone Stamp Tool (shortcut S) to remove the crocodile’s eye. Use a soft brush to do this more effectively. While holding down the ALT key, select the same area of skin near the crocodile’s eyes to cover the eyes. Do the same with the crocodile jaw so that the two animals look better, the photo looks more real.
Pay attention to find all the points, the details that need to be edited so that the 2 animals become more “fit” as you like. When you complete this step, you will get the result.
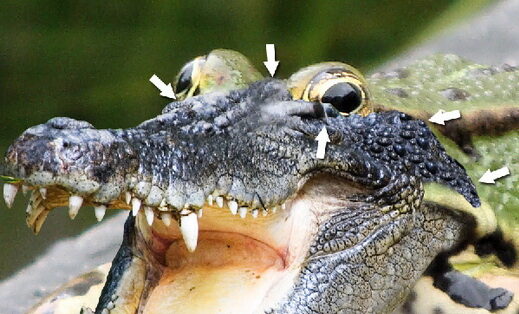
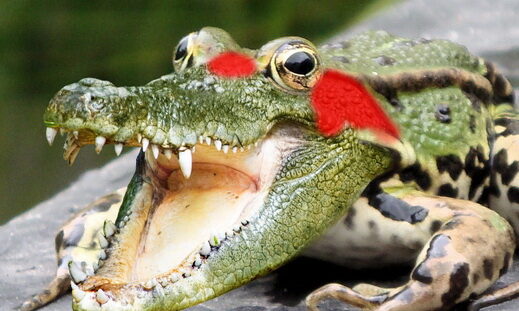
Step 5 . Taking a closer look at the crocodile’s head, you can see that there are still many incomplete details. Use the Eraser Tool (keyboard shortcut E) to erase the parts that don’t fit the frog’s body. Use a soft brush to erase overlapping points.
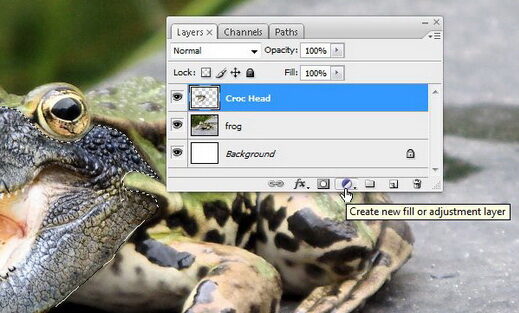
Step 6 . Select the crocodile head as shown above
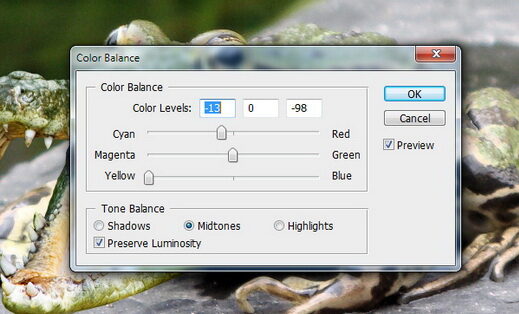
Select Color Balance. Set the options as shown in the picture.
Step 7 . To adjust the color more naturally, continue to use the Eraser Tool to erase the red part (with Opacity at 100%) and the blue part (with Opacity at 50%).
Use the Dodge Tool to lighten the red part of the image.
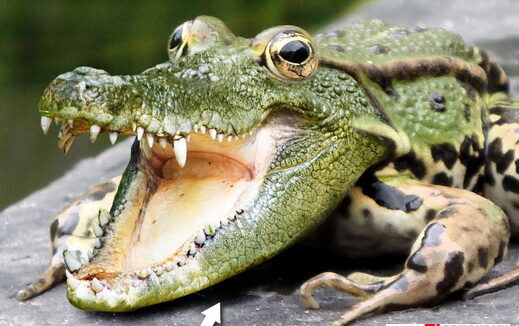
Step 8 . We also need to create a shadow under its mouth (arrow part). Select the Frog layer and use the Burn Tool to darken the bottom of the crocodile’s mouth to match the existing frog’s shadow.
And in the end we got the desired result!
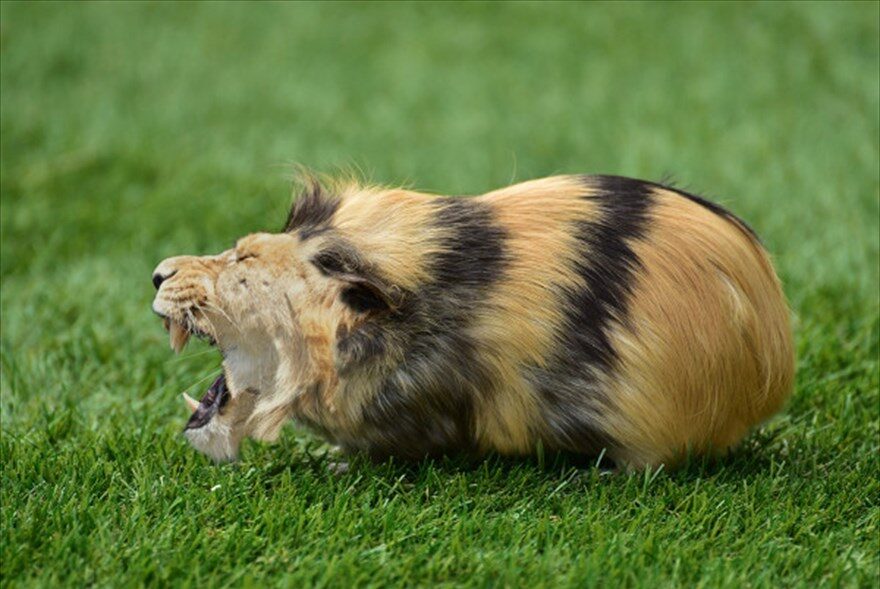
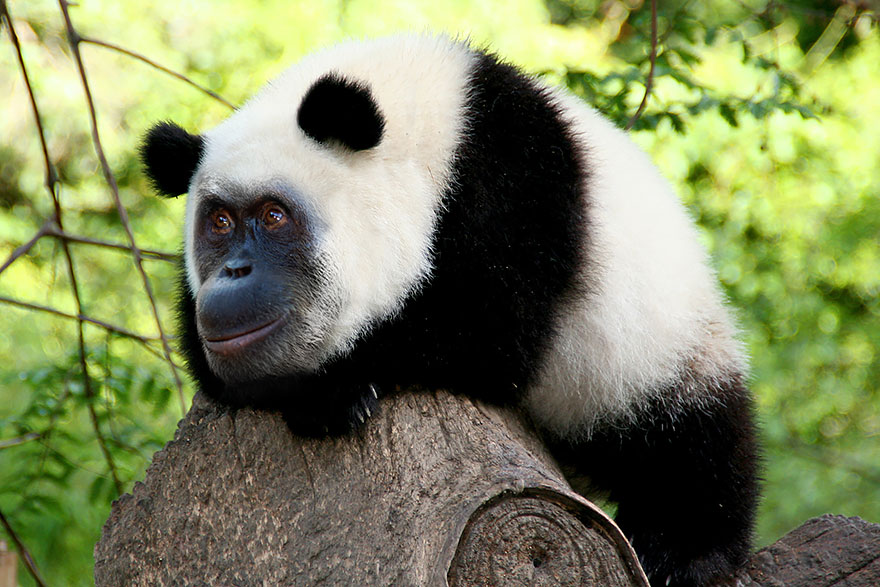
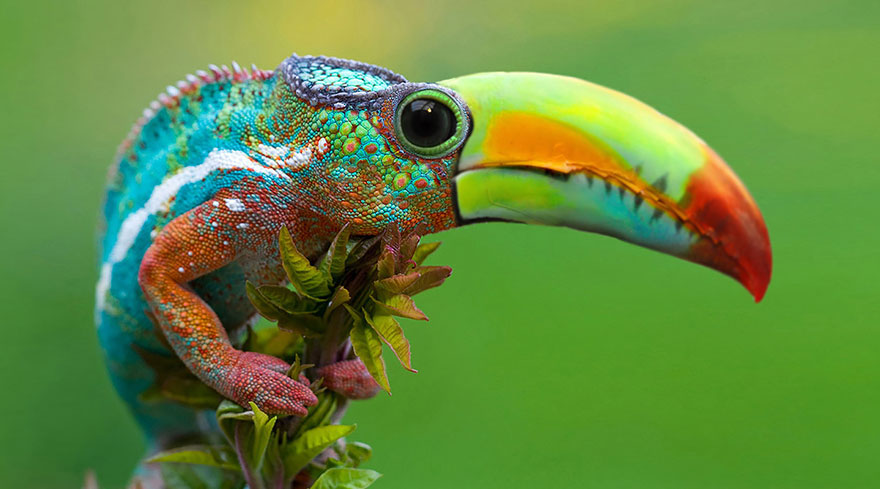
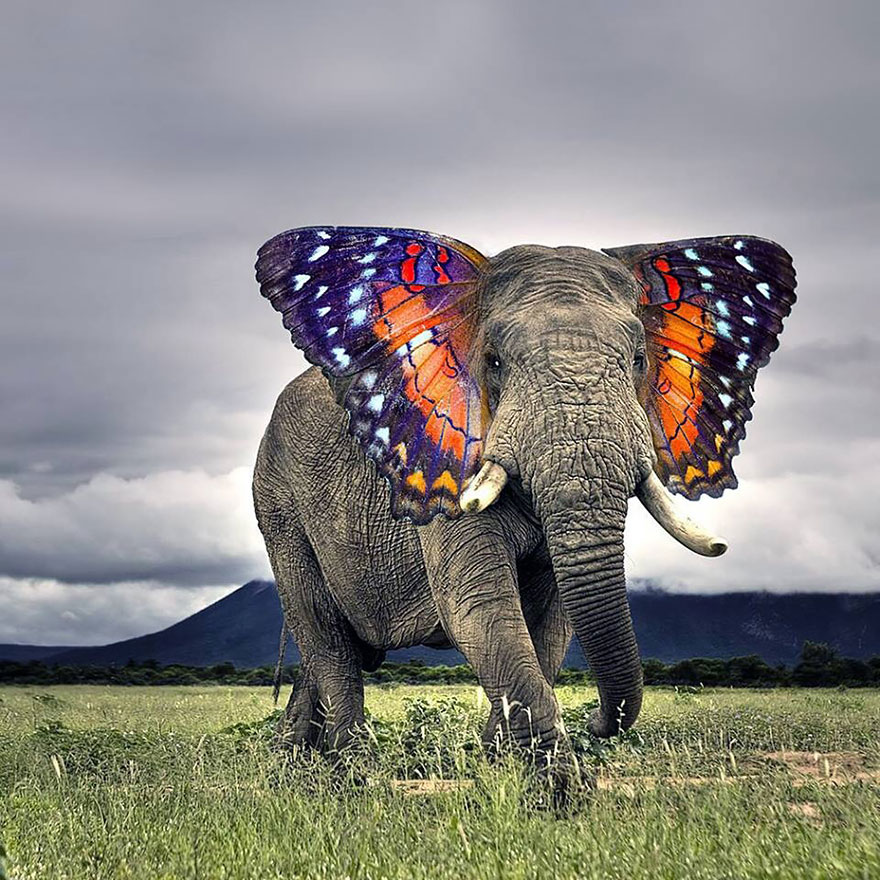
Funny pics of hybrid Photoshopped animals