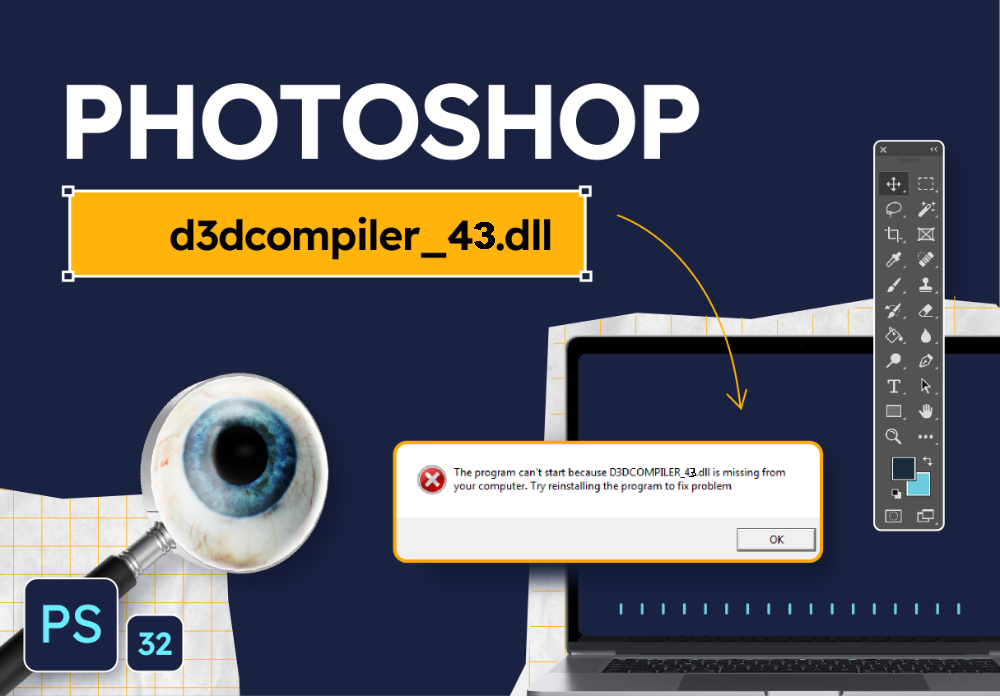
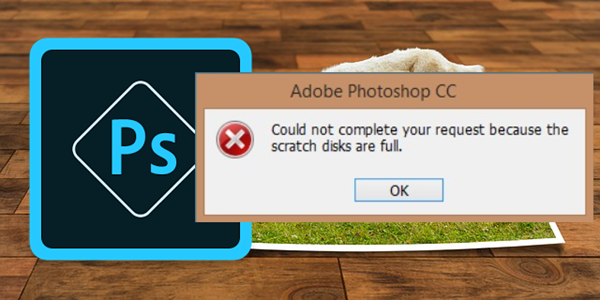
Fix Photoshop Scratch Disk Is Full errors. If you have used Adobe Photoshop on a Windows 10 computer, you must have encountered the Scratch disk error at least a few times. This error can be frustrating and adversely affect your workflow. However, the error is pretty easy to fix, and you can start Photoshop on your PC right away. In this article, we will learn what the Scratch disk error is and Fix Photoshop Scratch Disk Is Full errors.
According to Adobe, the Scratch disk is a (virtual) storage drive on a Windows 10 computer that is used as temporary memory for Photoshop when the program runs.
The software uses the Scratch disk space to store the parts of the project you are working on, along with historical table status, that does not fit in the RAM on the computer.
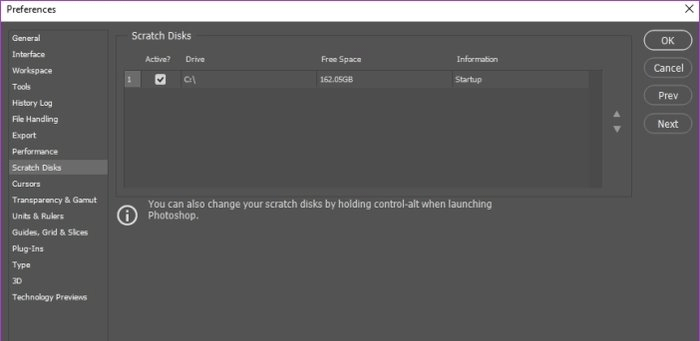
By default, Photoshop uses the boot drive as the primary Scratch disk, but if you have multiple partitions or drives, you can configure any drive to use as the Scratch disk.
The Scratch disk error appears when you are working on a large project and the drive Photoshop uses as the Scratch disk is almost full. Now you understand the reason for the Scratch disk error, and how to fix it is easy.
How to set up Scratch disk in Photoshop CC 2019
Before starting to fix the problem, the article will show you how to set up the Scratch disk in Photoshop CC 2019 . Follow these simple steps to configure Scratch disk:
Step 1 . Open the Edit menu in Photoshop.
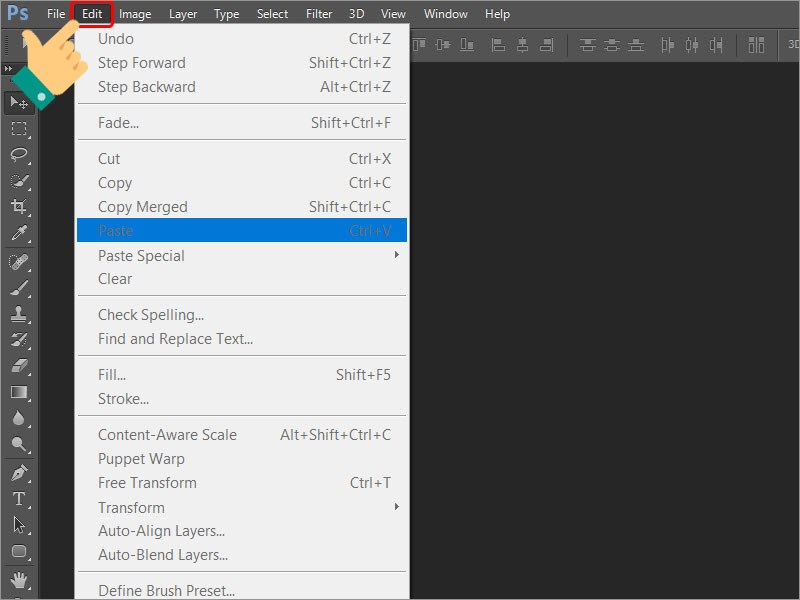
Step 2 . Then select the Preferences option at the bottom.
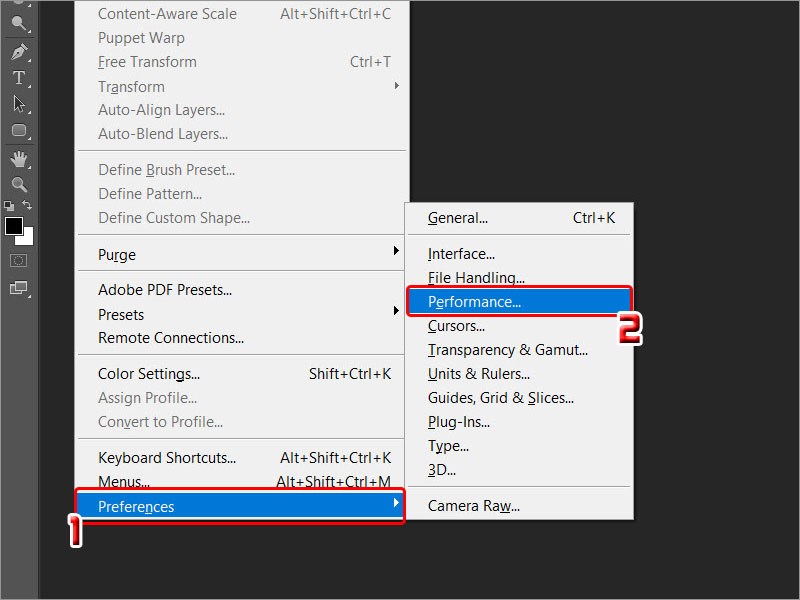
Step 3 . In Preferences, select Scratch Disk to open the Scratch Disk menu.
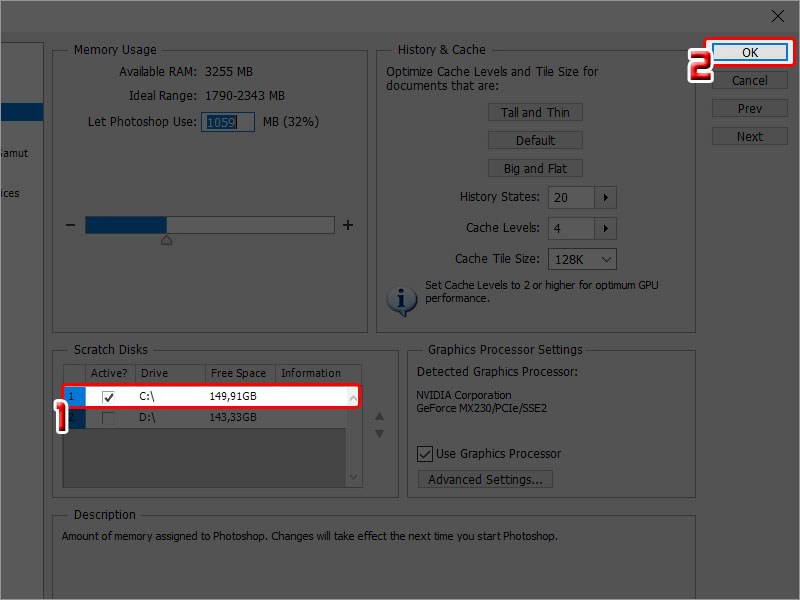
Step 4 . Here, select the drive you want to use as Scratch disk and click OK .

If there is only one drive on your Windows 10 computer, you can only use it as the Scratch disk. However, if you have multiple drives, you can choose the one with a lot of free space to avoid the Scratch disk is full error.
You should also use the stick SSD drive as the HDD as the Scratch disk. That will ensure that Photoshop continues to run optimally on the system and not encounter any performance issues.
Instructions on How to Fix Photoshop Scratch Disk Is Full errors
Now that you know how to configure Scratch disk, here is how to Fix Photoshop Scratch Disk Is Full errors.
1. Convert another drive for the Scratch disk
The first and easiest way is to assign a new scratch disk to Photoshop. Just follow the steps above and choose another hard drive. You can even select multiple hard drives as backup disks.
2. Free up space on the hard drive
If you don’t have a separate hard drive, you can fix this by deleting unnecessary, junk files from the drive to make room for Photoshop. However, there is a chance that you will still get the error even when there is free space on the hard drive.
To limit the error of scratch disks are full, free up the disk by deleting junk files on the drive. However, Photoshop only uses the unfragmented free space to make Scratch Disks. So, sometimes your drive has a lot of free space and still gives the error scratch disks full. To overcome this situation, after freeing up memory, use Disk Defragmenter to defragment the hard drive.
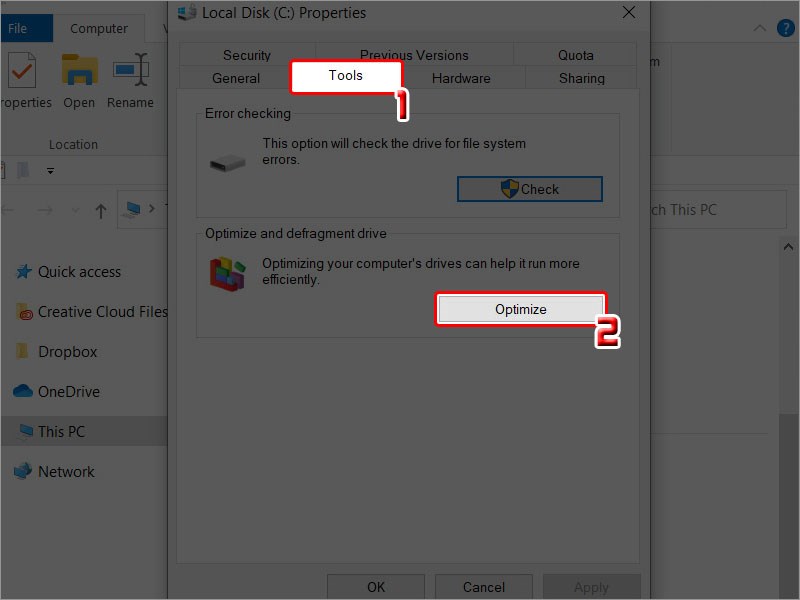
This happens because Photoshop requires un-fragmented free space on the Scratch disk. In that case, you need to defragment the drive using Disk Defragmenter. To do that, open the Start menu, search for the defragmentation utility and run it on the drive, partition in question.
3. Delete the Photoshop temporary file
You will need to manually delete Photoshop temporary files in the following folder:
C:\Users\YOUR USERNAME\AppData\Local\TempThis folder contains all the system temporary files and Photoshop temporary files labeled Photoshop Temp along with the numeric string.
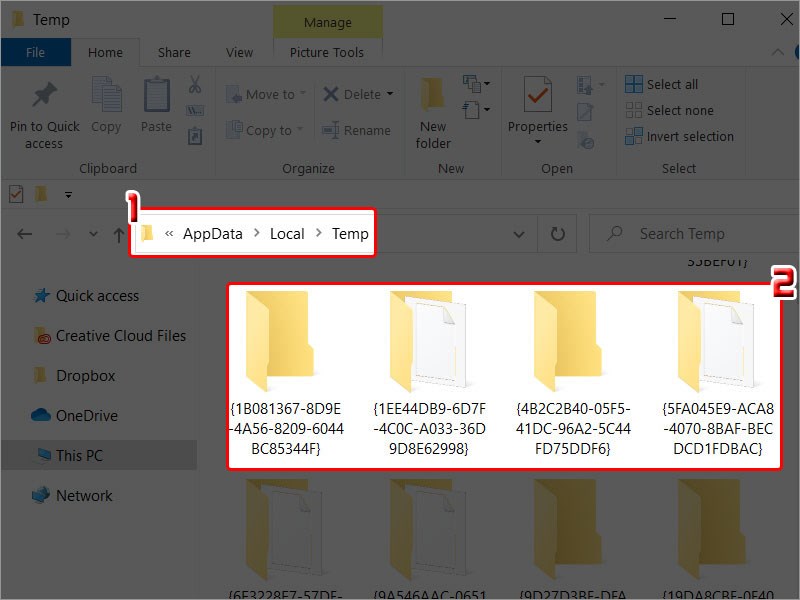
Before deleting files, make sure you save your progress in Photoshop if you don’t want to lose data. If you can’t delete the files and get the message This action can’t be completed , close the program from Task Manager and try deleting again.
4. Scratch disk error when cutting image
If you get a Scratch disk full error while cropping an image, you may have accidentally entered the size and resolution value in the crop tool options bar or entered the value in the wrong unit. For example, you enter the size 1200 x 1600 but the unit is inches instead of pixels, this will create a large file resulting in Scratch disk error. The solution to this problem is to press the Clear option in the options bar after selecting the snipping tool and before cutting.
Now you know how to fix Scratch disk error in Photoshop CC 2019. Hope this article is useful to you.
I wish you all success!
Fix Photoshop Scratch Disk Is Full errors


