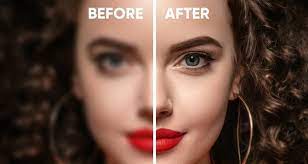
How to fix out of focus pictures in Photoshop. Photoshop is one of the most widely used photo editing software with many useful features, including increasing the sharpness of the image, making your blurry photos clearer. In this article, theartcult.net will introduce you the 2 simplest ways to fix out of focus pictures in Photoshop.
I. Benefits of sharpening images
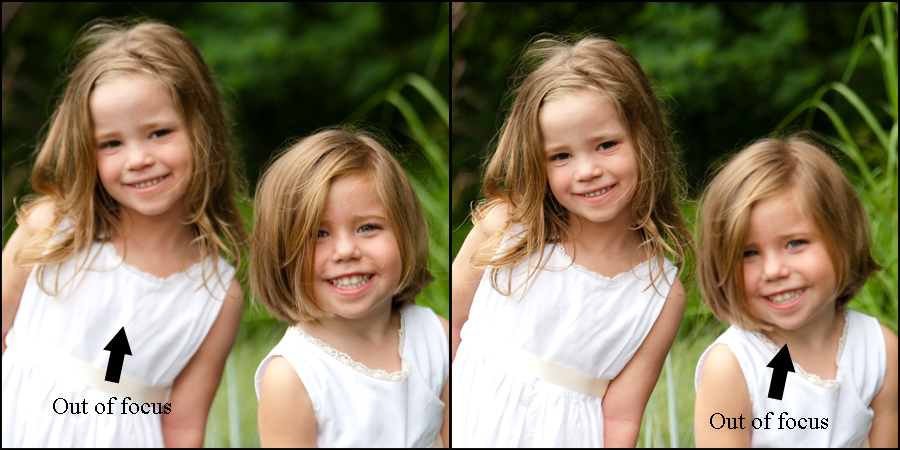
- Increase image sharpness when it is not possible to take pictures in good conditions.
- Help blurred, blurred, broken photos become clearer.
II. How to fix out of focus pictures in Photoshop Using the Unsharp Mask Tool
1. Quick Guide
- Open Photoshop on your computer > Click File > Select Open > Click on the image you want to increase sharpness and select Open to open the image.
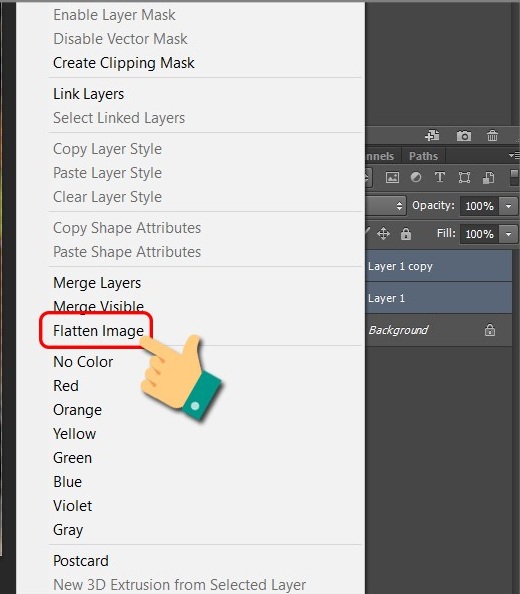
- Right click on Layer > Flatten Image > Select Filter > Select Sharpen > Select Unsharp Mask > Adjust Radius, Threshold, Amount > OK .
2. Detailed instructions
Step 1: Open Photoshop on your computer and then click File > Select Open.
Select the image you want to sharpen and select Open to open the image you want to sharpen.
Step 2: If your image has many layers, merge them by right-clicking on Layer > select Flatten Image.
Select tool
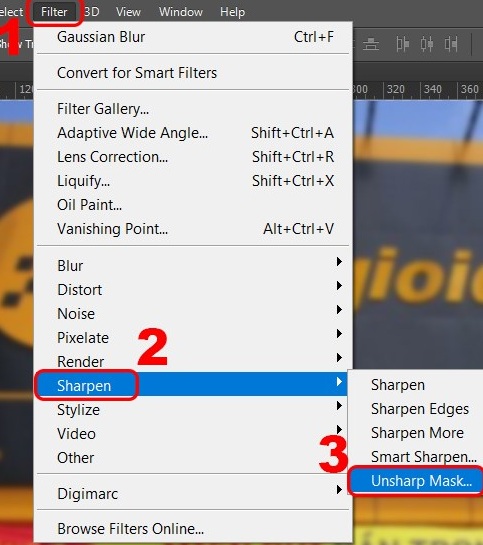
Step 3 : Select Filter > Select Sharpen > Select Unsharp Mask .
Select the Sharpen tool
Step 4 : Adjust the following 3 parameters:
- Radius : Adjust the width of the halo along the image, depending on how blurry the image is, you can leave it 0.5-1.
- Threshold : Adjust the edge contrast value, the smaller the value, the more noise will increase.
- Amount : Adjust the halo of the image, drag the toolbar left or right.
Then click OK to confirm.
If the image has a lot of fine detail, you will adjust the Radius to small and the Amount value to be large accordingly. In case the image has less good detail, adjust the Radius in the range of 1.5 or more and the Amount index is small so that the halo will be larger and clearer.
And this is the result.
III. Sharpening with the High Pass Sharpening tool
1. Quick Guide
- Open Photoshop on your computer and then click File > Select image and Open to open the image you want to increase sharpness > Duplicate Layer > Select Filter > Select Other> Select High Pass .
- Adjust the parameters in the Radius bar as desired > Click OK > Arrow icon and then select Overlay .
2. Detailed instructions
Step 1 : Open Photoshop on your computer and then click File > Select Open .
Select an image to open > Click Open .
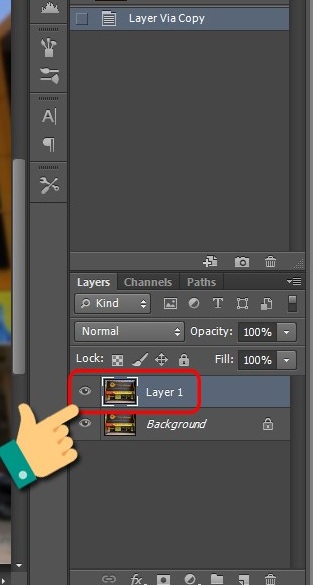
Step 2 : You press CTRL + J on Windows computer or CMD + J on Macbook to duplicatethe image layer you want to increase the sharpness > Click on Layer 1 (the new layer you just copied).
Select Layers
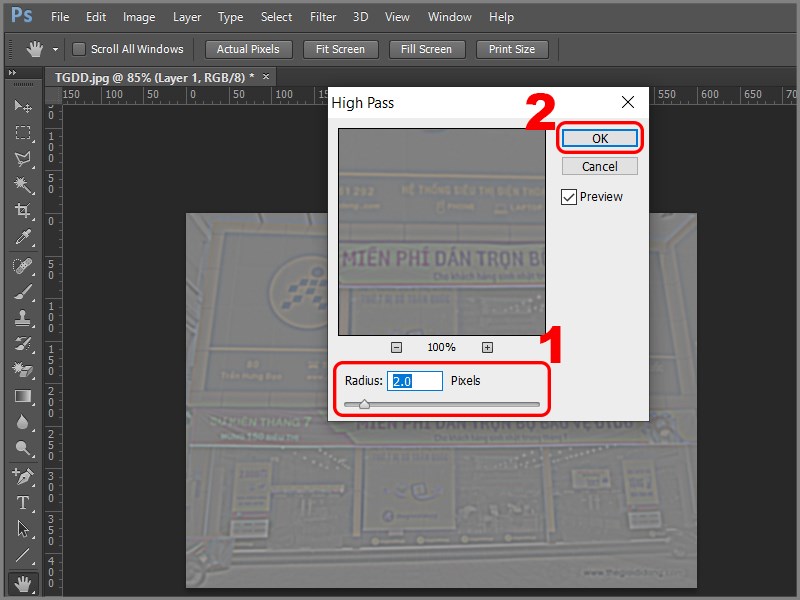
Step 3 : Click Filter > Select Other > Select High Pass .

Select tool
Step 4 : Adjust the horizontal bar in the Radius section ,
Depending on the level of blur, blur of the image, you can use the appropriate adjustment, when adjusted to where, there will be an image showing for easy adjustment > When you are satisfied, press OK .
Adjust parameters
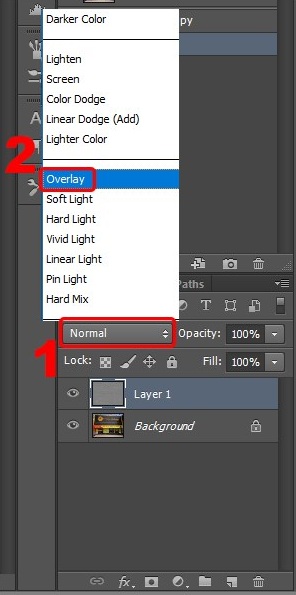
Step 5 : At the Layer section in the right corner of the screen, click the arrow icon and select Overlay .
There are many other blending modes that you can apply such as: Soft Light, Hard Light, Vivid Light, Linear Light, Pin Light,… In case the image is too sharp, you can also adjust it at Opacity to blur.
Final action to finish editing
Thus, you have successfully fix out of focus pictures in Photoshop!