Fix Failed to install 0xC1900101 error in Windows 10/11. In this guide, we will discuss the cause of Setup Error 0xC1900101 along with eight ways to solve it on Windows 11/10. As the name suggests, this is a form of installation error and appears when installing a new operating system using the media creation tool.
What does installation error 0xC1900101 mean?
Reasons for 0xc1900101 Error
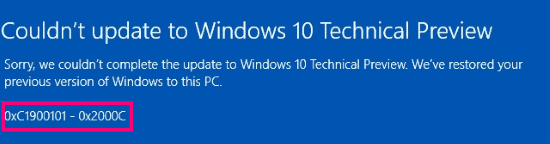
When you update or install your operating system, the system sometimes prompts you with a 0xc1900101 error with BSOD. There are many reasons for this error code and I’ll just list some of them.
- Corrupted system files in Windows.
- False system files in Windows caused by an incomplete uninstallation, an incomplete installation, improper deletion of hardware or applications.
- Out-date drivers or operating system is not compatible with the drivers.
- Antivirus software or virus attack.
- Incompatible external hardware.
Error Code Related to 0xc1900101
Errors starting with 0xc1900101 are usually driver-related errors, so if you see the following errors, you can take the same approaches to resolve them.
- 0xC1900101 – 0x2000c
- 0xC1900101 – 0x20017
- 0xC1900101 – 0x30018
- 0xC1900101 – 0x3000D
- 0xC1900101 – 0x4000D
- 0xC1900101 – 0x40017
How to Fix 0xc1900101 Error?
So after you have known what reasons can cause 0xc1900101 error, then read the following paragraphs to find a way to solve it. And some of the following methods need administration permissions on your device.
Before you begin to fix 0xc1900101 error, you’d better enter safe mode in advance in case that other errors occur while solving this problem.
Way 1: Remove All External Devices
If there are a lot of external devices plugged into your computer, such as DVD, printer, USB flash drive or digital camera, then Windows will get stuck when trying to figure out the drivers for them. And sometimes the drivers of external devices may not be compatible with the operating system.
Therefore, in order to solve the problem that shows error code 0xc1900101 Windows 10, you’d better remove all the unwanted external devices. Then restart your computer to check whether this error happens again.
If this method doesn’t fix this error, then you can try the following ones.
Way 2: Free up Disk Space
Do you know how much space does Windows 10 take? Actually, nowadays you need to have a minimum of 32 GB of free space to update to Windows 10 version 1903 whether it is a 32-bit or 64-bit.
So if you don’t meet the minimum requirement, then error code 0xc1900101 may occur. Then you can solve this error by releasing hard drive space to successfully install the update.
There are many different methods to get more storage space for your system partition. Now I will list some of the efficient methods for you to gain more storage space on your hard drive.
- Extend your system partition.
- Delete temporary files and Windows.old folder.
- Turn off Hibernation.
- Uninstall useless applications.
- Change the Virtual Memory size in Windows 10.
- Migrate your operating system to a larger SSD or HDD.
If you want to get detailed information, then click here. And if you have got enough free space, but 0xc1900101 error still occurs again, then you need to try the following ways.
Way 3: Run the Windows Update Troubleshooter
If there is something wrong with your hardware, then 0xc1900101 error will occur, too. Therefore, you can try running Windows Update Troubleshooter to check if there is a problem with your hardware.
Here are the instructions for running Windows Update Troubleshooter.
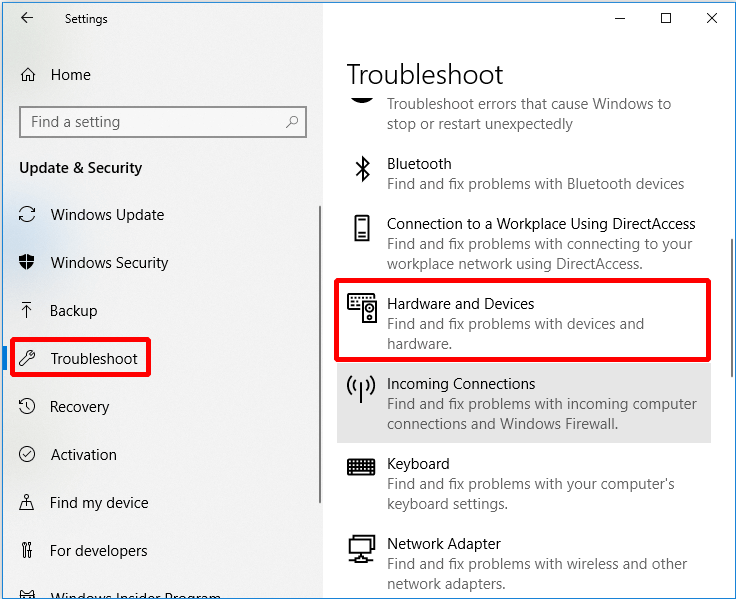
Step 1: Click Settings from the Start menu to continue.
Step 2: Click Update & security on the Settings page to continue.
Step 3: Click Troubleshoot and click Hardware and Devices in the right panel to continue.
Step 4: Click Run the troubleshooter to continue.
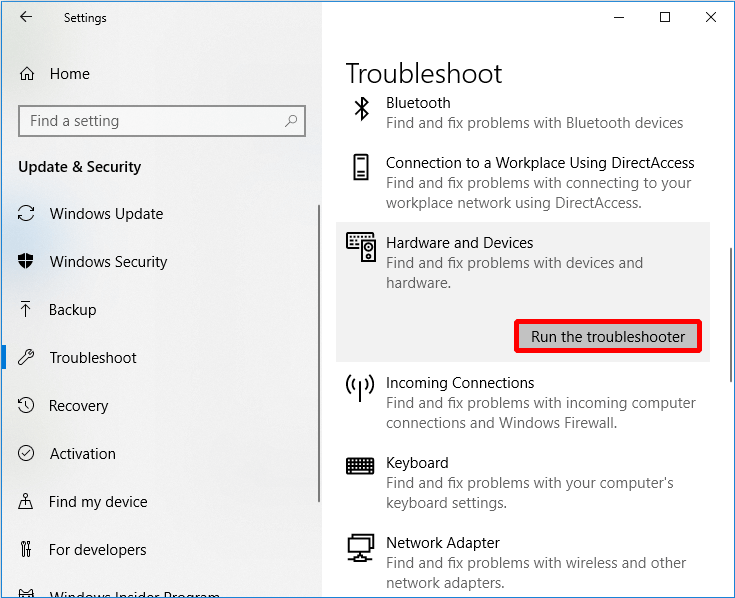
Then just wait for the computer to detect the problems. And if there are problems with hardware, they will be displayed after the scanning process is completed. Then you just need to select the problems to fix.
However, if there is no problem detected, then it may not be a hardware problem, and you may need to try the following methods.
Way 4: Update or Uninstall Drivers
Sometimes, if you only upgrade your operating system while not update drivers, then 0xc1900101 error will occur. And this is because your upgraded operating system is not compatible with the out-of-date drivers. Similarly, if your drivers are damaged, this error will occur, too.
Therefore, I highly recommend you to update your drivers or even uninstall them to fix 0xc1900101 error. Then how to do it? Here’s the way to update your driver or uninstall the device.
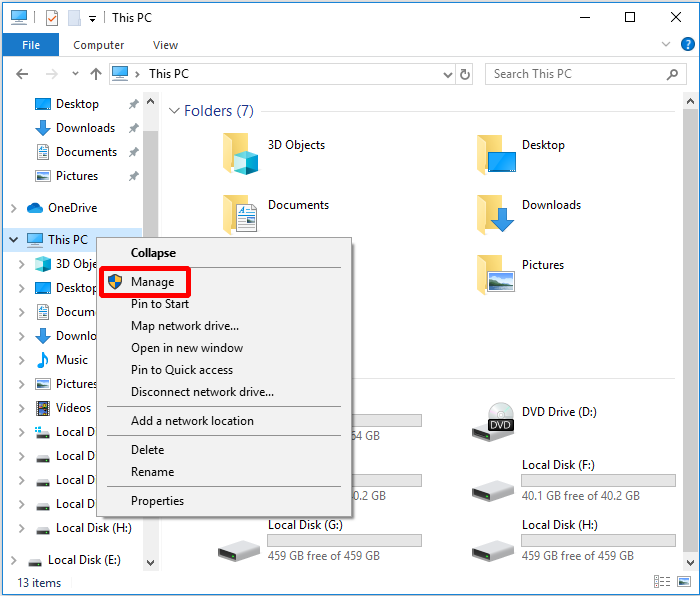
Step 1: Open File Explorer and right-click This PC to continue.
Step 2: Choose Manage to continue.
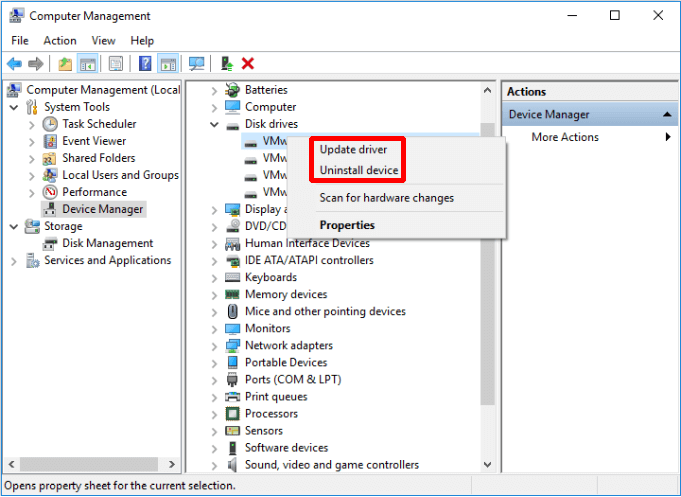
Step 3: Choose Device Manager under System Tools option to continue.
Step 4: Right-click the disk device under Disk Drives, then choose Update driver or Uninstall device.
You’d better update all the disk drivers. And after updating all the disk drivers, you need to reboot your computer to see whether this error occurs again. If this way doesn’t resolve it, then try the next one.
Way 5: Check Disk
As we all know, the corrupted file system or bad sectors on the disk will cause many errors to happen, and 0xc1900101 error is one of them. So in order to fix 0xc1900101 error, using the Windows Snap-in tool – Check Disk is a good idea.
Check Disk can scan the file system and fix any logical corrupted file system. Besides, it will repair soft bad sectors and mark hard bad sectors to avoid being used again.
Here is the way to check the file system or whether there are bad sectors.
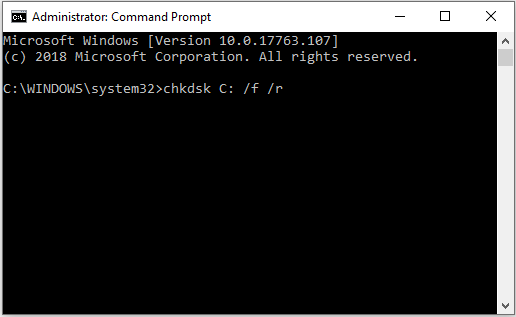
Step 1: Enter cmd in the search box next Cortana, then right-click Command Prompt to click Run as administrator to continue.
Step 2: Press Enter after typing chkdsk C: /f /r. (C is the letter of the drive where you save your operating system.)
If you restart your computer, and find that 0xc1900101 error occurs again, then it may be not the reasons for the corrupted file system or bad sectors on the disk. So you need to try the following method.
Way 6: Uninstall Non-Microsoft Antivirus Software
If 0xc1900101 error occurs, then the problem might be your non-Microsoft anti-virus software on your computer. So in order to fix this problem, you need to uninstall it completely at first and try to reinstall your operating system.
Besides, sometimes all files and registry entries with your non-Microsoft antivirus software need to be moved. And the best way to do that is to download and use a specified removal tool for antivirus.
However, if uninstalling anti-virus software doesn’t fix the error, then you can try the following method.
Way 7: Upgrade BIOS
There is another way to fix the 0xc1900101 error, which is to upgrade BIOS. If your BIOS is out of date, then you cannot upgrade your operating system successful.
So in order to get rid of this error, you need to update your BIOS. But it is very complicated to do that and you may cause damage to your computer once you have done wrong, so you’d better check your motherboard manual to upgrade your BIOS.
And if this way still cannot fix the error, then you need to try the last method.
Way 8: Reset This PC
After you tried all the above methods, but you haven’t fix 0xc1900101 error, then you’d better reset your computer. You can save your personal files by Reset this PC feature built-in Windows 10. And this way is really convenient for you.
Here is the tutorial.
Step 1: Click Update & Security on the Settings page.
Step 2: Click Recovery and click Get Started on the right.
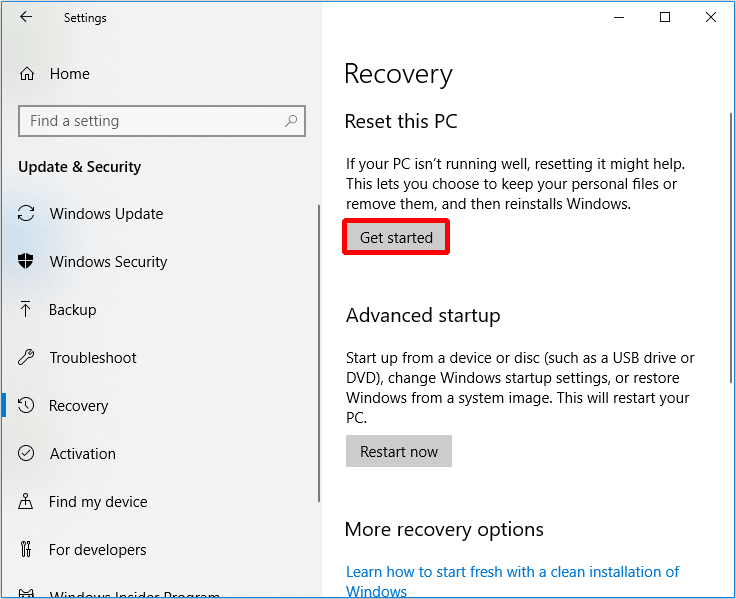
Step 3: Choose whether to Keep my files or Remove everything to reset your PC.
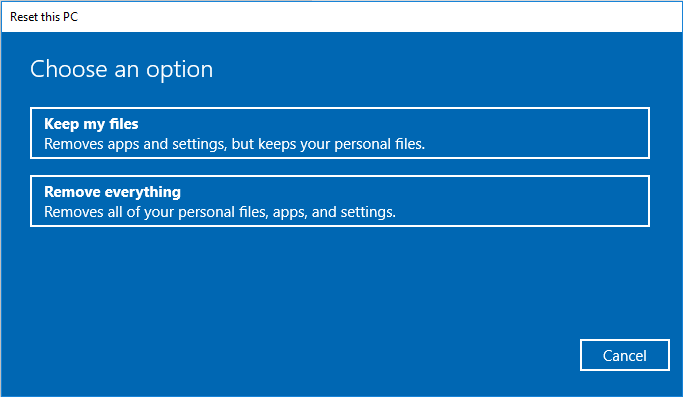
Step 4: Read the following messages and click Reset.
You need to wait for a period of time when the computer is resetting. And you can also try to reinstall your operating system to fix this error.
From this article, I have known why 0xc1900101 occurs and I also have mastered several efficient solutions to fix 0xc1900101 error.Click to tweet
Useful Suggestion
There are always various errors that occur during using your computer, so in order to ensure that the system can be restored in time when the system crashes, I suggest you back up your system in time.
So how to back up the operating system safely and quickly? I extremely recommend you to use MiniTool ShadowMaker – a piece of professional backup and restore software. You can use it to back up files and folders, operating system, disks and partitions.
What’s more, you can use it to sync files to two or more locations easily. And you can use the Disk Clone feature under Tools page to make an external drive bootable, and you can even clone simple volume on dynamic disk using this feature.
One better thing is that you can use the software for free within 30 days, so it is a good idea to download MiniTool ShadowMaker and have a try.
Free Download
Here is the way to use MiniTool ShadowMaker to back up the operating system.
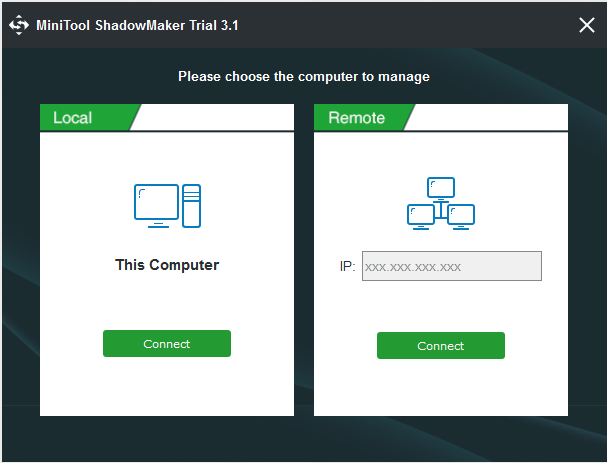
Step 1: Launch MiniTool ShadowMaker and choose Local or Remote to get the main interface by clicking Connect.
Step 2: Go to the Backup page. MiniTool ShadowMaker backs up the operating system and selects Destination by default. But you can click Source and Destination to change the source and destination.
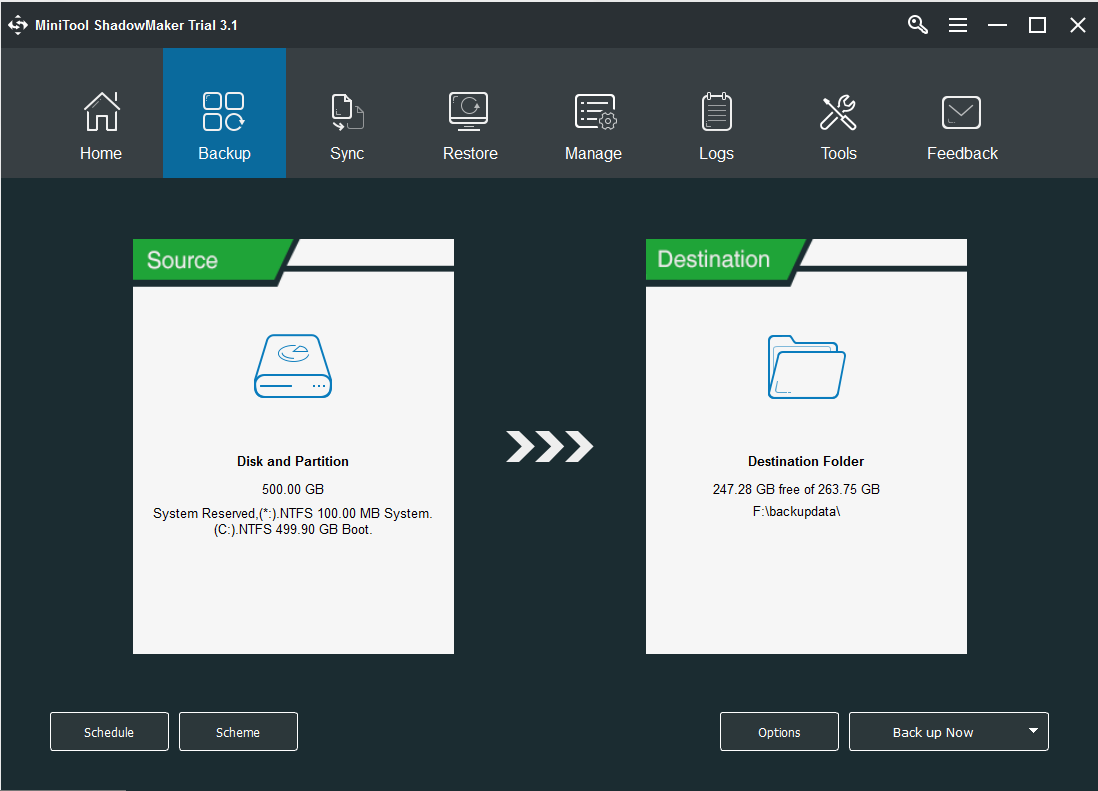
There are three important features under the Backup page which is very useful for you.
- Schedule: In order to avoid losing data, you can set automatic backup here.
- Scheme: Manage the space occupied by the backed up files by deleting the specified backup image file versions here.
- Options: Set some advanced parameters here, such as adding comments to backup data, setting encryption mode, shutting down after successful backup, etc.
Step 3: Click Back up Now when you have confirmed the backup source and backup destination.
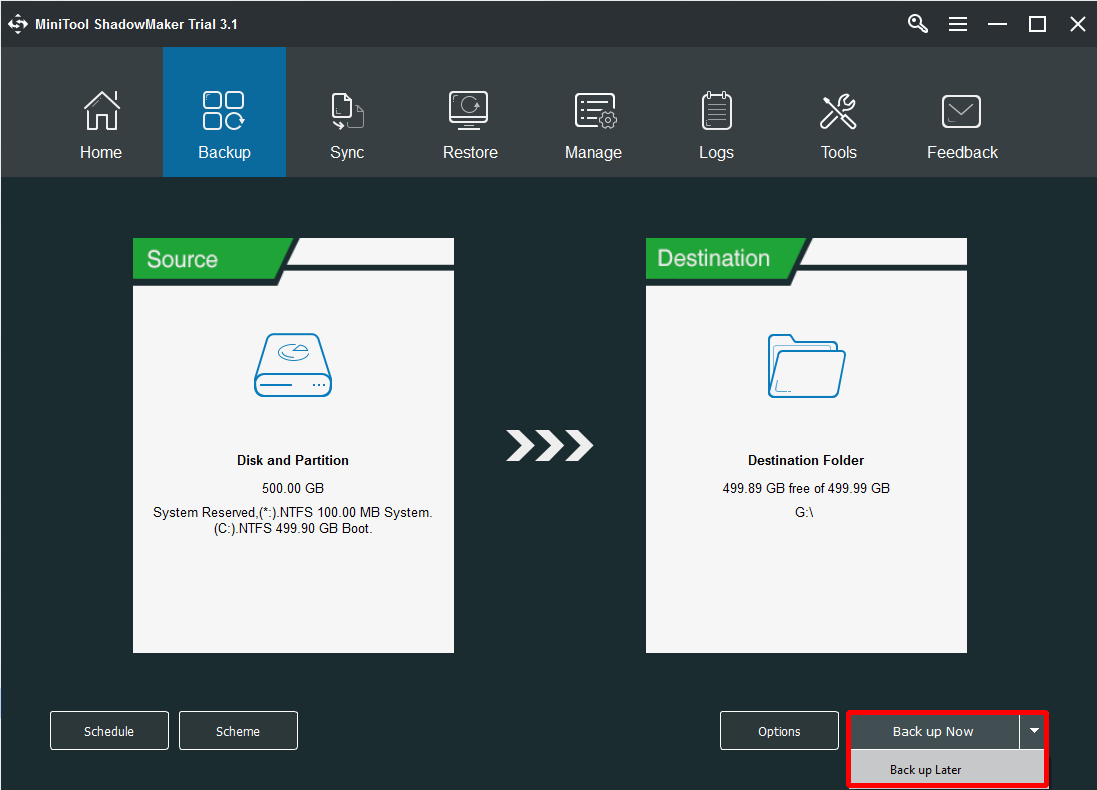
After finishing these steps, you can back up the operating system successfully.
I suggest that you use MiniTool ShadowMaker to create bootable media in case that you cannot boot your computer.
Bottom Line
In conclusion, there are many reasons to cause the 0xc1900101 error. But at the same time, I have offered you 8 powerful methods to fix this error from this article. In addition, I have offered you a piece of efficient backup software in case that losing data.
0xc1900101 FAQ
There are 8 methods you can try to fix the error:
- Remove all external devices.
- Free up disk space.
- Run the Windows Update Troubleshooter.
- Make changes to Drivers.
- Check Disk.
- Uninstall third-party antivirus software.
- Upgrade BIOS.
- Reset this PC.