Disable Superfetch and Prefetch for gaming. Windows 10 is a desktop operating system that has not stopped evolving in the last five years since it was released in 2015. As a result, it is constantly receiving new improvements and functions that have made it a The most used desktop system in the world.
But of course, this is something Redmond didn’t achieve overnight, in fact it cost much more than originally planned. To achieve this, as we told you, new and more powerful functions have been implemented over time. At the same time, another corporate goal is not only that we have more features, but that the user experience is the best possible. Because it couldn’t be otherwise, because this is an extremely important factor that the software on the computer works in the most fluent way.
And it’s the fact that having to work every day with a sluggish PC that takes longer than necessary to perform tasks, is what can lead us to despair. Therefore, to improve this, Microsoft in turn the developers include certain functions that will help us in these tasks. To improve the performance of windows 10, we have at our disposal a lot of functions implemented, some better known and more affordable than others.

What is Superfetch in Windows and how will it help us?
This is exactly the case we are going to talk about these lines, all thanks to functions called Superfetch and Prefetch. Well, for those of you who don’t know them, let’s start with the first one, SuperFetch. First of all we will tell you that this is a function that, despite the fact that many of you have never heard of it, has been running for a good number of years in Windows. In fact, Microsoft itself describes it as something that helps maintain and improve Windows performance over time.
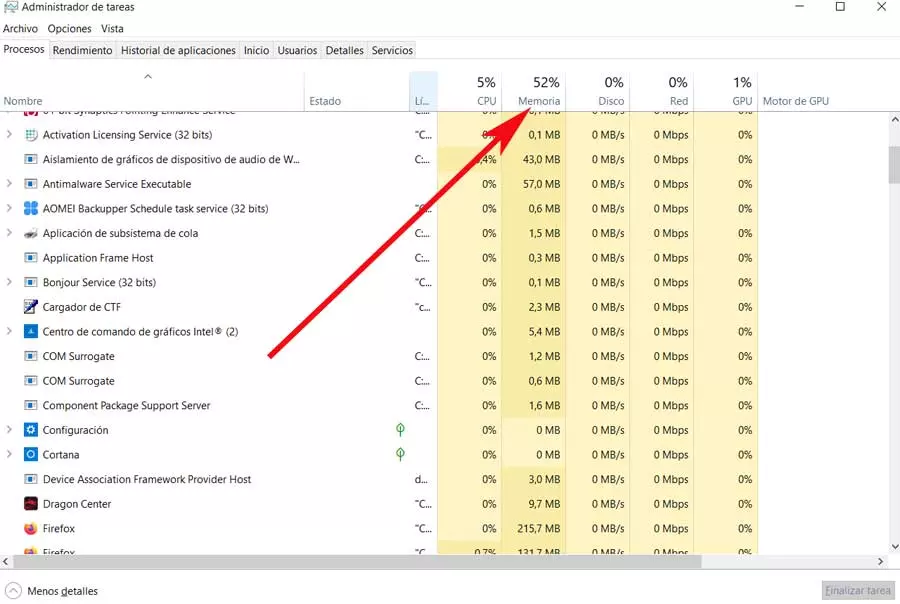
Its operation focuses on such an important part as the management of memory RAM that the operating system uses continuously. Specifically, we are talking about a feature that by default is always active windows and that takes advantage of the excess RAM at the time. For example, to control the RAM usage of each loaded application, the Task Manager would be very useful.
Therefore, it uses the same to speed up the applications that we use the most on a daily basis by preloading them in the system itself. With this, what we achieve is access to the most popular programs, much faster, all in the background.
Is it useful to enable the Superfetch function all the time?
It must be said that Superfetch has been with us since old versions of Windows and its main goal is to analyze the usage that the team makes of the RAM installed in the PC. With this, what is really achieved is that the function itself can know the installed applications that we use most often to add them to their own list. With this, what Windows does is optimize that software load by preloading it in RAM.
All this means that we will be able to open these programs, say popular, much faster, with the advantages that all this entails. Also, we must know that for this preload, Superfetch uses the rest of the RAM memory at all times, so it does not affect the tasks we perform now. Also, when the system needs to use more RAM, Superfetch will release part of it so that it can be used immediately. Since it couldn’t be otherwise, all this is something done in a completely transparent way to the user, so it only offers advantages.
When to turn off Superfetch and how to do it
In fact, we can say that this is a rare occasion where this function will negatively affect the operation of Windows 10. Also, being smart, it frees up previously used memory. to preload apps, if needed. , so just use the rest.
Of course, at the same time we must be aware that the fact that this works continuously, can cause it to consume more CPU than expected. Therefore, it is possible that under certain circumstances, at a minimum, Superfetch should be turned off. This is something that can be done especially recommended on older or very limited computers in terms of internal specifications, RAM and CPU. Therefore, we will show you how to disable this function that we are talking about.
To do this, the first thing we will do is open Windows and application services , something we achieve from the Start menu search box, for example. Therefore, once we have the Services window on the desktop, we will have to do a search in the Superfetch function.
Once we have placed it in the Services list, when checking it, in the left part of the window we will see an option called Stop, which we click on. Even if it is no longer running, restarting the PC will re-enable it. So if what we want is for it to stop forever, we can simply right click on the item and select Properties, in the Startup type click on Disable.
What is Prefetch and how it improves Windows performance
Once we’ve seen what Superfetch is and how it works in the background in Windows, let’s see what the other mentioned feature gives us, prefetch . Well, first of all we will tell you that like in the previous case, Prefetch is also a good number of years and versions of Windows among us.
In this particular case, it is a folder that appeared in Windows XP and continues to work in Windows 10. This is the folder that we will find in the Folders Window , generally in the C : drive. So it is worth mentioning that the most important function of the aforementioned folder, which is automatically created in Windows, is to store certain information related to the applications that we run in the operating system. In this way, what is really achieved is, as before, the programs load much faster.
As is easy to imagine, this makes loading programs more agile, positively affecting the overall operation of the device. Out of curiosity, we’ll say that the entries here are created on apps that have a .PF renewal profile.

On the other hand, we must remember that the files stored here are small, so deleting the contents of the directory over time does not make sense. Moreover, with cleaning it, the only thing we will achieve is a sure start of applications in Windows slower than usual, at least for a while.
Disable Superfetch and Prefetch for gaming
How to disable Superfetch Windows 11
1. Use the service application
The first is the easiest way to disable Superfetch in Windows 11.
- Press Windows + S to launch the search menu, search and open services.
- Find and right-click the SysMain entry, select Properties.
- Click the Startup Type drop-down menu and select Disabled from the list of options.
- Next, if it’s running, click the Stop button under Service Status, then OK at the bottom.
Restart your computer for the changes to take effect.
2. Turn off Superfetch with Command Prompt
Press Windows + S to launch the search menu, search for Terminal, right-click the relevant search result and select Run as administrator.
Click Yes on the UAC window.
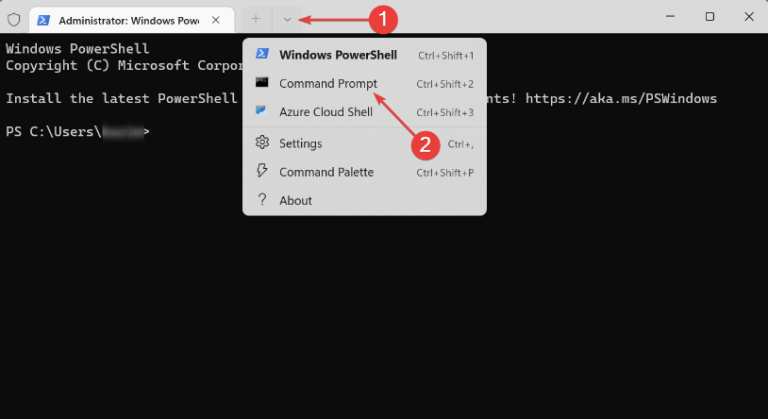
Click the down arrow at the top and select Command Prompt.
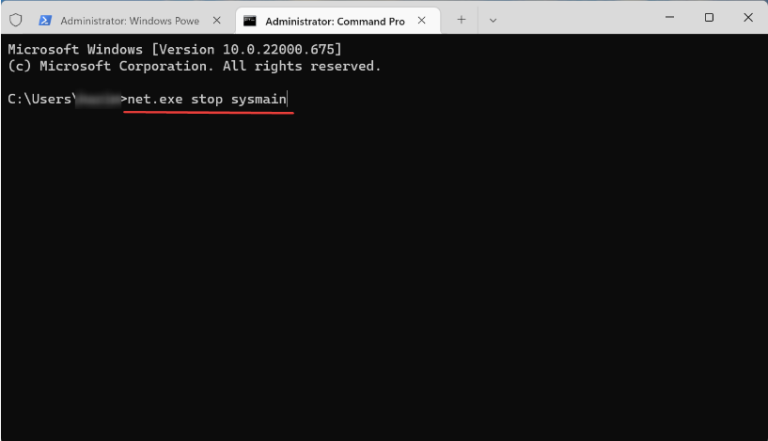
Execute the following command to stop the service:
net.exe stop sysmain
Execute the following command to disable Superfetch loading at startup:
sc config sysmain start = disable

3. Use Registry Editor
Press Windows + R to start the run command, type regedit and click OK.
Click the Yes button on the UAC window.
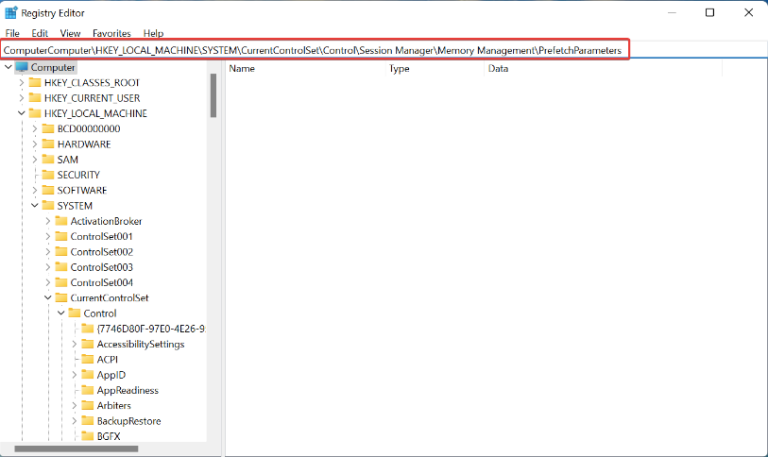
Type the path in the address bar and press Enter
Computer\HKEY_LOCAL_MACHINE\SYSTEM\CurrentControlSet\Control\Session Manager\Memory Management\PrefetchParameters
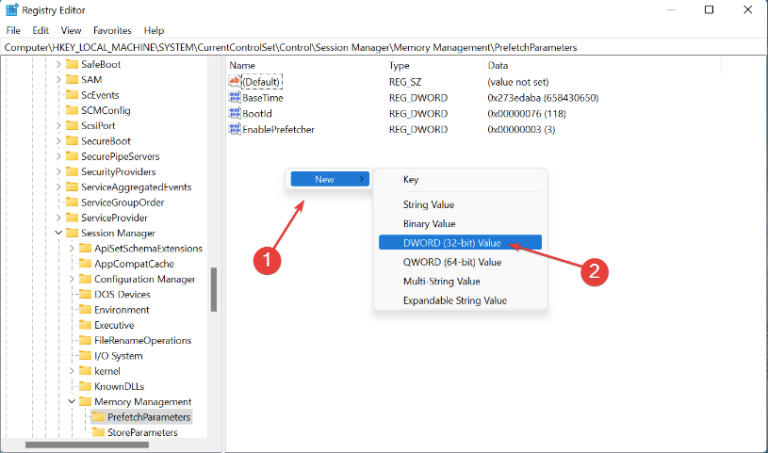
Right-click an empty space, hover over New, and select DWORD (32-bit) Value.
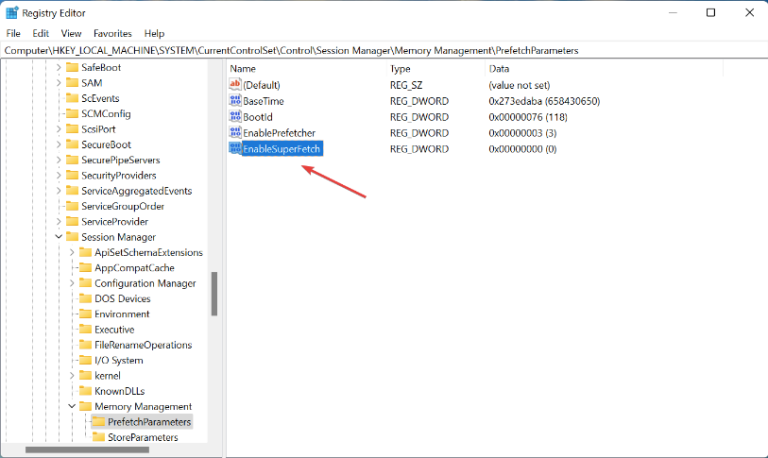
Name the entry EnableSuperfetch and double-click it to modify the properties.
Enter 0 in the text field below Value data and click.
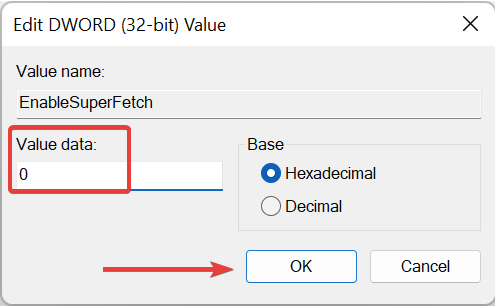
Restart your computer.
Should Superfetch be disabled in Windows 11?
Disabling Superfetch can often improve the performance of Windows 11. However, this is not recommended in some cases. For example, if you’re hosting Windows 11 on an SSD, Superfetch won’t do much here because the load times themselves are too short.
However, if RAM is always running full or disk usage is high, disabling Superfetch may improve.
Overall, if your PC is running slow, you can try disabling Superfetch in Windows 11 as described in the article to improve performance.
How to Disable Prefetch in Windows 11/10
To disable Prefetch in Windows 11/10, follow these steps:
- Press Win+R to open the Run prompt.
- Type regedit > press the Enter button.
- Click the Yes
- Go to PrefetchParameters in HKLM.
- Double-click on the EnablePrefetcher REG_DWORD value.
- Set the Value data as 0.
- Click the OK button.
To disable Prefetch in Windows, Run regedit to open the Registry Editor. Navigate to the following registry key:
HKLM\SYSTEM\CurrentControlSet\Control\Session Manager\Memory Management\PrefetchParameters
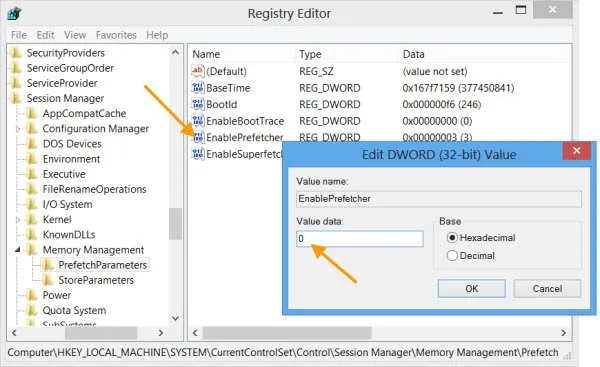
Double-click on EnablePrefetcher on the right side to open its DWORD value box.
The possible values for EnablePrefetcher are:
- 0 – Disable Prefetcher
- 1 – Application launch Prefetching enabled
- 2 – Boot Prefetching enabled
- 3 – Application launch and Boot Prefetching enabled
The default value is 3. To disable Prefetch, set it to 0. Click OK and Exit.
Incidentally, you can also disable or tweak the Suoerfetcher here – you will see the EnableSuperfetcher DWORD just below it.
The possible values for EnableSuperfetch are:
- 0 – Disable SysMain
- 1 – Enable SysMain for boot files only
- 2 – Enable SysMain for applications only
- 3 – Enable SysMain for both boot files and applications
If you are a Solid State Drive user, you may want to check out freeware SSD Life that can check the health of your Solid State Drive and SSD Tweaker which will help you tweak your Solid State Drives.
If you find the article useful, please like and share to support us. If you have any questions or comments, let us know in the comments section below.