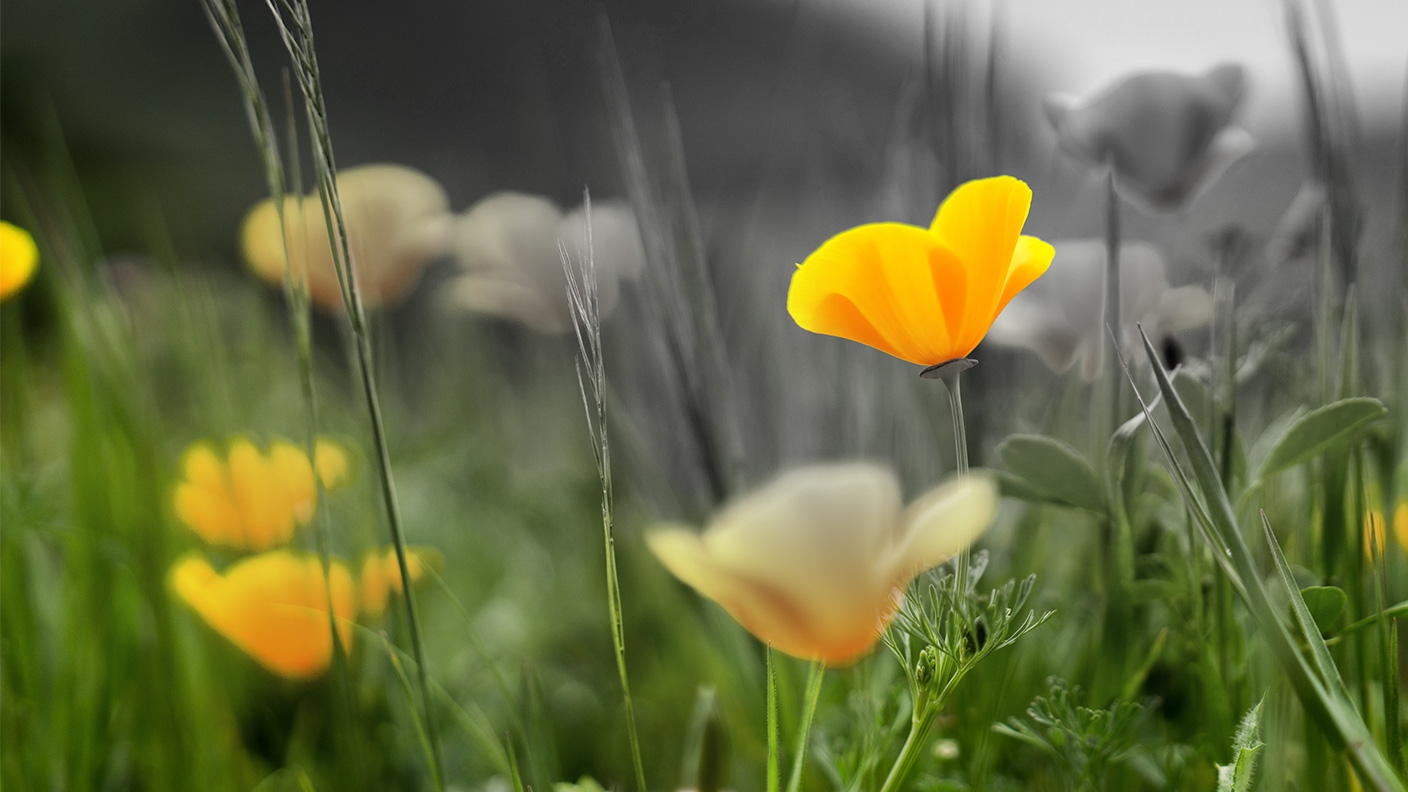
How to make certain colors black and white in Photoshop. Learn how to convert a photo to black and white in Photoshop. Then bring color back to part of the photo for drama and focus.
WHAT YOU’LL NEED
Open a photo in Photoshop
Download and unzip the sample file, or use a color photo of your own. Click the Open button in Photoshop’s Start Screen or choose File > Open. Then navigate to the photo and click Open.
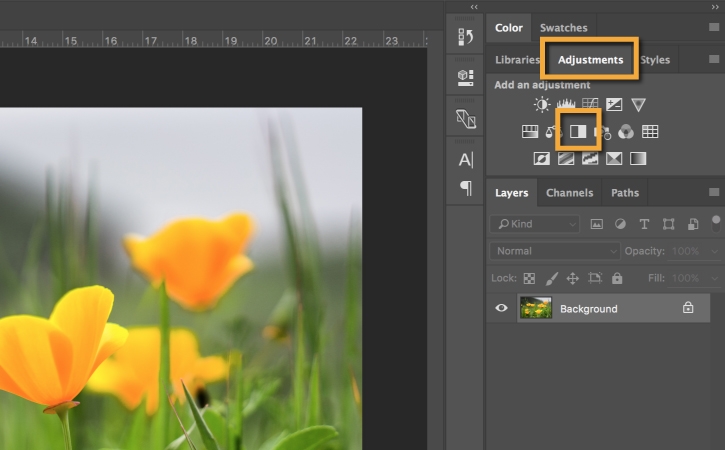
Add a Black & White adjustment layer
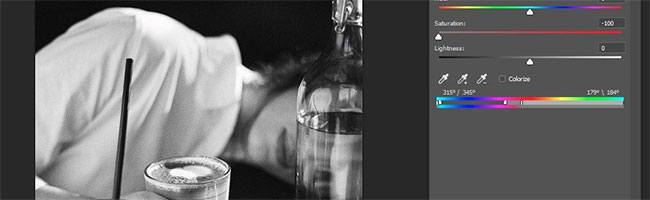
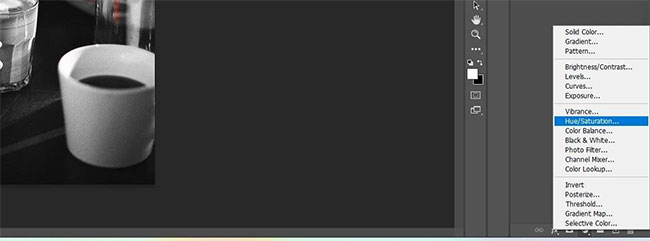
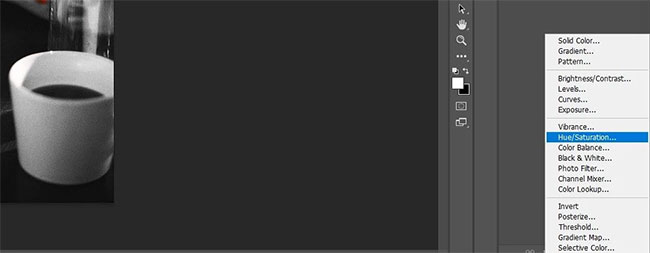
Click the Adjustments panel tab or choose Window > Adjustments to open the Adjustments panel. Then click the Black & White adjustment icon in the Adjustments panel.
A new Black & White adjustment layer appears in the Layers panel, causing the photo on the layer below to change to black and white.
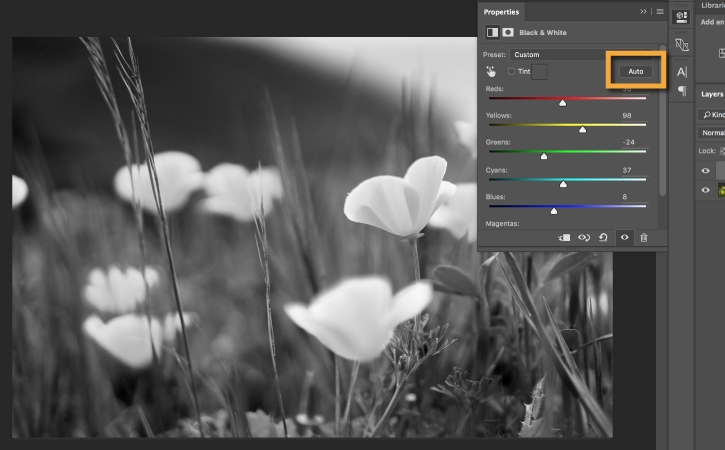
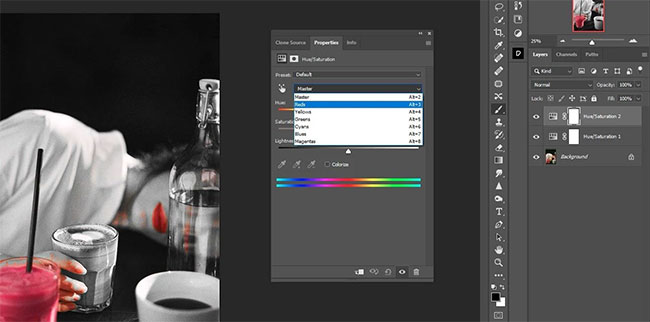
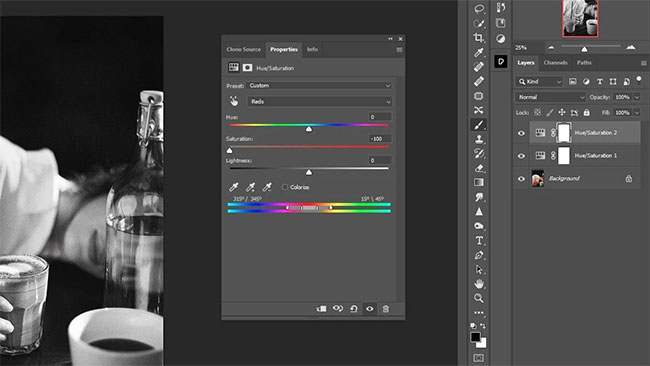
To fine-tune the black and white adjustment, make sure the Black & White adjustment layer is selected in the Layers panel. Then click the Auto button in the Properties panel (Window > Properties). In the sample photo, this brightens areas that were yellow in the original photo and darkens areas of other colors, giving the black and white version more tonal contrast.
Optional: You can drag the individual color sliders to change the brightness of corresponding parts of the black and white photo. Try dragging the Yellows slider to the right to make the flowers and grass even brighter.
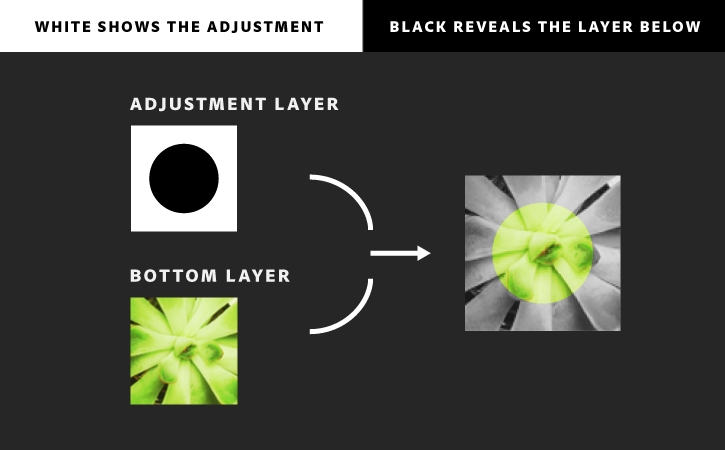
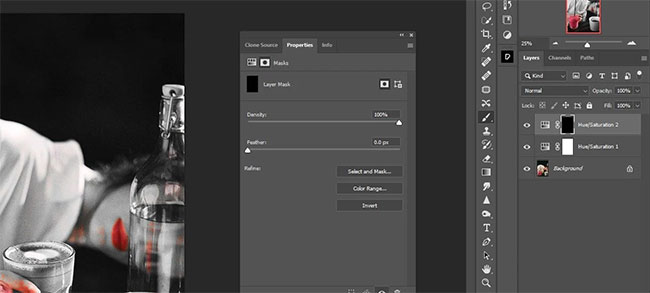
Layer mask basics
The white rectangle on the Black & White adjustment layer in the Layers panel is a layer mask, which you can use to control where the black and white adjustment affects the photo.
The adjustment will be visible wherever the layer mask is white, but will be hidden from view wherever the layer mask is black, letting the original color show through there. In the next steps you’ll add black to the layer mask, bringing some color back into part of the image.
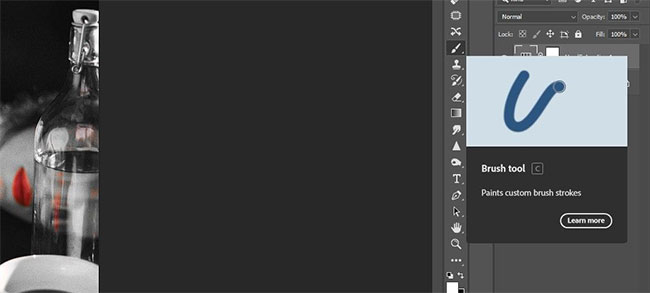
Prepare to paint
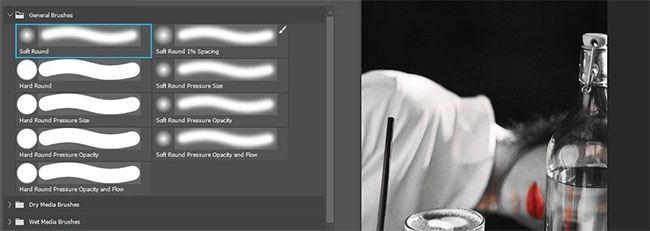
Select the Brush tool in the Tools panel. Open the Brush picker in the Tool Options bar and change the Size and Hardness of the brush tip. The values you choose depend on the photo. For the sample photo, try Size: 100 px and Hardness: 50%.
Go to the color boxes at the bottom of the tools panel to set black as the color to paint with. First click the small default colors icon above the color boxes. Then click the double-pointed arrow icon to switch to black as the Foreground Color.
Bring back color to an area of the photo
In the Layers panel, make sure the white layer mask thumbnail on the Black & White adjustment layer is selected. The white border around that thumbnail tells you it’s selected.
Brush over the parts of the photo where you want to bring back color. You’re not actually painting on the photo; you’re painting with black on the adjustment layer mask, which hides the adjustment and lets the original color show through.
Hint: You can zoom in for a closer view by pressing Command + (Windows: Control +) on your keyboard. To zoom back out, press Command – (Windows: Control –).
Painting tips
You can change the size of the brush tip as you’re painting. Press the [ (left bracket) key on your keyboard to make the brush tip smaller. Press the ] (right bracket) key to make the brush tip larger.
If you brush over an area you don’t want in color, switch from black paint to white paint by pressing the X key on your keyboard. Then brush over that area again. You’re actually painting with white on the layer mask, which makes the black and white adjustment visible again.
You can brush over more than one part of the photo, bringing in color wherever you like. Try lowering the Opacity of the brush in the Tool Options bar to get a tinted color look in some areas.

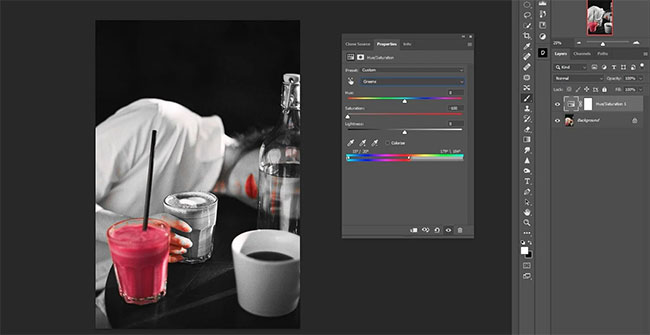
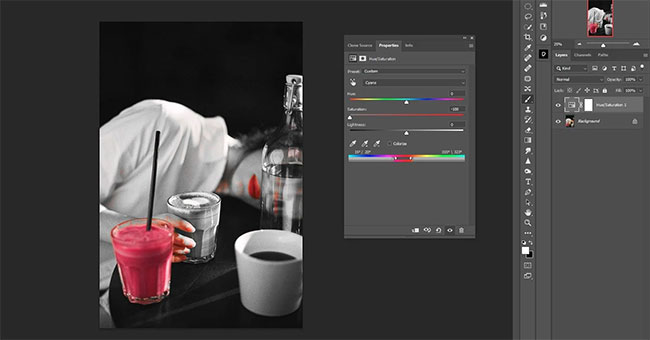
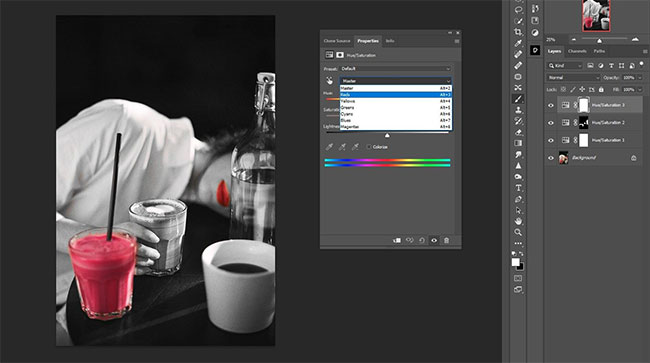
How to make one object color and the rest black and white in Photoshop
Step 1: Pick a color and turn everything else black and white

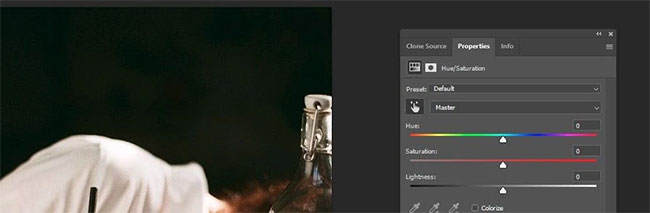
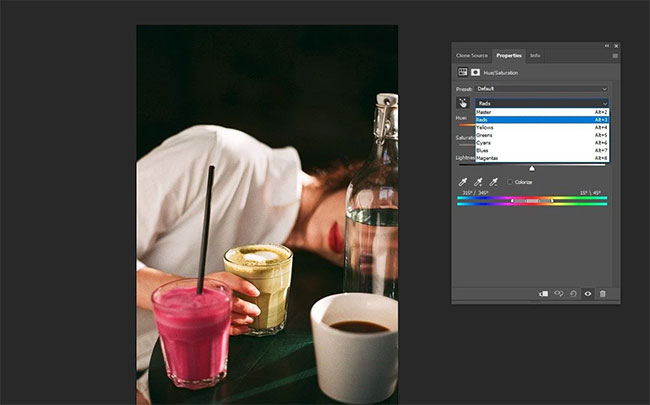
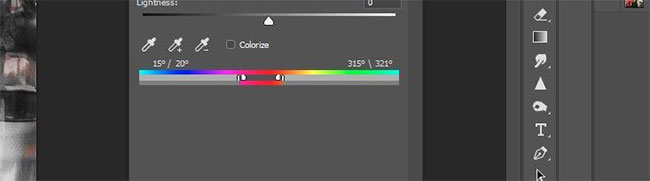
Step 2: Hide unwanted red pixels
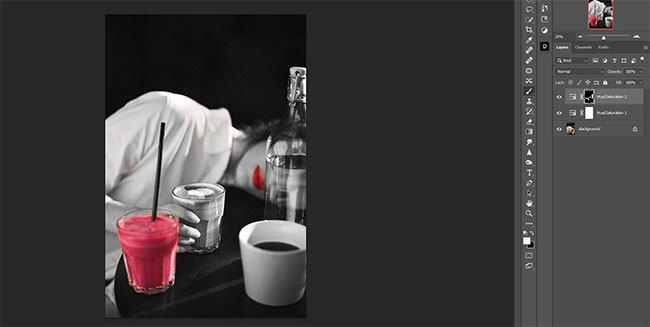
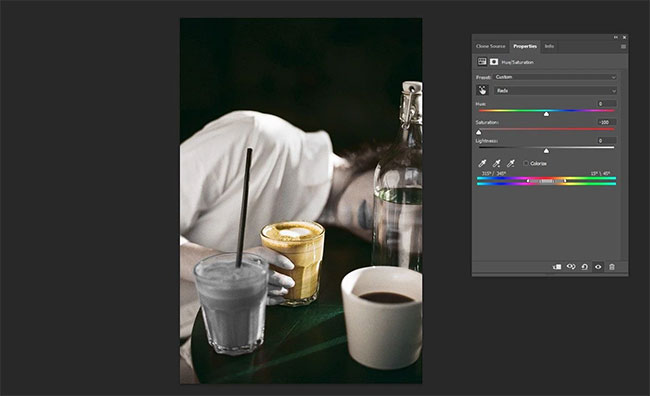
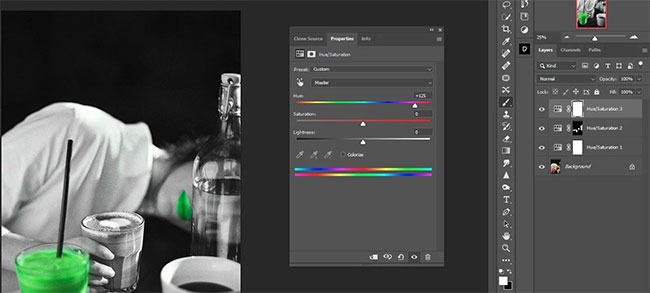
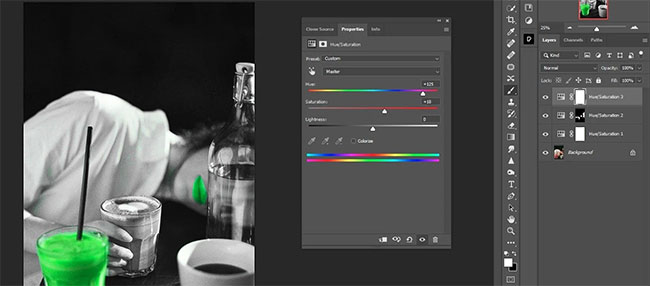
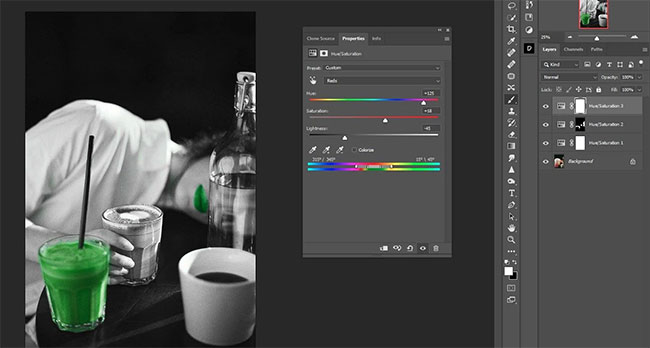
Step 3: Change the drink to another color

Conclusion
When you’re done, choose File > Save to save your photo.
Converting a photo to black and white and bringing back creative splashes of color is a great way to add drama and focus to your photograph.