How to use Radial Blur Photoshop. Photoshop has many different blur filters available for you to do interesting effects. In particular, Radial Blur is a very effective filter that creates a strong focus effect, let’s find out with Theartcult now!
1. What is Radial Blur?
Radial Blur is often referred to as the radial blur effect. It is described as extremely fast movements in circles or radial lines. Photographers capture radial blur by setting a slow shutter speed, coupled with extremely fast panning or zooming. This technique is relatively difficult to perform.
However, with Photoshop it is different. You can simulate the radial blur effect with just a few simple edits. Use it to give your photos more of an impression of a sense of speed.
2. How to Use Radial Blur in Photoshop
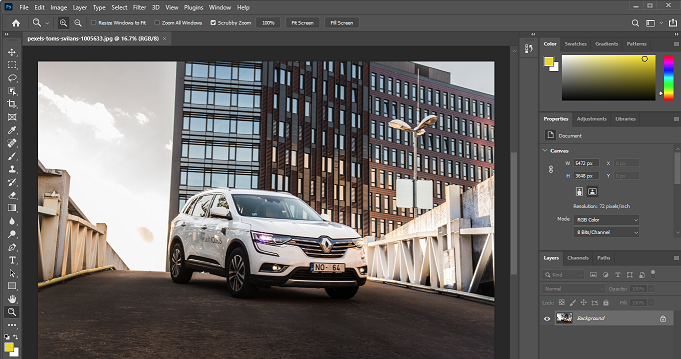
Now, we will start using the Radial Blur filter in Photoshop to create a focus effect for the image. Open in Photoshop the photo whose subject you want to draw attention to.
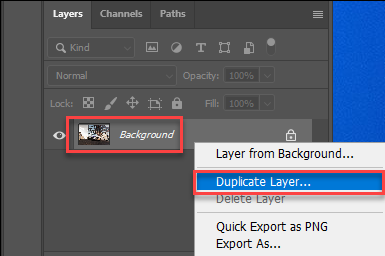
Step 1: Create duplicate layer
The image you open will appear under the background layer, which cannot be edited. You need to create a duplicate layer before working.
Right click on the background layer and choose Duplicate Layer…
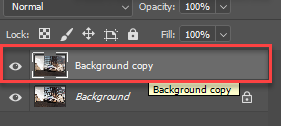
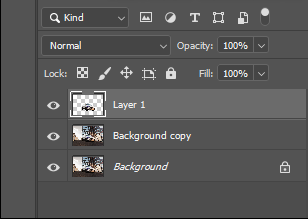
Once the Background Copy Layer is created, make sure you click on it .
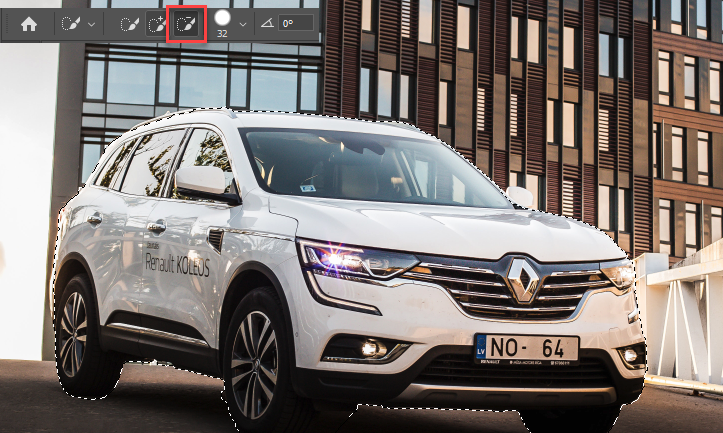
Step 2: Select the subject with the Quick Selection Tool .
You need to isolate the object so that it is always clear, not blurred by the Radial Blur filter. Do that using the Quick Selection Tool on the left toolbar.

Use the Quick Selection Tool with the plus sign to select your object. Select multiple times until the object has the following outline:
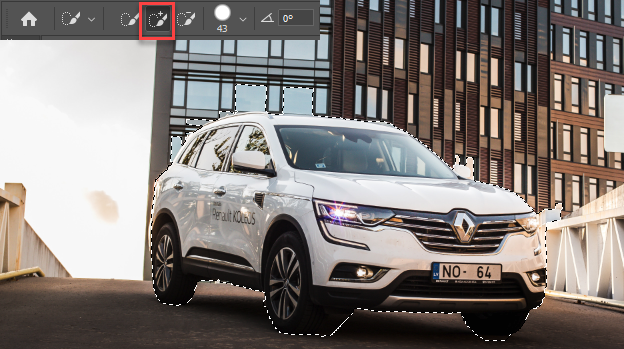
The Quick Selection Tool minus will help you remove redundant selections.
Once the object has been relatively accurately selected, you press Ctrl + J (or Command + J). Photoshop will turn this selection into a new Layer.
Step 3: Add Radial Blur .
To add a radial blur effect, you need to first make sure to select the “ Background Copy ” layer.
Next, go to Filter >> Blur >> Radial Blur.
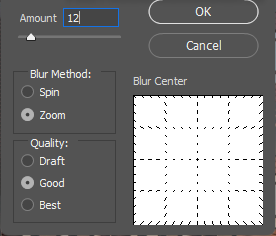
The Radial Blur panel will appear, this is where you make adjustments.
- Amout: Level of blur – adjust based on your taste
- Blur Method: Zoom
- Quality: Good
You can preview your adjustments with the white square in the Blur Center section.
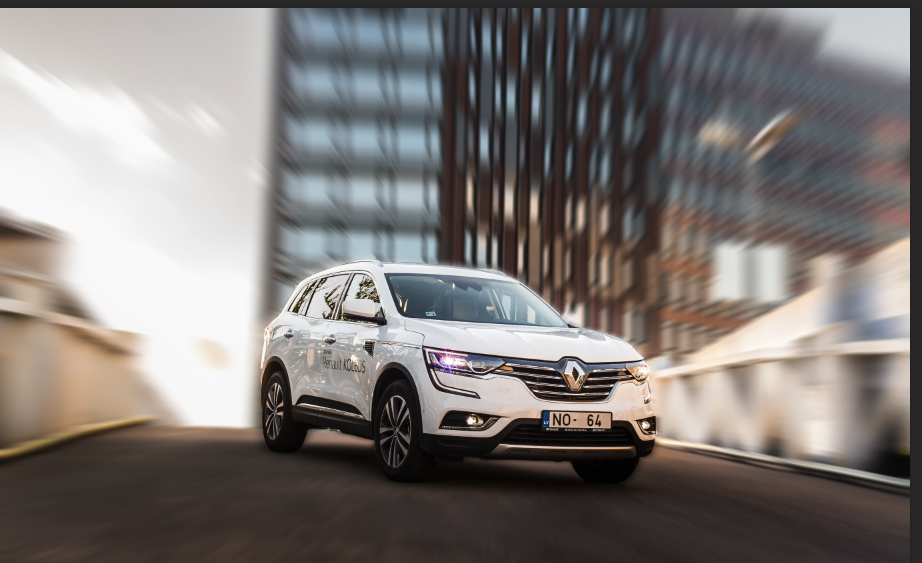
Next, you need to adjust the center point (Blur Center) to the position of your subject on the image. In my case the object was near the bottom right corner.
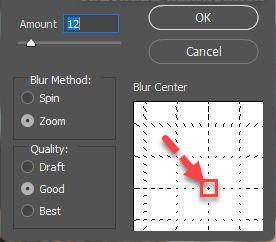
Click OK and your settings will be applied. If the results are not satisfactory, you can return to the Radial Blur window and adjust again.
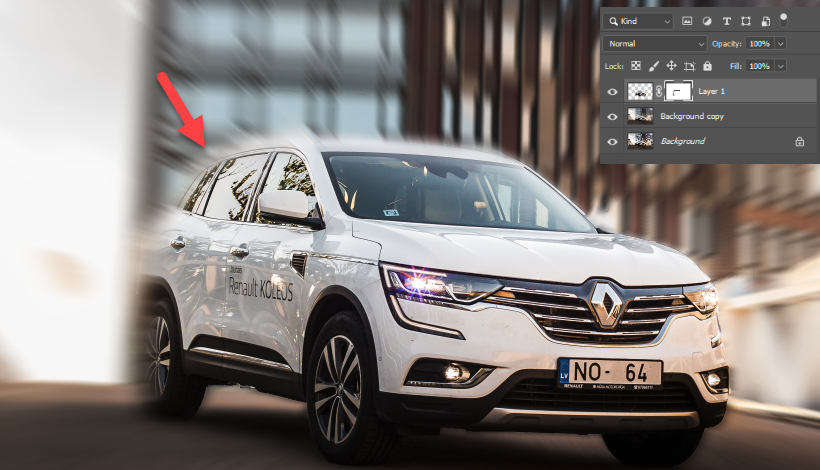
Step 4: Modify the object accordingly
You can see that the object is still clearly separated from the Radial Blur effect. Let’s make the contact area smoother.
Select Layer 1 >> Add layer mask .
Select the Brush Tool (B) on the toolbar, set the brush to black , Opacity and Flow are both 100% .
Now, you slowly draw around the subject outline positions that you do not want to focus on. In my case it was the rear end, to add a sense of speed to the overall image.
3. Blur command options in Photoshop
+ Average
Average is one of the useful tools in Photoshop Blur. With this filter, Photoshop will calculate to take the average pixel of the image in the selection or the entire image. Then fill the image in the selection or the entire image with that average pixel.
+ Blur and Blur More
Blur helps to remove noise in the image or the junctions between color points, making your image smoother, more blended. Blur More results will be 3, 4 times higher.
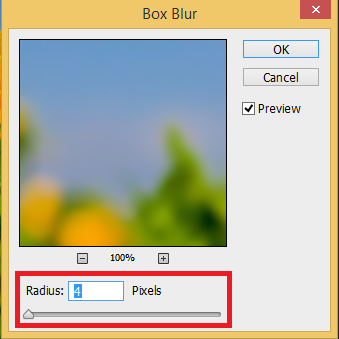
+ Box Blur Tool
Box Blur helps to blur the image depending on the average color of adjacent pixels. This filter helps to create special effects. You can choose the size of the image area used to calculate the average result, the larger the Radius parameter, the more blurred the result.
+ Gaussian Blur
This tool quickly blurs the selection to an adjustable degree. The higher the Radius value, the stronger the blur. Box Blur and Gaussian Blur are difficult to distinguish at first glance, but if you increase the Blur level gradually you will see: Box Blur blurs the image from the color edges, and Gaussian Blur blurs in a way that homogenizes the edge colors. together.
+ Lens Blur
Helps add blur to the image like a depth of field when taking pictures, helping us to highlight the subject, while the background background is blurred.
+ Motion Blur
Motion Blur helps to blur the image in a specified direction (from -360 to +360) and to a certain extent (from 1 to 999). The effect of the filter is similar to when we take a photo exposed for a fixed time.
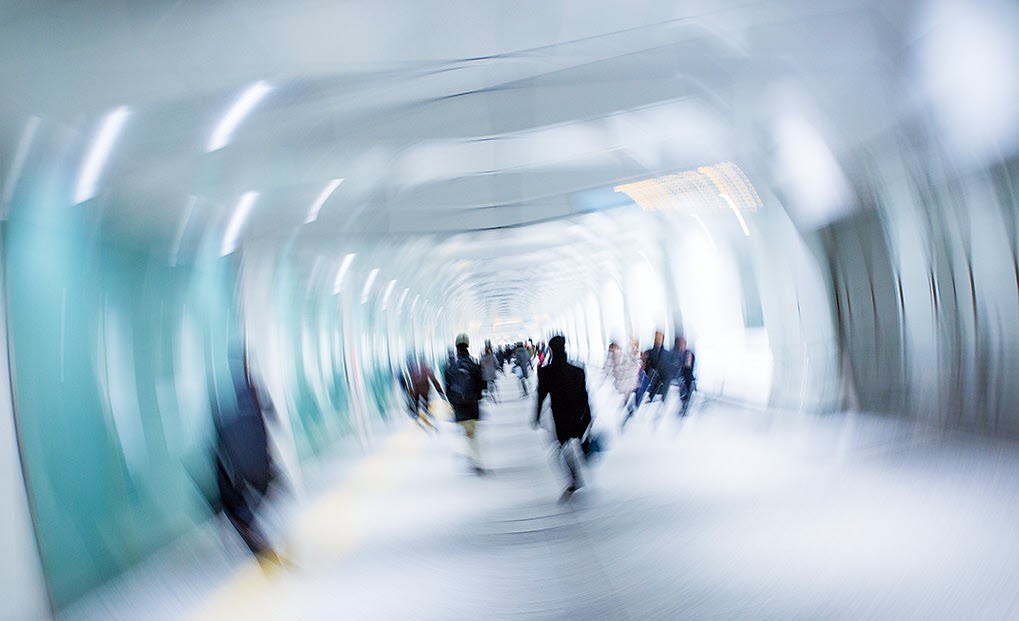
+ Radial Blur Tool
This tool helps simulate image blur by zooming or rotating the camera to create a soft blur. You choose Spin to blur in a concentric circle, then determine the degree of rotation. Select Zoom to blur along lines that converge to the center, if zooming in or out of the image, set the parameter from 1 to 100. Quality levels range from Draft (fast but not smooth results), to Good and Best, gradually increasing by level gives us softer results.
You can also change the center of the effect by clicking and dragging on the image.
+ Shape Blur Tool
The Shape Blur effect allows to blur according to a specified shape.
This shape only applies to each pixel, so no matter which blur you choose, the difference is not clear for us to see.
+ Smart Blur Tool
Blur images with high precision. You can define the Radius, Threshold and blur quality as you like. The Radius parameter allows us to adjust the size of the search area for different pixels. The Threshold parameter allows us to identify dissimilar pixels before applying an effect to it. You can choose Normal mode for the entire selection, Edge Only and Overlay Only for the gradients. In case of high contrast, Edge Only applies only to white and black points, and Overlay applies to white points.
+ Surface Blur Tool
The Surface Blur effect allows for blurring, creating a smooth, smooth surface, removing polka dots while preserving edge detail.
Conclude – How to use Radial Blur Photoshop
Thus, we have an impressive image with Radial Blur. Feel free to apply this technique in many other images. Good luck!
Hope this article helps you with How to use Radial Blur Photoshop!
Visit Macwintips.com to update the most practical and useful tips for Mac and Windows.