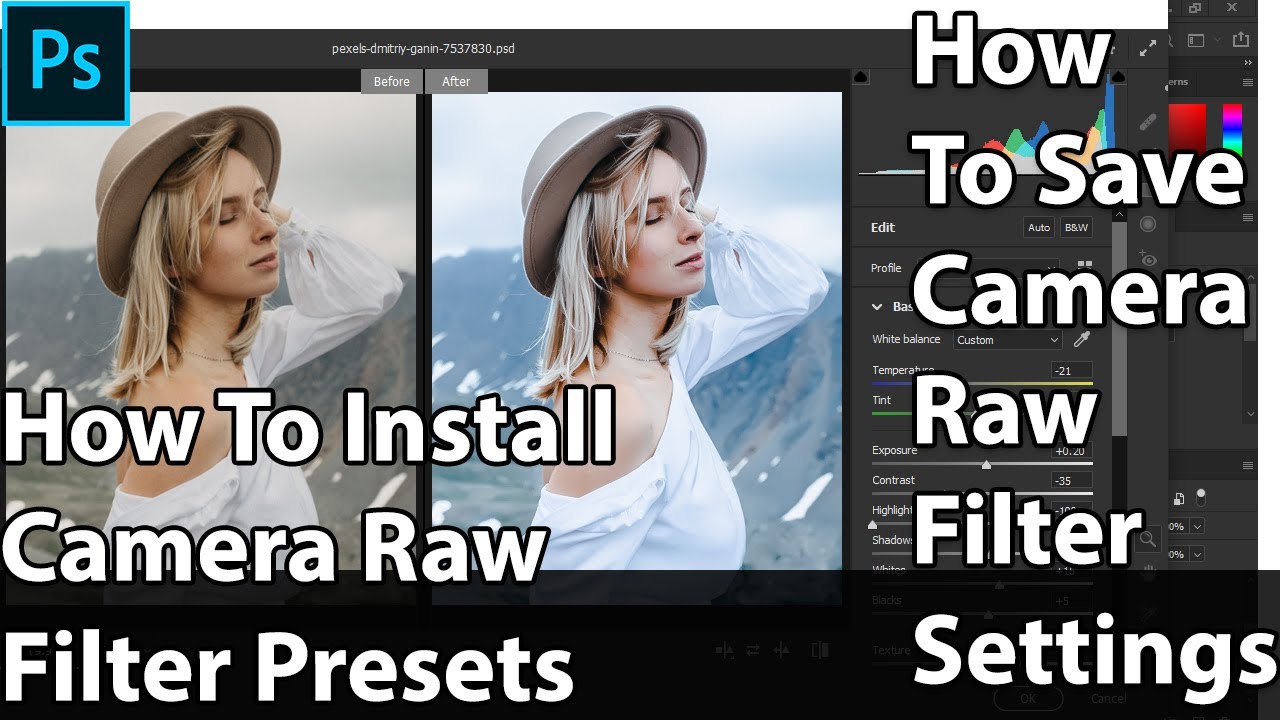
How to save a preset in Photoshop Camera Raw. When using Adobe Photoshop software, using presets in Camera Raw will help you edit photos more professionally. In the following article, Theartcult will show you how to add, export and delete presets to Camera Raw. Let’s follow the article together! The article is done on Acer Aspire Laptop, Windows 10 operating system, and Adobe Photoshop CC 2018 version. You can perform the same operation on computers and laptops running Windows operating systems, macOS, and on another version of Adobe Photoshop.
I. How to add and add presets to Camera Raw
1. Quick Guide
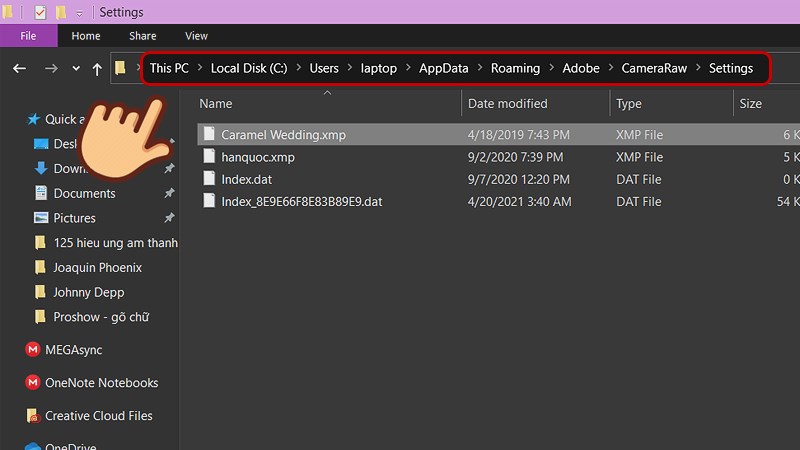
Method 1: Copy and paste the preset into the folder under the path: C:\Users\machine name\AppData\Roaming\Adobe\CameraRaw\Settings.
Method 2: Open the image in Camera Raw by selecting Filter > Camera Raw Filter… (keyboard shortcut Ctrl + Shift + A) > Select the option list icon > Select Load Settings… > Select the preset you want to add > Select Open.
2. Detailed instructions
Method 1: After downloading the preset, copy the preset and put it in the folder according to the path:
C:\Users\DeviceName\AppData\Roaming\Adobe\CameraRaw\Settings
Method 2:
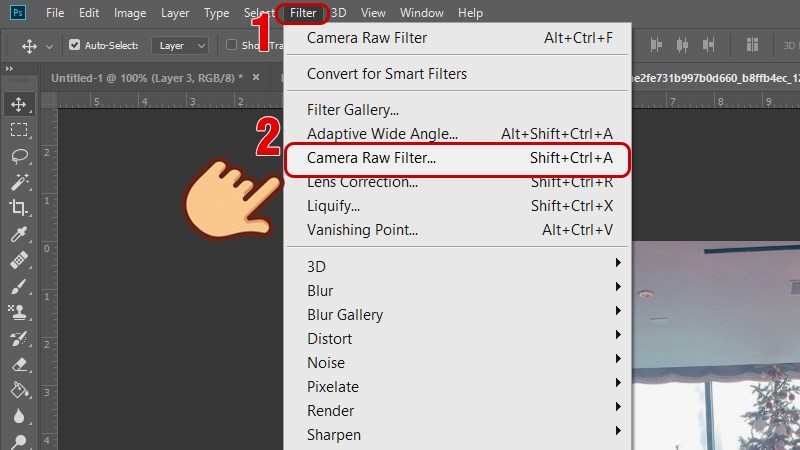
Step 1: Open the image in Camera Raw with Photoshop by choosing Filter > Camera Raw Filter (shortcut Ctrl + Shift + A ).
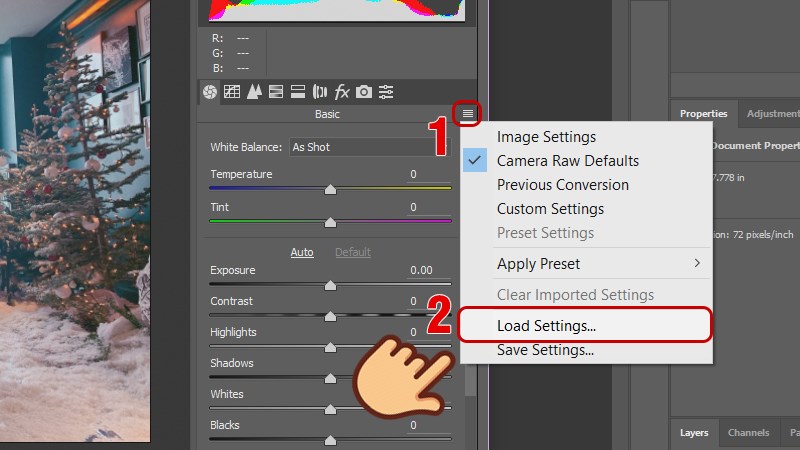
Step 2: In the Camera Raw window, click the option list icon and select Load Settings…
Step 3: Select the preset you want to add and select Open .
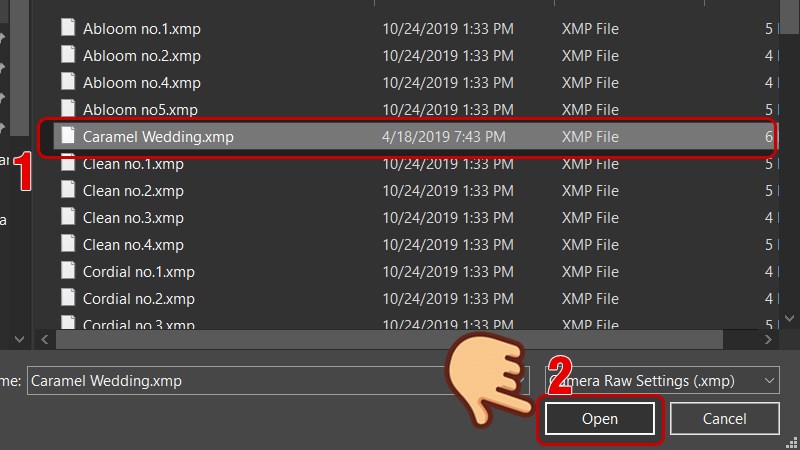
Go back to the Apply Preset section and you will see that the preset has already been added!
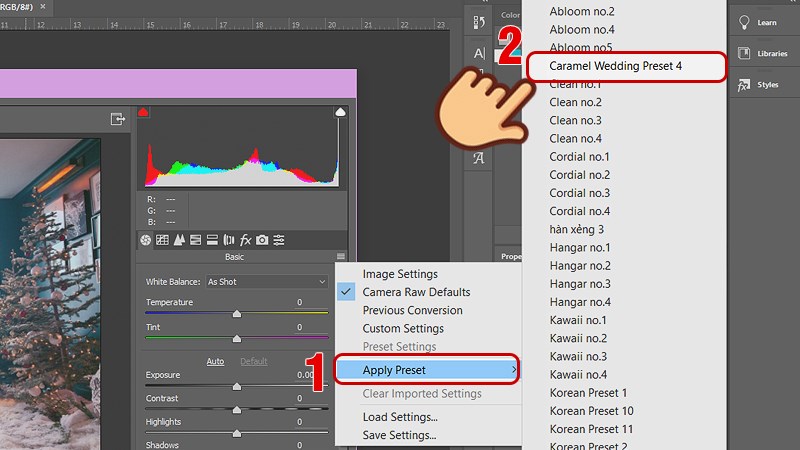
II. How to save a preset in Photoshop Camera Raw
1. Quick Guide
After creating the preset, click the option list icon > Select Save Settings… > Click Save… > Name the preset > Click Save > Access the file under the path C:\Users\machine name\AppData\Roaming\Adobe \CameraRaw\Settings to get presets.
2. Detailed instructions
Step 1: After creating a new preset, click the option list icon and select Save Settings…
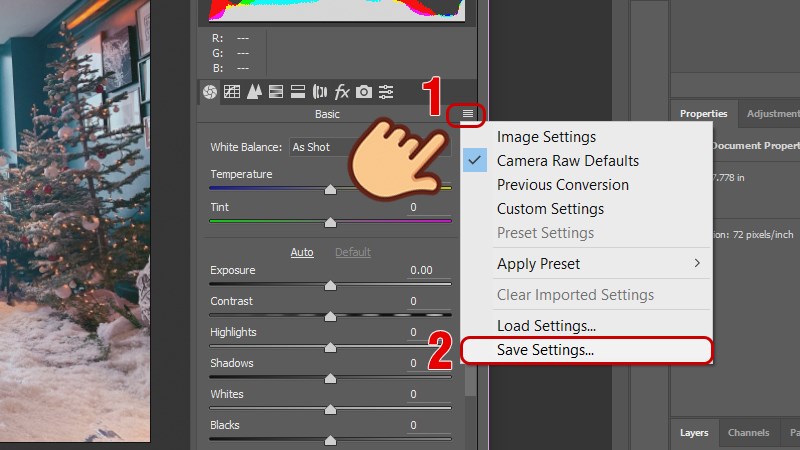
Step 2: In the Save Settings dialog box, leave the defaults and click Save
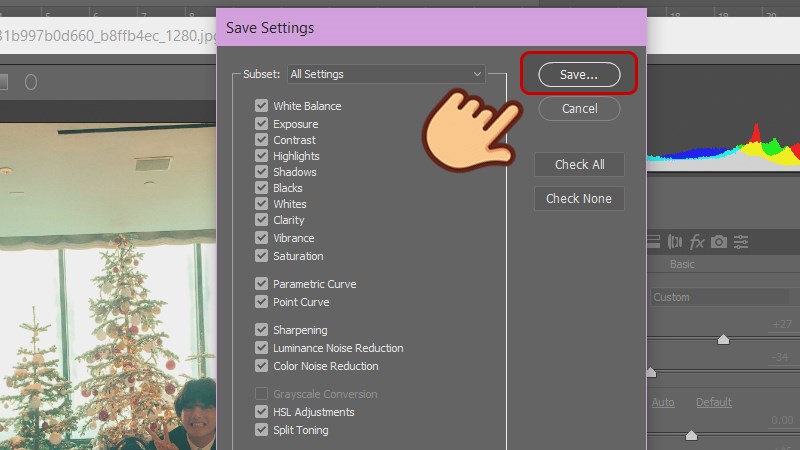
Step 3: Give the preset a name and click Save .
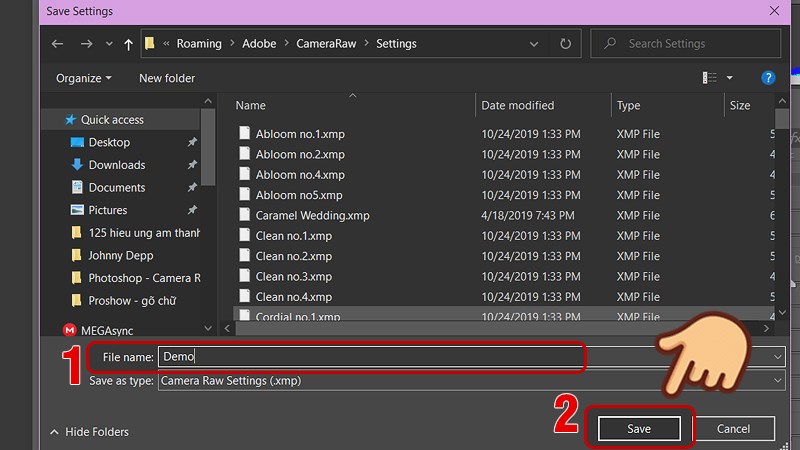
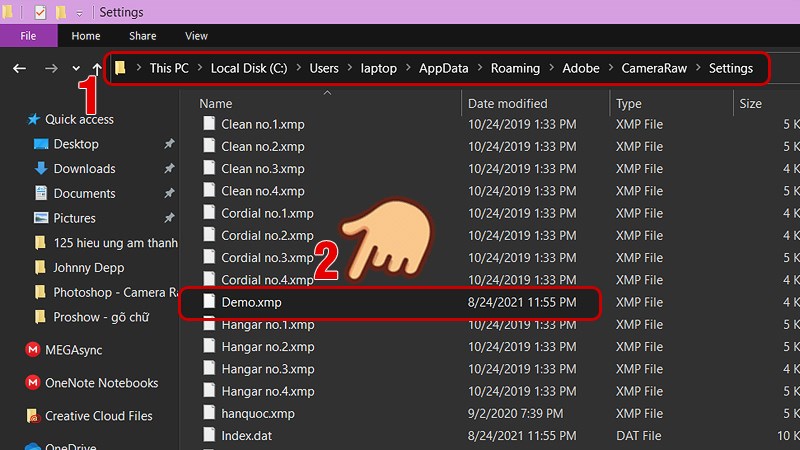
Now your preset is in the Settings folder, please follow the link below to get and share it with everyone!
C:\Users\DeviceName\AppData\Roaming\Adobe\CameraRaw\Settings
III. How to remove presets from Camera Raw
1.Quick Tutorial
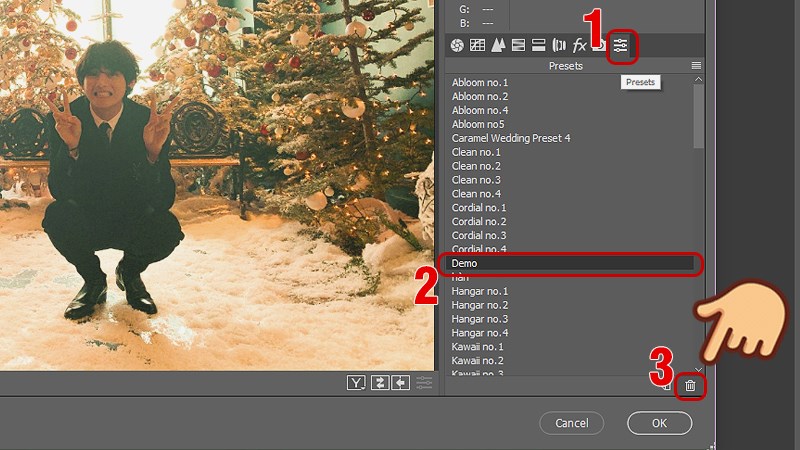
Method 1: Select the Effects tab > Select the preset you want to delete > Click the trash can icon .
Method 2: Access the Settings file under the path C:\Users\machine name\AppData\Roaming\Adobe\CameraRaw\Setting > Select the preset you want to delete > Press the Delete key .
2. Detailed instructions
Method 1: Select the Effects tab in Camera Raw, select the preset you want to delete and select the trash can icon .
Method 2: Access the Settings file under the path C:\Users\machine name\AppData\Roaming\Adobe\CameraRaw\Setting. Then select the preset you want to delete and press the Delete key on the keyboard.
Above is an article on How to save a preset in Photoshop Camera Raw as well as export and delete presets to Camera Raw. Hope the article will help you, if you have any difficulties when using this software, please leave a comment below! Good luck!


