How to fix a torn photo in Photoshop. Photoshop repair corrupted JPEG. In the following article, Theartcult.net would like to share an old photo that needs to be restored.
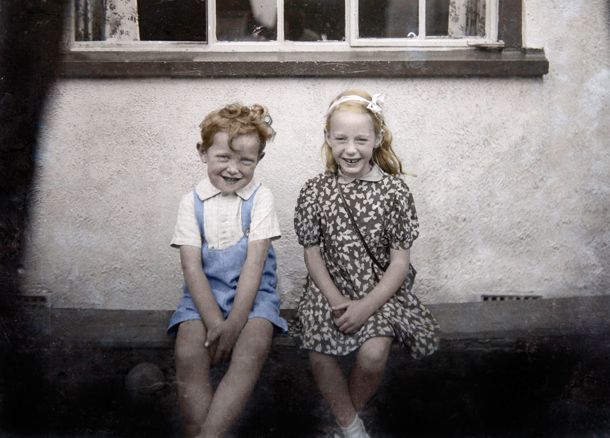
How to fix a torn photo in Photoshop
Image before being restored:
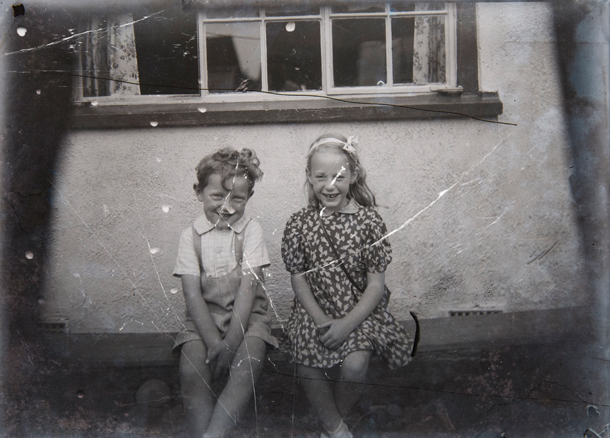
Edit the image with the crop tool
Open the original unedited image in photoshop. Double-click the locked Background layer to make it editable. Select the Crop tool and drag all the space you want to take. Drag the mouse to the corner of the tool, it will change to the rotate icon for you to rotate the image for balance because the original image is slightly tilted. Now your image is neat and trimmed with unnecessary fringe details.
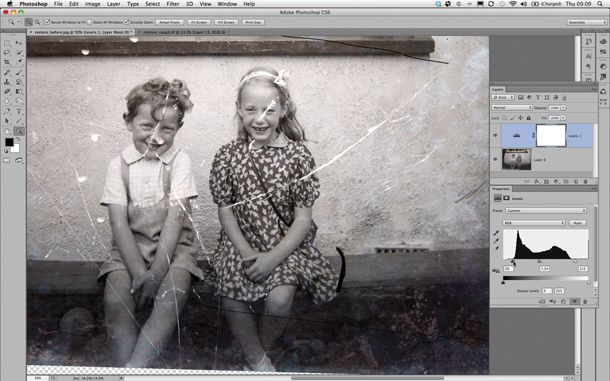 Adjust the contrast of the image
To increase contrast, choose Layer/ New Adjustment Layer/ Levels. Click OK. Drag the black input slider on the right to the value 29. This darkens the gray ghosts that are shot. Drag the white input levels slide to the left to achieve a value of 215. This brightens the highlight of the capture point. Drag the gray slider to 1.24 to lighten the midtones. This shot has more contrast.
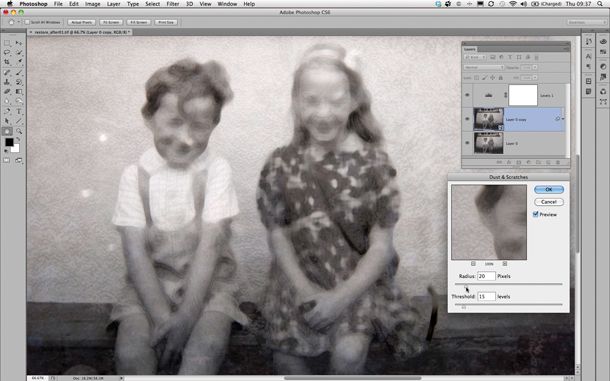
Create Smart Object
Click on ‘Layer 0’ and press Ctrl + J to duplicate the layer to save 1 copy for comparison or redo when necessary. Click on the ‘new duplicate layer’ choose Filter>Convert for Smart Filters then Click OK. This turns the layer into a smart object, allowing you to tweak the filter settings later. Choose Filter>Noise>Dust & Scratches. Set the Radius to 20 and Threshold to 15. Click OK. At this time, the image will blur the tears and dust, and our image will also blur the details of the face and clothes. To keep sharp details do the following:
In the layers panel, click on the white Smart Filter layer and press Ctrl + I to invert it to black. Then select the Brush tool (B), with white foreground to paint over the torn areas of the background.
Use Patch Tool (J)
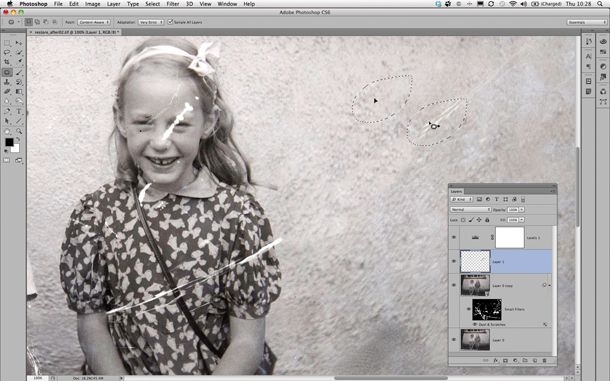
Press the shortcut J then circle the torn areas on the image and drag it to the same places on the unbroken image to replace the torn area. Do the same for the other parts of the picture
Use Clone Stamp Tool (S)
Press the shortcut S to dot the face, you adjust the opacity from 30 – 50 for the skin, and for clothes or backgrounds you can set the opacity to 100. Depending on you adjust the opacity to adjust the dots to be reasonable. . This tool needs meticulousness and dexterity because if you are not familiar, you can easily deform the image compared to the original image.
Video – How to fix a torn photo in Photoshop
Finish
Color the photo after editing the tear, dust … done.
Theartcult hopes that this article has helped you. If you have any questions or suggestions on this topic, don’t hesitate to leave us a comment below. Thanks for reading!
Visit Macwintips.com to update the most practical and useful tips for Mac and Windows!


