How to edit smile in Photoshop (4 ways). Do you have the perfect photo of someone, but you just wish they were smiling instead of scowling? It’s an easy fix in Photoshop. There are several ways to edit smiles in photos with Photoshop, like using the Liquify tool, Neural Filter, layers, and the Puppet Warp tool. Get your hands on it now!
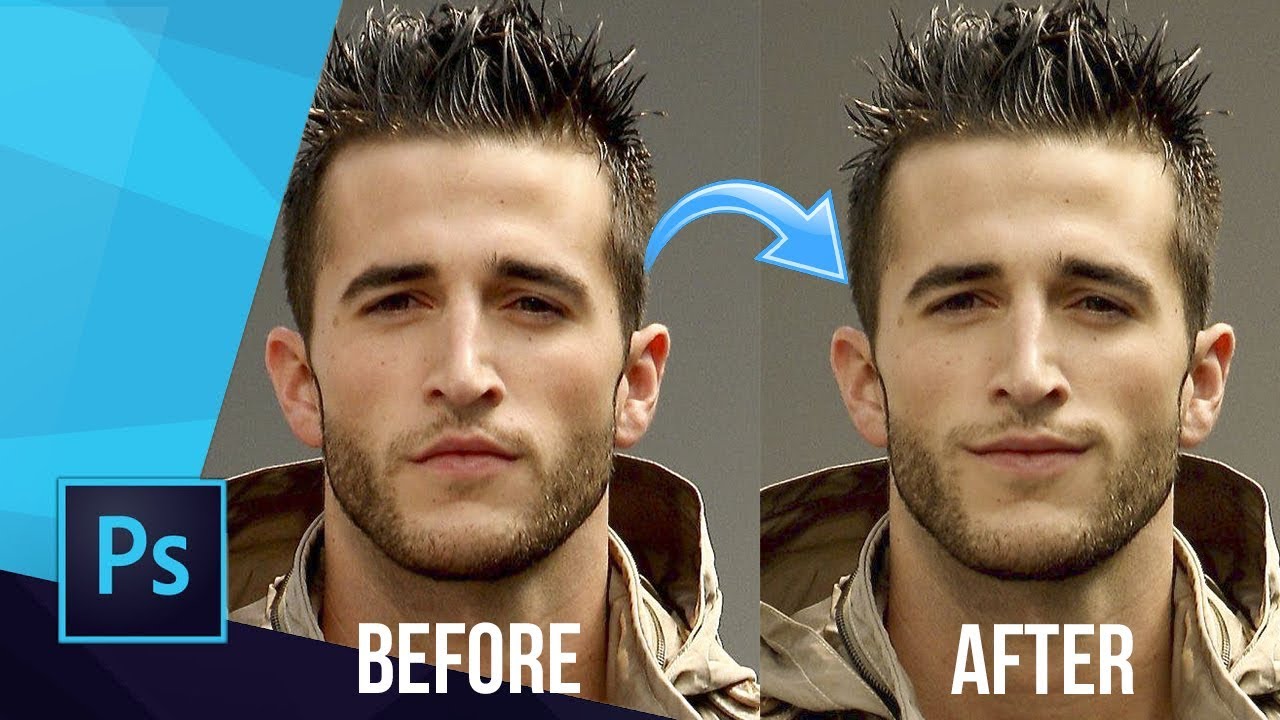
How to edit smile in Photoshop (4 ways)
1. Add a smile with another picture

Stacking images, using Photoshop Layers and the Selection tool is an old technique for replacing smiles. While this technique has a high chance of success, it depends on having the right image.
It’s best to use another photo of the same person instead of a similar photo of a stranger. It may happen that you take a lot of photos of a group and most of your subjects look good, but one person is not smiling. If you have another photo of them smiling, it’s easy to “transfer” that smile to a better photo.
If you don’t have a photo of the same person smiling, you can copy a photo of someone who looks similar at the same angle. You can retouch the skin color to help stitch the images together more accurately.
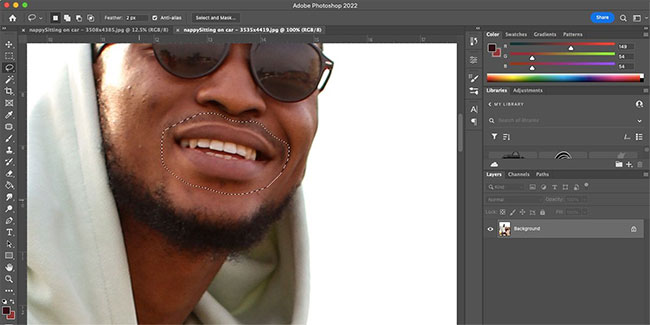
Open both of your images in Photoshop. On the smiling image, use Magnetic Lasso (L) to select the area around the smile and then duplicate the selection ( Cmd + C for Mac and Ctrl + C for Windows).

Paste the selection you just copied (Cmd + V for Mac and Ctrl + V for Windows) into a new layer above the unsmiling image. Use Free Transform (Cmd + T for Mac and Ctrl + T for Windows) to select the smile.
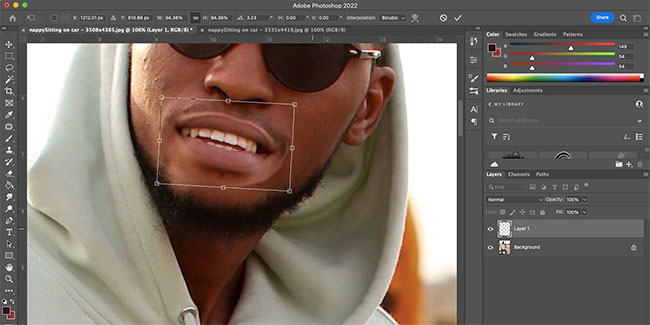
Move the smile so that it fits the face in the non-smiling photo. You can resize it by dragging the corner buttons and rotate the smile by hovering the pointer near a corner until it turns into an arrow, then click and drag the corner to rotate.
You may want to flip the smile horizontally to reflect the new angles on the face. While in Free Transform mode , right click on the smile and choose Flip Horizontal. Move the smile around until it matches the new image.
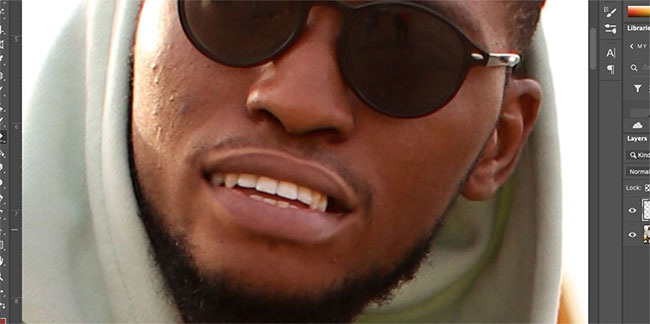
Once satisfied with the position, double-click the smile to exit the Free Transform tool. Use the Eraser Tool (E) to remove any unwanted parts of the image that overlap, such as excess skin around the mouth.
2. Add a smile using the Be Happy filter

Photoshop’s Neural Filters can create an artificial smile on any portrait. This technique uses the Adobe, which provides a quick and easy way to add smiles to photos using facial recognition technology. This can work for group or individual portraits.
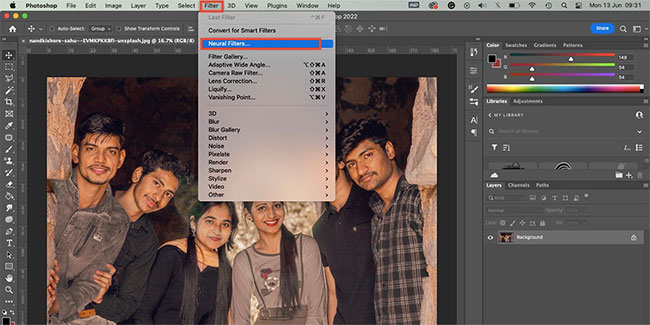
With the image on the artboard, go to Filter > Neural Filters. If this is your first time using the Smart Portrait filter, you will have to download it by clicking the cloud button. Please enable the filter.
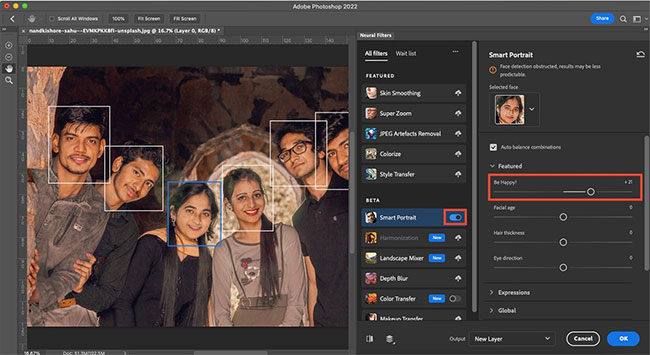
Under Featured, you’ll see the Be Happy! Move the slider to the right to add smiles of varying degrees to your portrait. After you are satisfied with the smile, click OK.
This filter uses only one smile image, which means it may not be suitable for everyone. And if you apply this filter to multiple people in the same photo, they all have identical smiles.
However, for quick and easy smile editing, this feature works very well, as the slider gives you some control over the size of the smile.
3. Add a smile using the Liquify tool

Convert your image to a Smart Object by right-clicking on the layer in the Layers panel and choosing Convert to Smart Object.
In the tools above, go to Filter > Liquify. This will open the filter settings. Use the Zoom Tool (Z) in the settings box to enlarge the mouth part of the image.
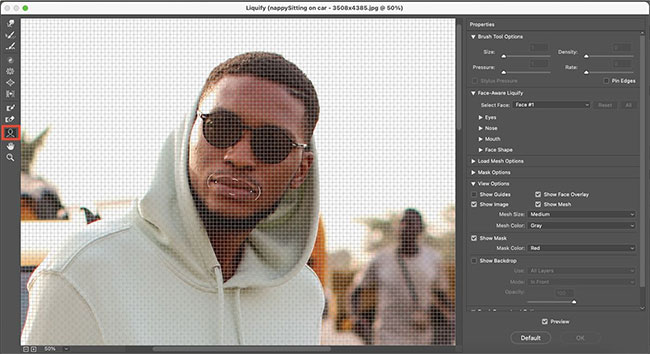
Select the Face Tool (A) in the left toolbar. Hover your cursor around your mouth and use standard lines to move the edges of the lips upwards. You can also use the properties on the right to change these values.
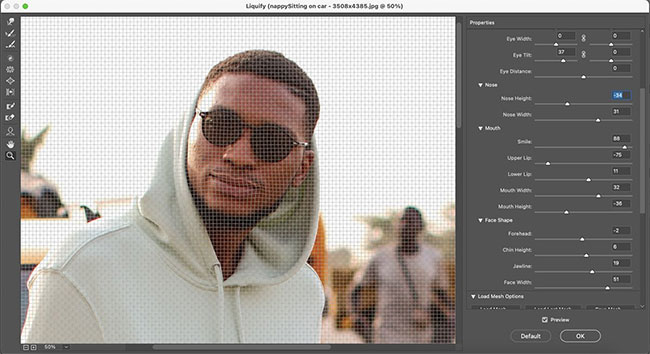
The other properties on the right give you options to move the eye position, expand the width of the jaw, move the nose, and so on. You can change these settings until the features come up. on a natural looking face with a smile. Click OK when you are satisfied with the results.
4. Add a smile with the Puppet Warp Tool

Photoshop’s Puppet Warp Tool is awesome, treating 2D images like a movable puppet. While this tool works best on the entire body, you can also use it for individual body parts, like the mouth.
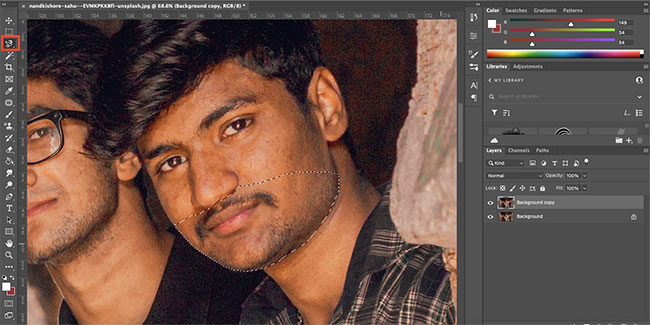
Duplicate the image in the Layers panel by right-clicking on the layer and choosing Duplicate Layer. Use the Lasso Tool (L) to select the lower half of the face.
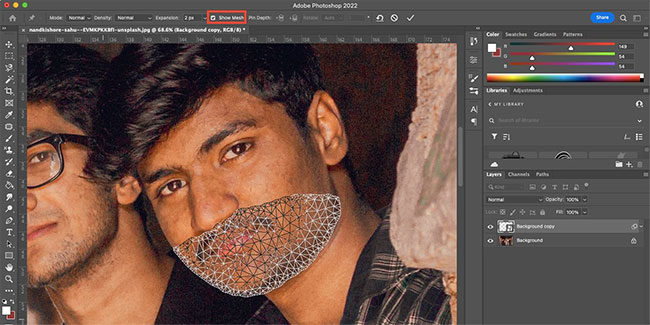
Go to Edit > Puppet Warp. This will apply a mesh to the selected area. Uncheck Show Mesh on the top toolbar to make the face more visible.
When you hover over the selected area, your pointer turns into a pin tool. Pin to areas that can move naturally when smiling, such as the corners of the mouth and the center between the lips. You can also pin cheek areas if those areas are within your selection.
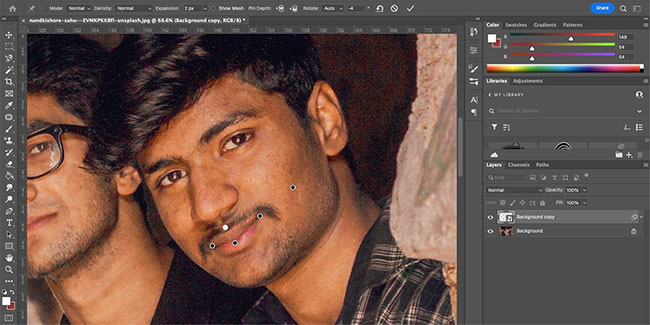
Once all the pins are in place, delicately move each pin to show a natural smile pose. If you move too much, distortion will be obvious, so be careful. If you’re happy with the smile placement, click any of the other tools, then click Apply on the pop-up window that appears.
If you can’t get the perfect smile in your photo, that’s not too bad. With a variety of smile retouching techniques, you can choose the one that’s right for your retouching needs.
The Liquify and Puppet Warp methods are best for adding a subtle smile to an image. But if you want to show a smile with natural teeth, your best bet is to composite another photo or use the Be Happy! filter.
Video How to edit smile in Photoshop


