Fix Photoshop 2022 liquify not working could not complete the liquify command because of a disk error . Liquify in Photoshop is a useful, but error-prone, tool. Today Theartcult will show you how to quickly fix Liquify errors in Photoshop, stay tuned!
I. WHAT IS LIQUIFY IN PHOTOSHOP CC?
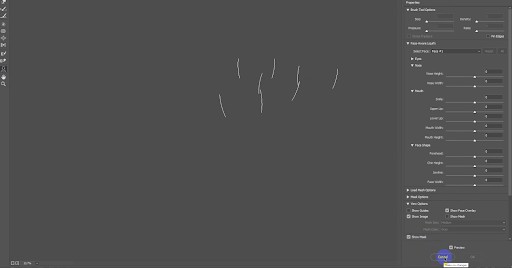
The Liquify filter in Photoshop CC allows pushing, pulling, rotating, reflecting,… any area of an image. The distortions you create can look very subtle or drastic -> Liquify is a powerful tool for retouching images as well as creating artistic effects.
How to use Liquify in Photoshop: Go to Filter -> find and select Liquify (Shift+Ctrl+X) or find and select in Windows
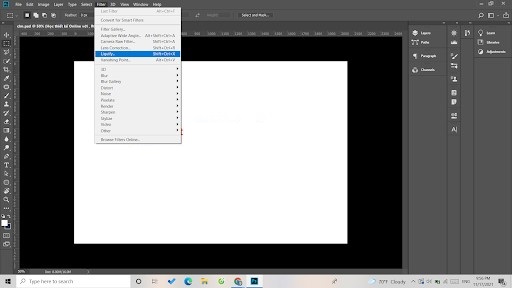
Use Liquify by going to Filter -> find and select Liquify
No matter how helpful it is, there are certainly cases where newbies can’t use Liquify in Photoshop, to fix it, find out the causes and symptoms of this error.
II. WHAT IS LIQUIFY ERROR IN PHOTOSHOP CC?
The Liquify tool is one of Photoshop’s many magical tools. It allows you to bend and shape your photos with real ease. So it’s not surprising why problems with Liquify would delay your work.
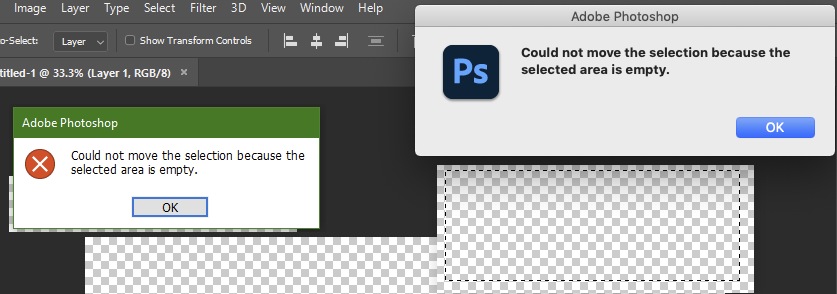
Not using Liquify in Photoshop is an error that you cannot use and manipulate with the Liquify tool in Photoshop
Some common Liquify errors in Photoshop: opening liquify not on images, liquify error not working, unable to use liquify,…
III. HOW TO FIX FREQUENT LIQUIFY ERRORS IN PHOTOSHOP
1. Liquify is stopped suddenly
All software threads may be stopped unexpectedly. As a habit, you can always assume that the problem may be related to the size of the file you are working with. Even if large files don’t slow down Photoshop completely, they can still affect the tools. If Liquify freezes frequently, or takes too long to load your artwork, try these solutions.
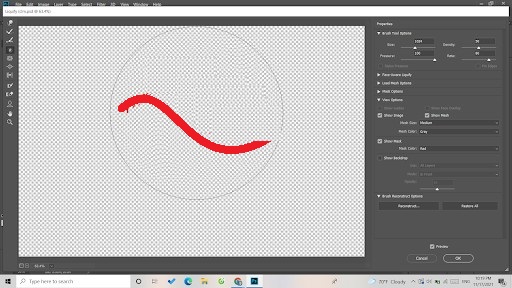
Method 1: Create Liquify Mesh on a low resolution
Keeping images at high resolution leads to difficulty as it slows down your workflow. Luckily, you can apply edits in Liquify by temporarily reducing the resolution of your work.
– Use Ctrl+J to create a copy of your artwork as a backup
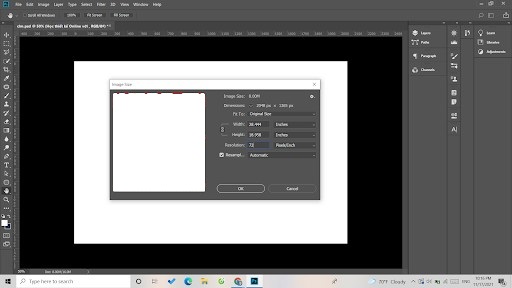
– Go to Image -> Image Size reduce the Resolution to 72 dpi
– Go to Filter -> Liquify . Your work will now open faster.
– Make your edits in Liquify. However, do not click OK . Instead, click Save Mesh.
Quit Liquify and Undo (Ctrl+Alt+Z) your changes to the resolution.
Again, go to Filter -> Liquify and load your saved Mesh to apply the same changes with a higher resolution. Click OK to save the changes when you’re done.
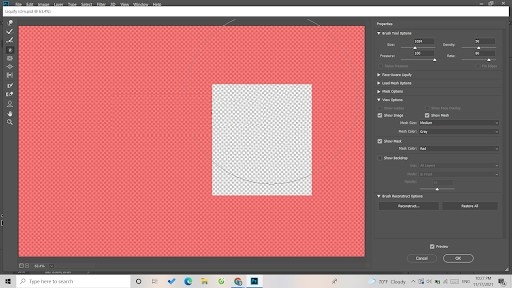
Method 2: Working with a Smaller Area
The first solution is a good fix for this problem, but if you only need to edit a small area, use the selection tool to select the area you want, and then go to Filter -> Liquify. By working on a smaller area, you will be able to load and edit your works much more easily.
2. Liquify Doesn’t Work
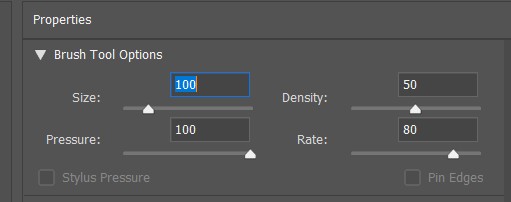
Method 1: Check your pointer size
Some of the most frustrating problems are solved with incredible ease. If you’re having trouble seeing the pointer for the Liquify tool, and you only seem to get a two-line icon, try reducing the brush size.
Method 2: Reset your Photoshop preferences
If you’re still having problems with Liquify, or using the tools, try resetting your Photoshop preferences.
Hold Alt+Ctrl+Shift as you start Photoshop.
Method 3:
uninstall version 22.4.3 and back to version 22.2
Then I went to Edit / Preferences / Performance / Advanced Adjustments …and untick all the checkboxes
Method 4:
holding alt key and clicking liquify filter fixed it. My issue was photoshop is not able to detect my gpu and because of that I wasn’t able to use liquify.
CONCLUSION – Photoshop 2022 liquify not working
Above is a brief guide on How to fix Liquify error in Adobe Photoshop CC application. Theartcult hopes that this article has helped you. If you have any questions or suggestions on this topic, don’t hesitate to leave us a comment below. Thanks for reading! Visit Macwintips.com to update the most practical and useful tips for Mac and Windows!
Video to fix could not complete the liquify command because of a disk error
https://www.youtube.com/watch?v=JlmM6ggaXq8