How to fix Error code 0x800f0954 Windows 11. While installing .NET Framework 3.5 on the system, many users reported that Error code 0x800F0954. The error message also occurs when installing various Optional features in Windows 11/10.
What causes Error Code 0x800F0954?
Before going into the solutions, it is important to find out the reason behind the error message. Error code 0x800F0954 occurs when you try to install the .NET Framework 3.5 or any other optional feature using the Windows Features or DISM functionality. Here are all the common culprits behind the problem.
The message will occur if there is an obstruction in the connection between the Windows Server Update Service and the Windows Optional Features Installer.
The .NET Framework 3.5 is a relatively older .NET Framework. Therefore, you often encounter the mentioned error while installing it through Windows Features.
Misconfigured optional components settings and component repair settings can be another important reason behind the problem.
Now that you know in advance about the different reasons that cause error messages, let’s check out how to get rid of them.
How to fix Error code 0x800f0954 Windows 11
Windows couldn’t complete the requested changes. The changes couldn’t be completed. Please reboot your computer and try again.
Error code: 0x800F0954 – CBS_E_INVALID_WINDOWS_UPDATE_COUNT_WSUS.
You may receive Error 0x800f0954 when you try to install .NET Framework 3.5 or any other Optional feature using the Windows Features function or DISM. Try the following suggestions to resolve the issue:
Open Registry Editor
Navigate to the following registry key:
HKEY_LOCAL_MACHINE\SOFTWARE\Policies\Microsoft\Windows\WindowsUpdate\AU
In the right pane, find UseWUServer . Set its value to 0.
Exit Registry Editor and restart your computer.
If this doesn’t help, you may need to Repair your computer with a Windows ISO.
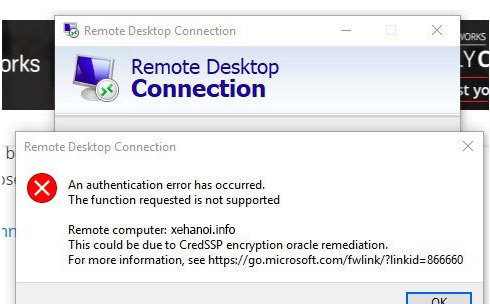
How to fix Windows Update Error 0x500f0984
When your system shows Windows Update Error 0x500f0984, you may not be able to download or receive any build updates. However, you can fix this by creating a batch file and running it with administrator privileges.
- Open NotePad.
- Copy and paste the list of commands given in the post.
- Click the File tab.
- Select the Save as option to save the file.
- Name the file Wufix.bat and press the Save button .
- Run the Wufix file with administrator privileges.
- Restart your computer.
The batch command, as the name suggests, executes a series of commands.
To fix Windows Update Error 0x500f0984, you need to first create a batch file using NotePad.
Open the NotePad app and copy-paste the following list of commands into it.
SC configure trusted installer start = auto
net stop bits
net stop wuauserv
net stop msiserver
net stop cryptsvc
net stop appidsvc
Ren %Systemroot%\SoftwareDistribution SoftwareDistribution.old
Ren %Systemroot%\System32\catroot2 catroot2.old
regsvr32.exe /s atl.dll
regsvr32.exe /s urlmon.dll
regsvr32.exe /s mshtml.dll
netsh winsock reset
netsh winsock reset proxy
rundll32.exe pnpclean.dll,RunDLL_PnpClean /DRIVERS /MAXCLEAN
dism /Online /Cleanup-image /ScanHealth
dism /Online /Cleanup-image /CheckHealth
dism /Online /Cleanup-image /RestoreHealth
dism /Online /Cleanup-image /StartComponentCleanup
Sfc /ScanNow
net start bits
net start wuauserv
net start msiserver
net start cryptsvc
net start appidsv
This will delete the Distribution folder contents and the software catroot2, re-register the necessary DLLs, reset winock, run DISM and SFC basically.

When done, go to the File tab in the upper-right corner of the NotePad window and select the Save As option.
When the Save As dialog box appears, enter the file name as Wufix.bat.
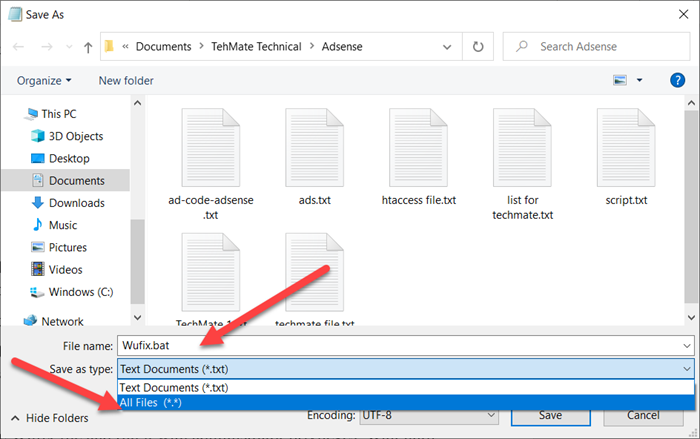
Click the drop-down button next to the Save as type field and select All Files from the list of options displayed.
Click the Save button to save the file.
Now right click on the Wufix file and run the batch file with administrator privileges (run the batch file with administrator privileges). Wait until the process completes.
Now, restart the PC and see if the error persists.
How to check installed .NET Framework version on Windows 11/10?
It is very easy to check the installed .NET Framework version. Actually, there are many ways to do it. You can do it using Command Prompt, Registry Editor, PowerShell, and File Explorer. To check the version via File Explorer, follow these steps: open File Explorer and navigate to %windir%Microsoft.NETFramework. Here you will find all installed versions.
Here’s how to fix error code 0x800f0954 on Windows 11/10. If you find the article helpful, please leave us a comment and share. Thank you very much for your visit!