Create Photoshop brushes from absolutely anything. Have you searched and downloaded many Photoshop brush sets, but it’s still not exactly what you want?
Instead of accepting what’s available, you can learn how to create a custom brush in Photoshop. The process isn’t overly complicated and will save you from scrolling through Photoshop forums looking for the right brush.
In this article, we’ll go through the steps on how to create a brush from scratch, how to change the settings of an existing brush, and how to arrange your brush so it’s neat.

How to Create Photoshop brushes from absolutely anything
If you’re trying to get the effect you want using Photoshop’s default brushes or can’t find the right brush to download, follow the instructions below to create a custom brush instantly. .
Step 1: Choose brush size
The first step when creating a Photoshop brush from scratch is to create a new document. Photoshop allows you to create a brush as large as 2500 x 2500 pixels, but having a brush this size makes it a bit difficult to use. In addition, using a large brush will consume more system resources, causing Photoshop to hang or crash.
Of course, you can resize your new brush while using it, but keep in mind that increasing the brush size too much will make it slow.
So choose a corresponding brush size for your future designs. This example will create a brush of 300 x 300 pixels.
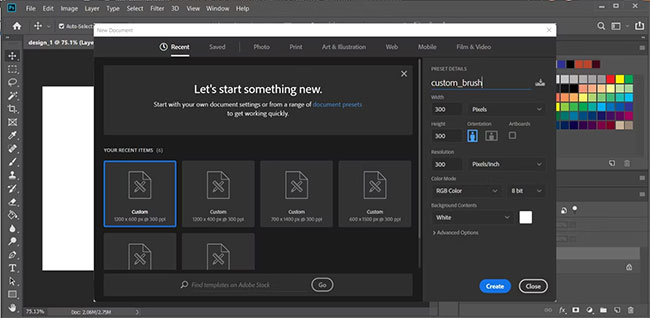
Go to New > Document and set the size for it. Also, make sure that you set the Background Contents to White (white).
Step 2: Create a brush pattern
You can turn any shape or element into a Photoshop brush. For this example, the article will create a brush that helps to achieve the effect of cracked and broken text. You can use existing pens, shapes, text, logos, images, or even brushes to set up your template.
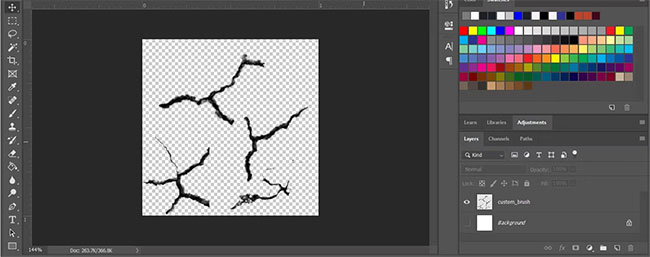
Remember that all elements must be black.
Step 3: Save the brush
Once you’ve created a new brush pattern, open the Edit menu and choose Define Brush Preset. In the pop-up window, you can preview your brush and give it a custom name. When you’re done, click OK.
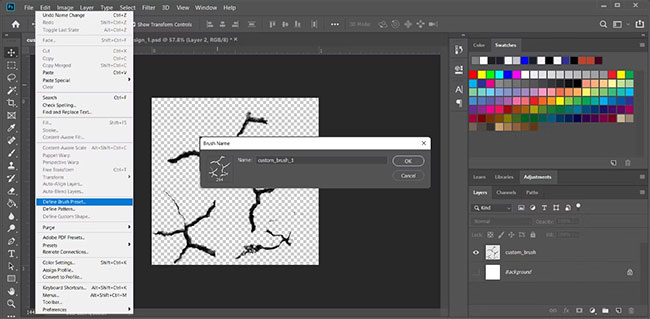
How to edit brushes in Photoshop
If you’re a beginner in using Photoshop brushes, you may not get the best results on your first try. However, you can edit your brush settings instead of creating a new one from scratch.
Select the brush and press F5 or go to Window > Brush Settings. The available settings can be a bit intimidating, especially for a Photoshop beginner. However, there are a few settings such as brush size, spacing or texture that will give you better control over your brush.
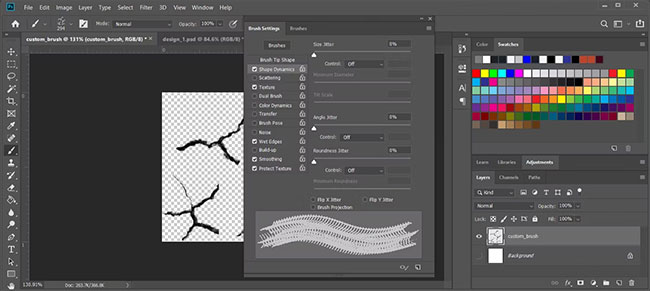
It will take a few tries to get the best brush settings, but as you gain more experience with Photoshop, the process will get easier.
How to access custom brushes
As you continue to edit your design, you will be constantly changing brushes, so your custom brush will no longer be accessible just by pressing B . To search for one of the custom brushes, go to Window > Brushes . There, you will see the entire list of available brushes.
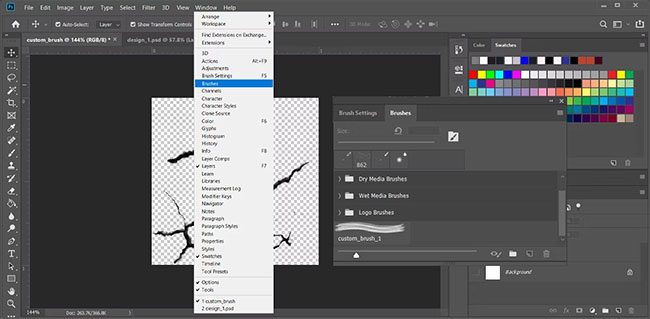
How to arrange Photoshop brushes?
If you’ve created or installed a lot of Photoshop brushes, it’s a good idea to organize your brush library so you can easily find them when you need them.
Go to Window and select Brushes. In the Brushes window, click the Create new group icon . To add one of the brushes to a specific folder, simply drag it over that folder. Alternatively, you can rearrange folders by clicking and dragging them.
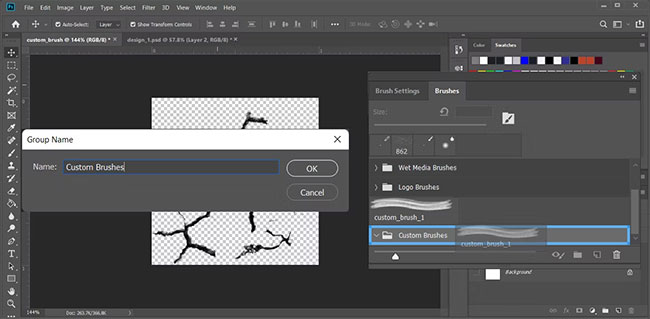
If you want to delete one of the folders, right-click the folder and select Delete Group.
The brush is one of the most used Photoshop tools, so having the right options will save you time when editing your designs. And once you create a new brush, you can use it at any time.
If you’re new to Photoshop, learning how to use it can be a daunting process. Fortunately, there are several techniques that can help.


