How to use Quick Selection tool to remove background in Photoshop? What is the Quick Selection Tool? How is the application of Quick Selection in each specific case?
1. What is the Quick Selection Tool?
Magic Wand Tool can be a great choice for selecting areas with similar tones. But if any of Photoshop’s selection tools are worthy of being called “magic”. Then it’s definitely not a Magic Wand. That’s the tool we’ll be looking at in this tutorial – the Quick Select Tool. Quick Selection Tool is a tool that first appeared in the cs3 version.
The Quick Selection Tool goes beyond the Magic Wand’s limited capabilities. By looking for similar textures in the image, this makes it great. When detecting edges, edges of objects. And unlike the Magic Wand; where we click on an area and hope for the best. The Quick Selection Tool works more like a brush, allowing us to select areas simply by “painting” over them!
2. How to use Quick Selection tool to remove background in Photoshop
Next we will learn how the quick selection tool works
2.1 Quick tool selection:
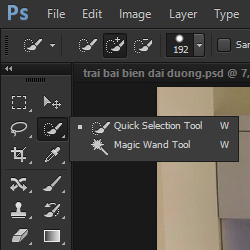
To select the Quick Selection Tool. Click on its icon in Photoshop’s Tools panel. Or press the letter W on your keyboard to select it with a keyboard shortcut.
2.2 Using Quick Selection
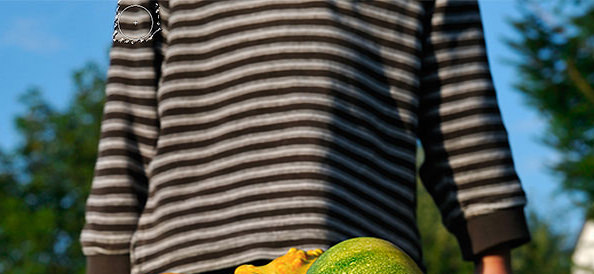
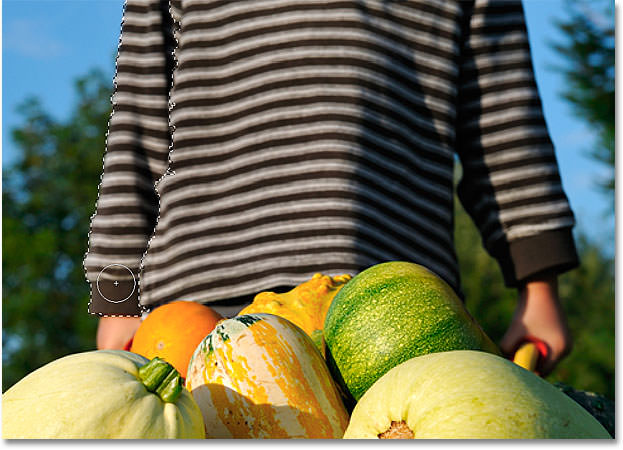
To start using quick selection. I’ll move the Quick Select Tool’s cursor to the top left corner of the kid’s sweater. And I will click once with my mouse. The initial selection border appears around the area I clicked on.
2.3 get more selection with Quick Selection tool
but obviously there’s more I still need to choose from. Which means I will need to add to my current selection. Normally, to add to the selection; we need to hold the Shift key on the keyboard to switch the tool to “Add to Selection” mode.
If you look at the Options bar at the top of the screen. You will now see a series of three icons that allow us to switch between the three selection modes of the tool. (from left to right – New selection. Add to selection and Subtract from selection). Depending on the requirements of the specific problem, we can choose the appropriate mode for the tool. Quick Selection
Also you should note that you can zoom in and out of your brush. By performing a right click and adjusting the size of the Quick Selection tool. Or use the 2 keyboard shortcuts [ and ] to zoom in and out of your brush.

To add to my original selection. I’ll just use the Quick Selection tool to click and drag along the left edge of the sweater. The area I drag over is added to the selection. As long as I keep the cursor inside the sweater and don’t drag over the sky or the trees in the background. only the sweater itself is added:
Then we will continue using quick selection. Make drag and expand your selection to suit the original purpose. If you accidentally drag too outside you can press ctrl + Z.
2.4 Remove selection
What if you want to remove a certain area when you accidentally add too much. With the Quick Selection tool in Photoshop. The quick select tool did an impressive job. With the original selection of my main theme, but it’s not perfect. There are a few areas here and there that need to be removed from the selection; like the distance between the sweater and the child’s arm where the background is shown through: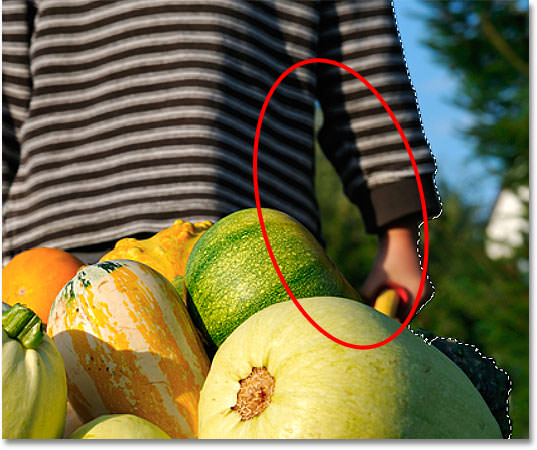
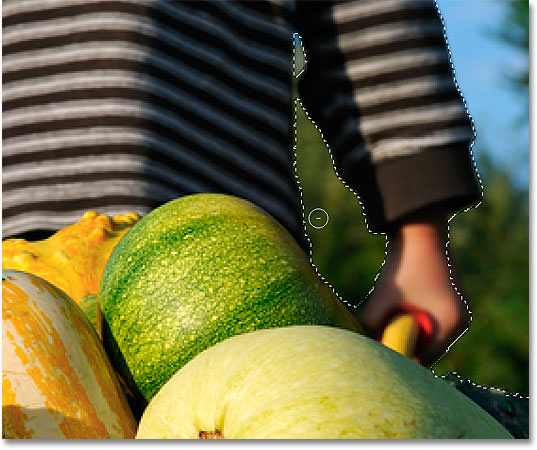
To remove an area from the selection, hold down the Alt (Win) / Option (Mac) key. Temporarily change the Quick Selection Tool to Subtract; from selection mode (you can also select the “Subtract from selection” option in the Options Bar but you need to remember to switch it back to “Add to Selection” when you are done)
3. Be careful when using the Quick Selection tool
The Quick Selection tool is a pretty powerful tool. However, it cannot replace other tools in creating selections. You need to use the Quick Selection tool flexibly to get good results
When using Quick Selection in Photoshop you need to pay attention. To add a selection we hold shift, to remove a selection we hold alt. Zoom in and out of the brush using the keyboard shortcut [ or ]
4. How to use Quick Selection tool to remove background in Photoshop?
With the tool ready, click and drag your mouse on the unwanted background. A group of marching ants, or selection, will appear and grow as you click and drag. Gradually work around your subject adding to the selection as you go.
Sometimes, you’ll find that some areas are added to your selection that you don’t want to include. Hold down the ‘Alt’ or ‘Option’ key to toggle the subtraction mode for the tool, and then click and drag your mouse around the background area you wish to remove. Release the ‘Alt’ or ‘Option’ key when you’re ready to add to your selection again. Alternate between the addition and subtraction modes as your work.
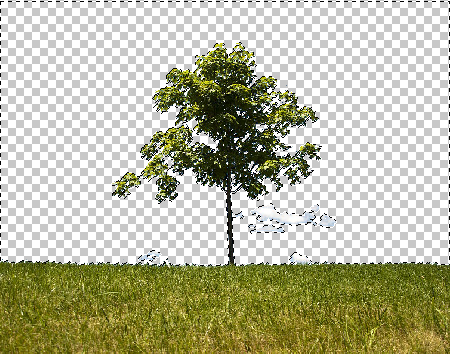
Removing the background of an image is the first step for compositing success. With the background removed, you’re ready to create a new surrounding for your subject using your own creativity. We wish you succeed!