How to Use Quick Mask Mode in Photoshop. how to use quick mask in photoshop,
how to remove quick mask in photoshop,
photoshop quick mask shortcut,
quick mask photoshop 2020,
quick mask mode,
what is quick mask,
photoshop quick mask not working,
edit in quick mask mode photoshop,
which statement best describes the quick mask feature in photoshop Now we can start learning how to use Quick Mask mode to edit.
How to Use Quick Mask Mode in Photoshop
- We will choose an image to work with and make a selection . I chose one of the flowers, Magnolia.
- We choose one of the selection tools. I choose quick option to do it as fast as possible.
- I use the tool on Magnolia and I get a good result first.
- I have stayed at some sites that are not fully selected .
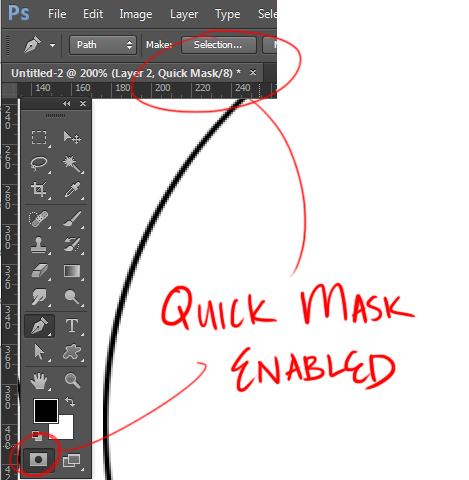
- I enter Quick Mask editing mode , either by pressing the button on the toolbar or the keyboard shortcut is the letter Q.
- Once activated we will see that everything left in the selection will be detected and what is left outside will be masked by a semi-transparent red layer.
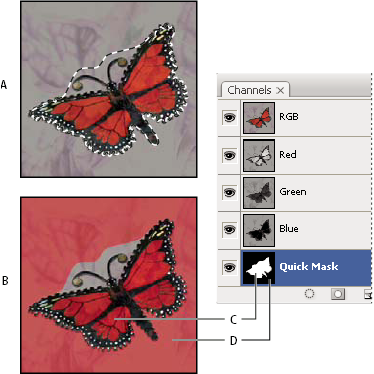
- If we go to the channels panel, we can see that in addition to the normal Photoshop channels when it is in RGB mode, an additional channel will be created, which is automatically named Quick Mask . In this channel we will see the masked part black and the unmasked part white.
- We double-click on the Quick Mask channel and we get a dialog that allows us to invert the mask and the part we selected is the mask.
- We choose the Brush tool and we paint over the parts that are not covered by the mask. Although the paint looks a bit red, we have to choose the Front color so that we can paint with the mask on the image, and the background color so that we can remove the mask from where we don’t want to be selected.
- I corrected the selection I made with the Quick Selection tool. I had to add masking around the edges and erase some places S. I worked with the tool until I was satisfied with the selection made.
- I exit Quick Mask edit mode.
- I’ve got my pick and ready for anything you need.
Note
A temporary Quick Mask channel appears in the Channels panel while you work in Quick Mask mode. However, you do all mask editing in the image window.
-
Using any selection tool, select the part of the image you want to change.
-
Click the Quick Mask mode button
 in the toolbox.
A color overlay (similar to a rubylith) covers and protects the area outside the selection. Selected areas are left unprotected by this mask. By default, Quick Mask mode colors the protected area using a red, 50% opaque overlay.

Selecting in Standard mode and Quick Mask mode A. Standard mode B. Quick Mask mode C. Selected pixels appear as white in channel thumbnail D. Rubylith overlay protects area outside selection, and unselected pixels appear as black in channel thumbnail
-
To edit the mask, select a painting tool from the toolbox. The swatches in the toolbox automatically become black and white.
-
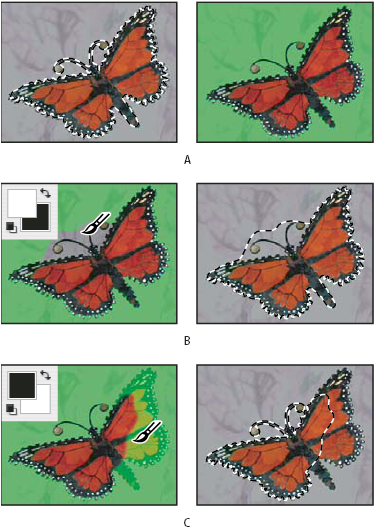
Paint with white to select more of an image (the color overlay is removed from areas painted with white). To deselect areas, paint over them with black (the color overlay covers areas painted with black). Painting with gray or another color creates a semitransparent area, useful for feathering or anti-aliased effects. (Semitransparent areas may not appear to be selected when you exit Quick Mask mode, but they are.)

Painting in Quick Mask mode A. Original selection and Quick Mask mode with green chosen as mask color B. Painting with white in Quick Mask mode adds to the selection C. Painting with black in Quick Mask mode subtracts from the selection
-
Click the Standard Mode button
 in the toolbox to turn off the quick mask and return to your original image. A selection border now surrounds the unprotected area of the quick mask.
If a feathered mask is converted to a selection, the boundary line runs halfway between the black pixels and the white pixels of the mask gradient. The selection boundary indicates the transition between pixels that are less than 50% selected and those that are more than 50% selected.
-
Apply the desired changes to the image. Changes affect only the selected area.
-
Choose Select > Deselect to deselect the selection.