How to merge two photos in Photoshop CS6 is not as difficult as you think. With just a few simple steps, you have a beautiful and impressive photo to post online or save on a computer that combines 2 different photos.

How to merge two photos in Photoshop CS6
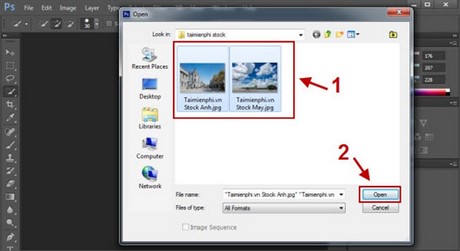
Step 1: You need to prepare an image to combine the cloudy sky and a cloudy sky image, which can be downloaded from the internet.
Step 2: Open Photoshop software, select File \ Open and navigate to the folder where the 2 image files you have prepared are saved. Highlight both photos and select Open to open in Photoshop.
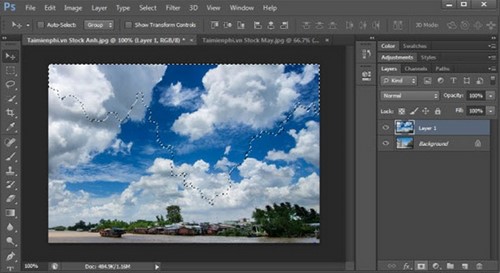
Step 3: At your original image, use tools like Quick Selection Tools/Magic Wand Tools to select the area of the sky to be merged, or you can also click Select\Color Range then options in Fuzziness to select Select the area of the sky that needs to be paired with clouds. You can use Quick Selection Tools

Step 4: After you have selected the sky to combine clouds, go back to the prepared cloud image (number 1), hold the left mouse button and drag that photo to your original image (number 2).
Note: The size of the two images should be similar to avoid the case that the cloud image you prepared is too small compared to the original image, which will be difficult to align.
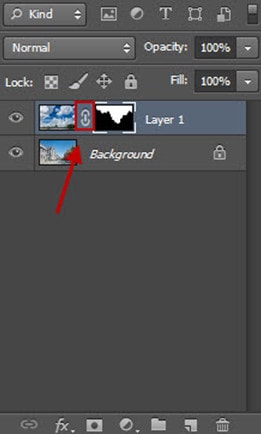
After dragging the image, you will get the following:
Step 5: You click on the Mask to delete the unselected areas. At this point your photo is almost complete.
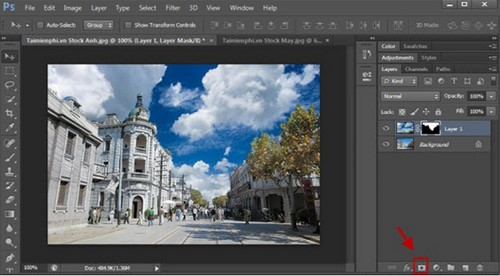
Step 6: Click the icon on the Layer to remove the link between the Mask and the image file.
Step 7: Then you select the sky image stock and customize the Opacity (blur the image) as well as the Fill or you can zoom in and out as you like to make your photo look more realistic.
Note: In case you select the sky area, if you feel that the selection area has many redundant, jagged points, you can use the Blur Tool to paint around the connection area between the sky and the ground to help the image. looks more natural.
So with just a few simple steps, your photos have become much more beautiful and vivid a lot of. Theartcult.net hopes this article will help you in editing beautiful photos.