How to make reflection in Photoshop. Similar to image rotation, image mirroring is also one of the most commonly used operations in Photoshop, but because Photoshop is integrated with many tools, it can be difficult for beginners to get used to. So in the article below, Theartcult will guide you in detail how to make a mirror image in Photoshop.

How To Make Reflection In Photoshop
The steps to make a Reflection in Photoshop are quite simple, to get started, refer to the detailed steps below.
1. Open The Image In Photoshop
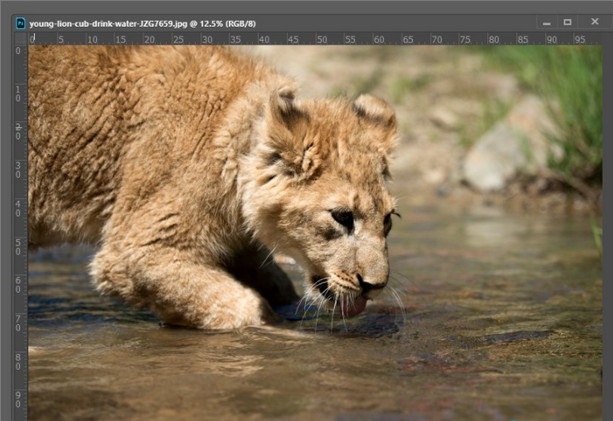
Step 1: To open your image in Photoshop, first open the software and click File => Open . Select the image file from your hard drive or desktop and then click Open.

Step 2 : Do the above to open a new file that you can edit in Photoshop.
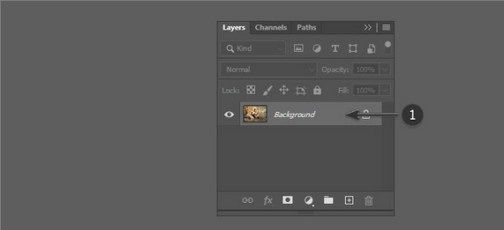
Step 3: This is an additional step, if you want to create a new Photoshop layer, all you need to do is double click on the background layer in the Layers panel to open a new layer window and name it whatever you want. click OK.
2. Rotate An Image Horizontally In Photoshop
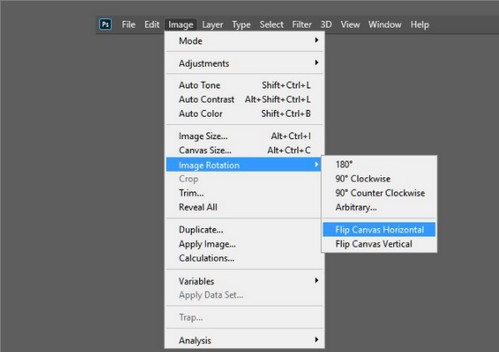
Step 1: To rotate the image horizontally in Photoshop, on the menu bar, click Image => Image Rotation => Flip Canvas Horizontal.
Step 2: The above operation to rotate the image horizontally without using layers.
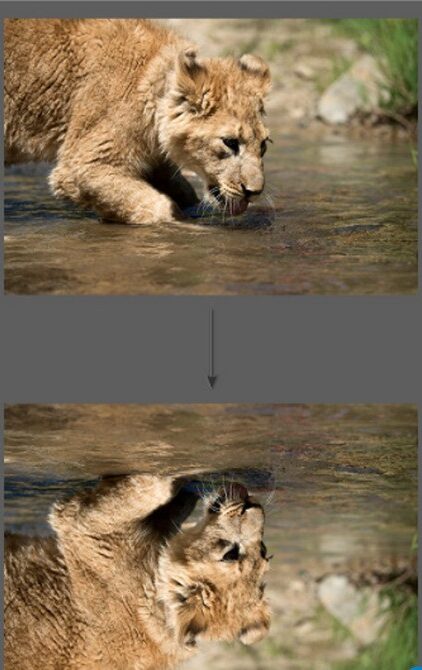
3. Rotate the Image Vertically In Photoshop
Step 1: Next to rotate the image vertically in Photoshop, go to Image => Image Rotation => Flip Canvas Vertical.
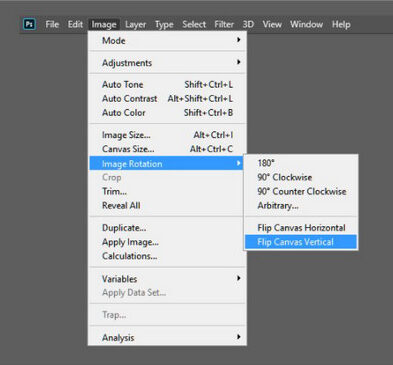
Step 2 : The above operation to rotate the image vertically without using layers.
4. Create Actions In Photoshop
Step 1: To create an action in Photoshop for image rotation, to automate the steps quickly and easily, navigate to the Actions panel by going to Windows => Actions.
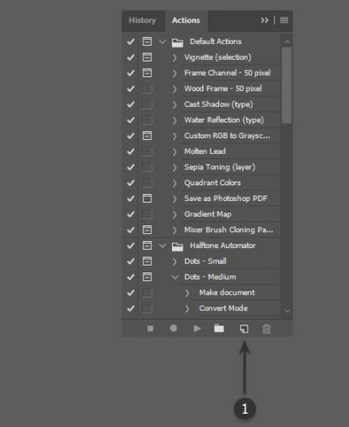
Step 2 : Next, click the Create New Action button , on the screen will display a menu containing useful settings when creating a new action in Photoshop. Proceed to configure these settings.
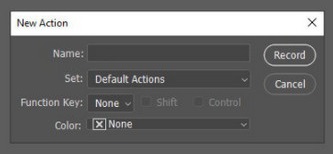
– Name: Give your action any name.
– Action Set frame : select the value as Default.
– Function Key: Allows you to map (assign) any action / operation to a key on the keyboard. When performing the operation, just press that key and you’re done.
– Color: You can assign any color to the action for faster identification.
Step 3: Once done, click the Record button. This is to record the changes you’ve made in Photoshop.
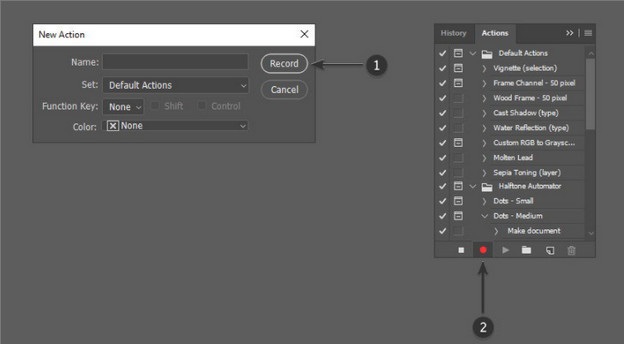
Step 4: Follow the same steps to assign keys to rotate the image horizontally or vertically. Once done, click the Stop Playing/Recording button.

The actions will be saved and you can find them in the list of actions in the Actions panel.
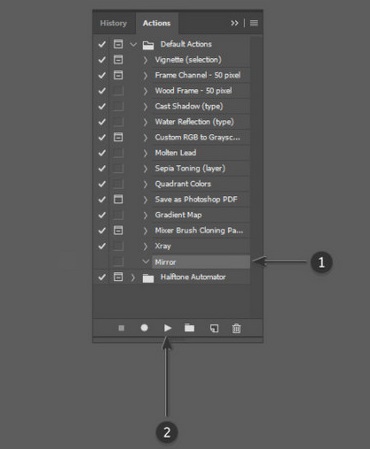
Step 5: In this step, you will try to check if the actions you created are working or not. Try opening another image and selecting the action from the Actions panel, then clicking the Play button in the bottom corner.
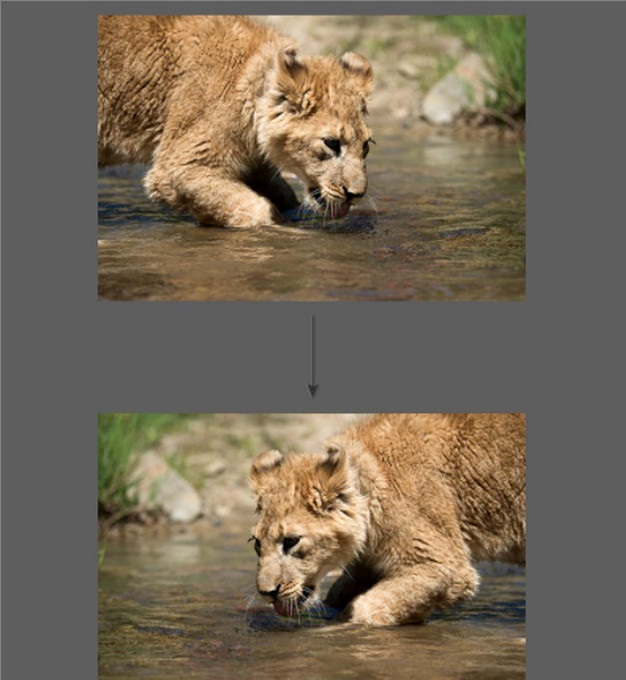
5. Create Reflections In Photoshop
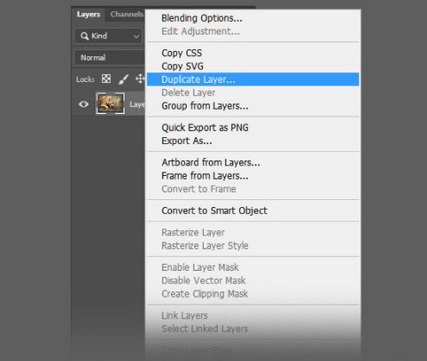
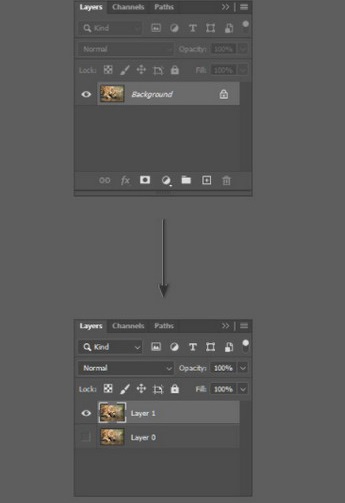
Step 1: First proceed to copy the layer in Photoshop. Double click on the original image and rename it to create a new layer, then right click on this layer and choose Duplicate Layer to duplicate, copy the new layer.
Step 2: Proceed to rename the new layer with any name, different from the original layer name.
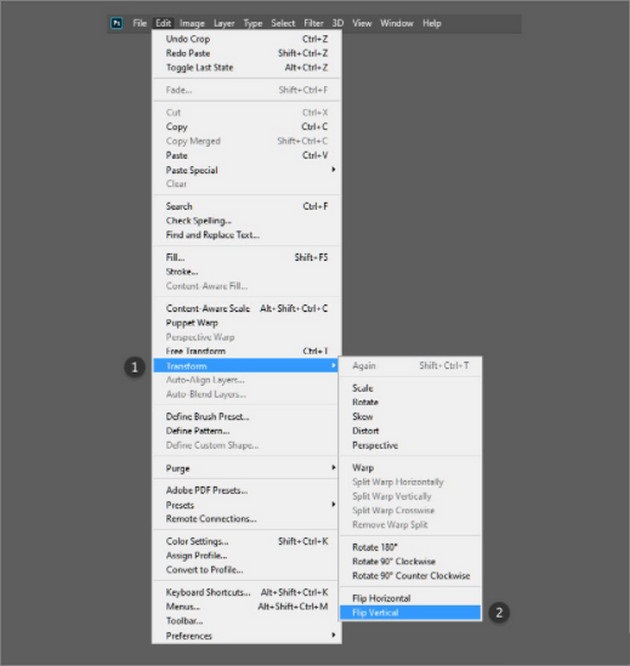
Step 3: The next step is to rotate the image on the newly created layer by selecting Edit => Transform => Flip Vertical from the menu bar.
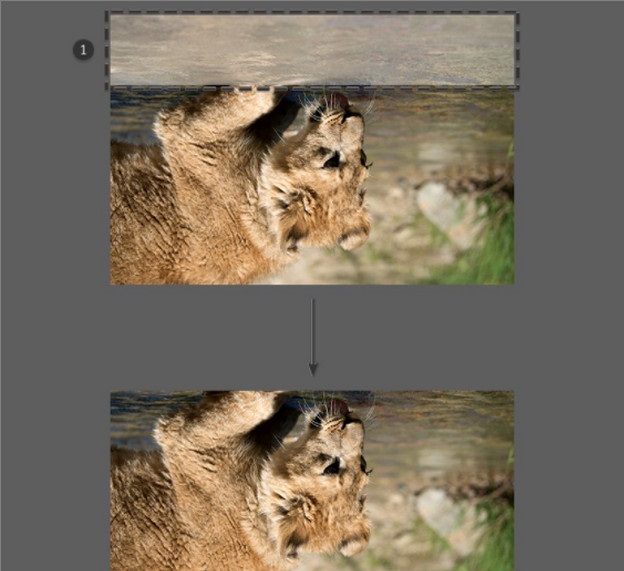
Step 4: Continue on the layer where you just rotated the image, use Marquee Tool to select the area (in this tutorial, above the subject’s legs) and press the Delete key on your keyboard to erase.
Step 5: Hide the copy layer by clicking on the eye icon next to it.
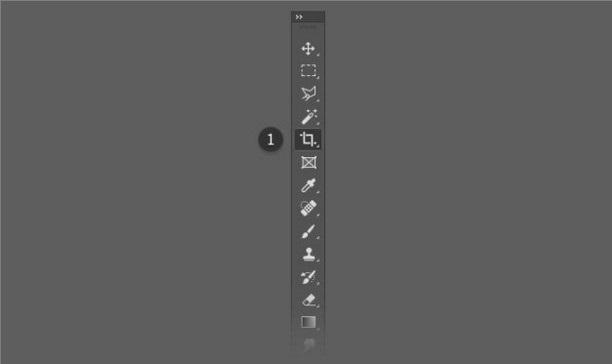
Pick the Crop Tool (C), then click and drag the left mouse button to expand the area below the image. Note, drag just enough to add the rotated image as a mirror image in Photoshop.
Step 6: Click the eye icon next to the layer again to display the rotated copy layer, then use the Move Tool (V) to move the layer to just below the original image.
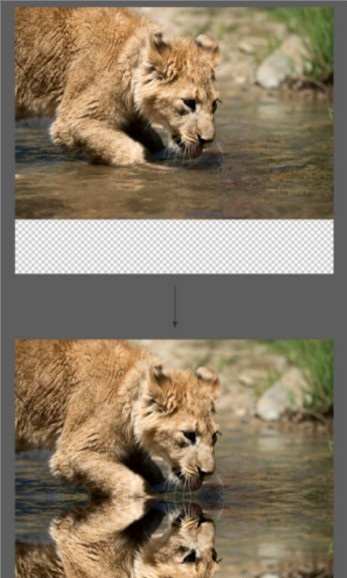
The copy layer must be placed above the original original layer in the hierarchy for the flipped image to display correctly.
Above Theartcult just showed you how to make a mirror image in Photoshop.
Hope this article helps you!