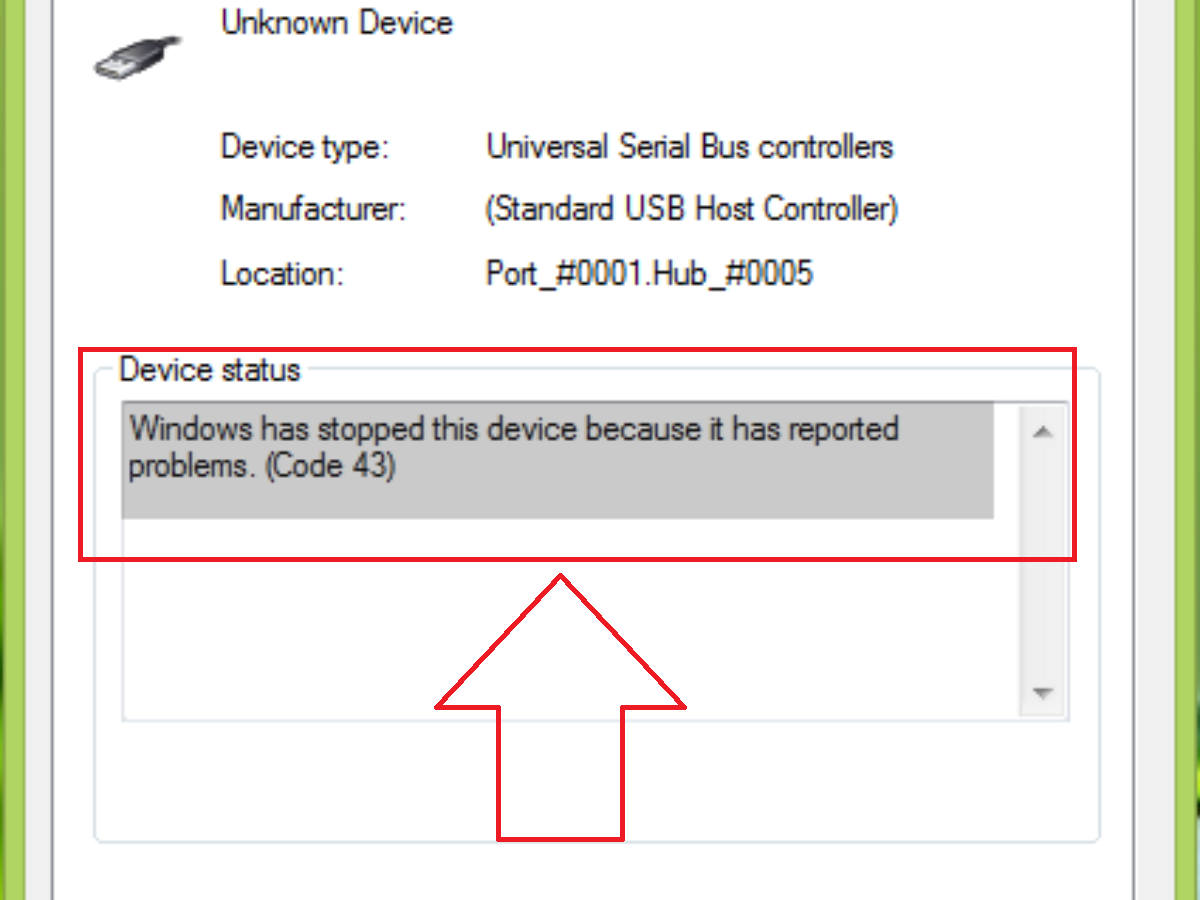
How to fix NVIDIA error code 43
Method 1: Restart the computer
This is the simplest we can handle.
1) Turn off the computer.
2) Remove the CMOS battery and replace it with another one.
3) Press and hold the power button for one minute to discharge all the power in the computer.
4) Plug the power back in and reinsert the battery.
5) Finally restart the computer and see if it is working properly. If you have not switched to method 2.
Method 2: Update the latest driver
The driver of the card may be outdated or corrupted during operation and this causes the above error, so you need to update to the latest version and you can go to the link below to download and run the driver. Automatic updates for your computer.
Method 3: Uninstall the NDIVIA Card Driver
2) Expand the “Display adapters” category and right click on the NVIDIA device name. Select “Uninstall”
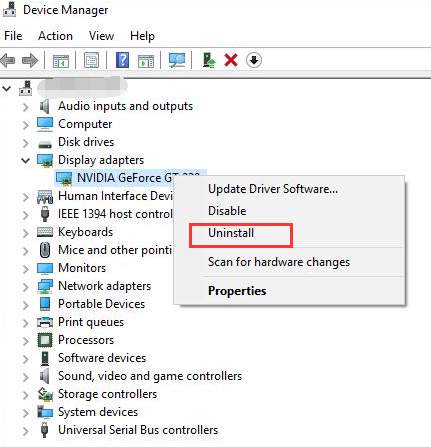
3) Reboot the device and see if it’s fixed or not
Method 4: Disable the video card and discharge the power
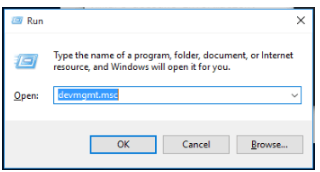
1) Press Win+R.
Type devmgmt.msc and then click OK. The Device Manager window appears.

2) Right click on the NVIDIA device name. The context menu will pop up. Click Disable on the context menu.
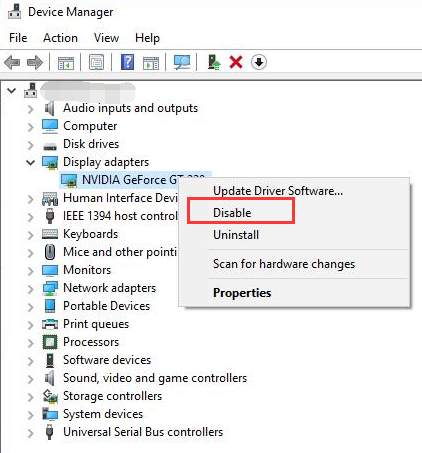
Fix graphics device problems with error code 43 in Windows 10
Driver updates for Windows 10 and many devices (such as network adapters, monitors, printers, and video cards) are automatically downloaded and installed through Windows Update. Though it’s likely you already have the most recent driver, if you’re having trouble with a device, you can try fixing it by updating the driver.
- Tap and hold or right-click the Start button, and then select Device Manager.
- On the list of devices, find the device that’s having driver problems (it will often have a yellow exclamation point next to it). Then tap and hold or right-click the device and select Properties.
- Select Driver, and then select Update Driver.
- Select Search automatically for updated driver software.
If a driver update is found, it will install automatically. Select Close when it finishes installing.
If Windows doesn’t find a new driver, you can try looking for one on the device manufacturer’s website and follow their instructions to install it.
If an update was recently installed, or you updated your device driver or driver software, you may be able to fix the problem by rolling back the driver to the previous version.
Note: Windows 10 installs drivers automatically, so you don’t have to choose which updates are needed. In rare cases, a specific driver might temporarily cause problems on your device. In this situation, you can prevent the problematic driver from reinstalling automatically the next time Windows updates by rolling back to a previous version.
- Tap and hold or right-click the Start button and select Device Manager.
- On the list of devices, find the device that’s having driver problems (it will often have a yellow exclamation point next to it). Then tap and hold or right-click the device and select Properties.
- Select Driver, and then select Roll Back Driver.
In some cases, uninstalling and reinstalling the driver fixes the error:
- Select the Start button. Type device manager in the search box, and select Device Manager from the list of results.
- On the list of devices, find the device that’s having driver problems (it will often have a yellow exclamation point next to it). Then tap and hold or right-click the device and select Uninstall > OK.
- After the driver uninstalls, tap and hold or right-click the name of your PC (found at the top of the device list) and select Scan for hardware changes. This reinstalls the device driver.
-
To see if this fixed the problem, tap and hold or right-click the name of the device again. On the General tab under Device status, you should see the message “This device is working properly.” If you don’t see this message, see the device documentation or contact the manufacturer.
We hope this article helps you! Visit Macwintips.com to update the most practical and useful tips for Mac and Windows.


