How to fix distortion in Photoshop. Image distortion is a common problem for photographers in the process of shooting. This problem can cause the image to look unsightly, distorted, or out of proportion, and part of the image may be stretched or bent (for example, the model’s nose looks a little too big). The smart guide below from Theartcult will fix one of these common mistakes using Photoshop in the following 2 ways.
Using Warp
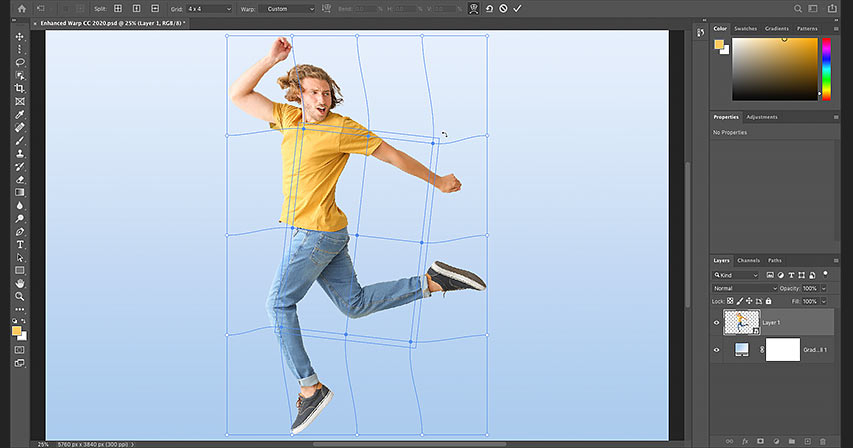
This is one of the most popular ways to distort images in Photoshop today. The Warp command allows the user to drag and adjust points to make changes to the shape of the image. In addition, you can also use the Shape tool in Warp Style in the option on the toolbar to make the image distorted.
To select the points you want to distort the image, choose View -> Extras to hide and show the warp grids that are convenient for adjusting the points on the image.
To use Warp, follow these steps:
- Select the shape you need to distort.
- Make a Warp style selection on the toolbar’s pop-up window
- Result.
Accordingly, we have simple steps as follows:
Step 1: Put the image you want to distort into Photoshop software
Step 2: Proceed to select Edit -> Transform -> Warp
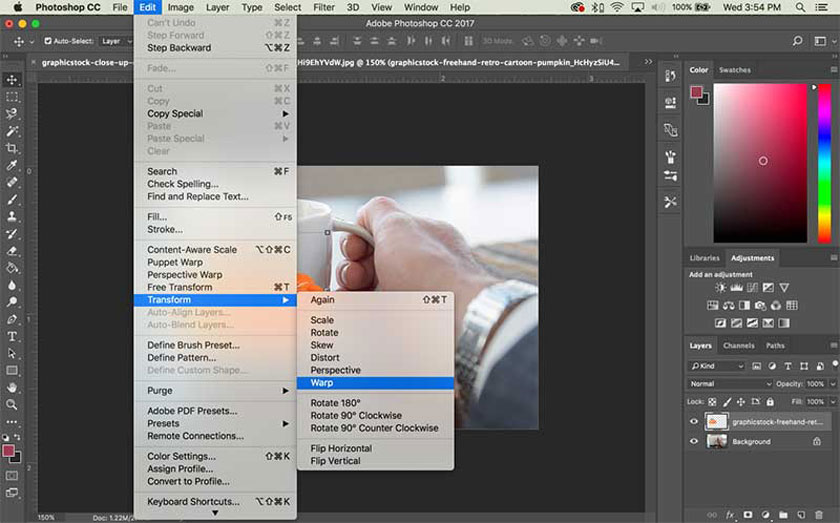
If you use the Free Transform command, click Switch Between Free Transform And Warp Modes on the toolbar.
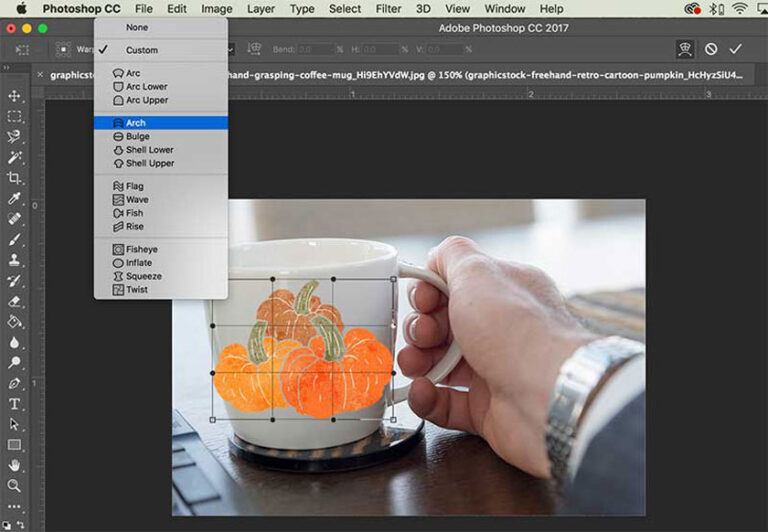
Step 3: To distort the image using a specific shape, on the Warp pop-up window located in the toolbar, select the Style you want.
If you want to make changes to the shape, you need to drag control points, segments on the Bounding Box or the mesh or area within the mesh.
Use the control handles to make adjustments to a curve. They are similar to how you adjust curves in Vector graphics.
If you want to change the direction of the styles that distort the image, select Change The Warp Orientation on the toolbar. To change the waypoint, click on the waypoint square on the toolbar.
Users who want to adjust the length, width, curve, distortion, .. for the image, pay attention to enter the value for the Text box in the options toolbar as follows:
- Bend aim to set curvature
- X: set horizontal distortion
- Y: set the vertical distortion.
Note : When you select None or Custom on the Warp Style pop-up window, entering these values will not be possible.
Step 4: Press Enter on Windows or Return on Mac OS. Alternatively, you can choose to click Commit on the options bar. If you want to cancel the changes, you need to press Esc or click Cancel on the options toolbar.
Note: When you want to warp, distort a Bitmap image, the editing will make the image blurry and no longer as sharp as the original image. Therefore, you should not execute statements one by one.
Using Puppet Warp
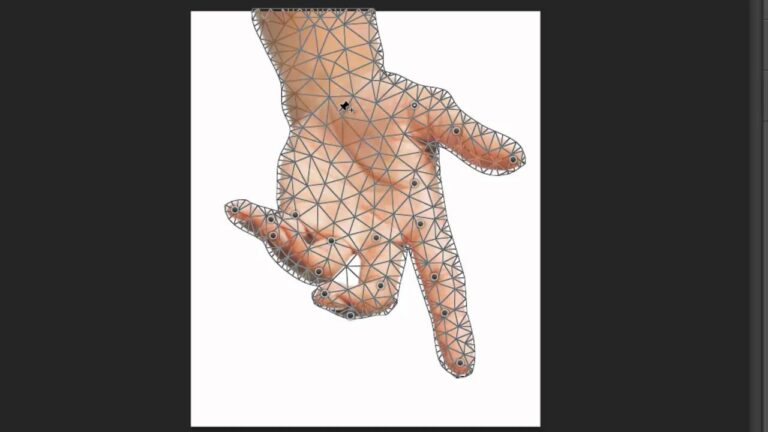
In addition to the above method, the use of Puppet Warp is also one of the ways to distort images in Photoshop used by many users today. So how is this method used? What options are there, etc., please continue to follow the information below:
Options
With Puppet Warp, we have the following options:
- Mode: It is to determine the elasticity of the mesh
- Density: Aims to determine the distance of mesh points. The more luwois points, the better control over details will become. However, on the contrary, they will also require you to take more time to process.
- Expansion: Helps the user to expand or shrink the edges of the mesh
- – Show Mesh: Uncheck to show only the adjustment handles, this makes your adjustments more visible.
How to use Puppet Warp in Photoshop:
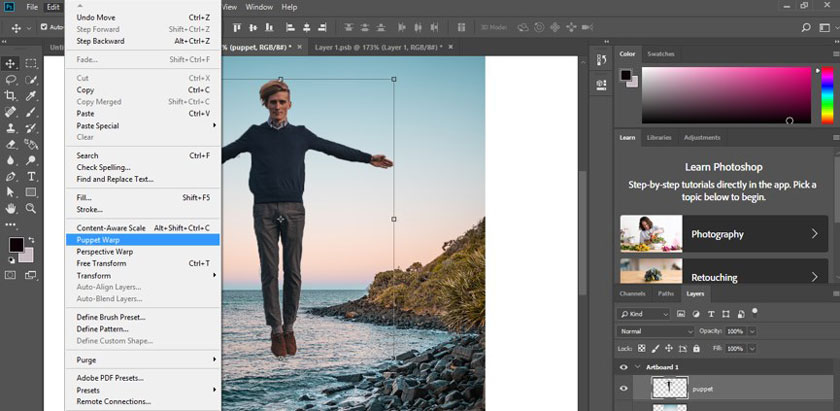
- Select the layer you want in the Layers panel
- Choose Edit -> Puppet Warp.
Shortcut keys
Photoshop shortcuts are available to help you work more conveniently in Puppet Warp as follows:
- Ctrl A (Mac: Command A): used to select all pin points
- Ctrl D (Mac: Command D): to perform deselecting of pin points
- Shift: To select multiple pin points when you click any pin point.
- Hold the H key to perform hiding the pin points. When you want them to show up again, just press it again.
- Alt – Click (Mac: Option-Click): When you click on a pin point will help delete it.
- Hold Alt (Mac: Option): Clicking on pin points causes them to display a circle, so you can proceed to rotate the pin point.
- When you want to cancel, just press the Esc key.
Using
Using Puppet Warp will allow users to distort certain parts of an image, while other parts of the image will remain intact without being affected. The steps to do the job are as follows:
Step 1: At Layer Panel -> Layer or Mask (vessel) that you want to transform.
Step 2: Select Edit -> Puppet Warp.
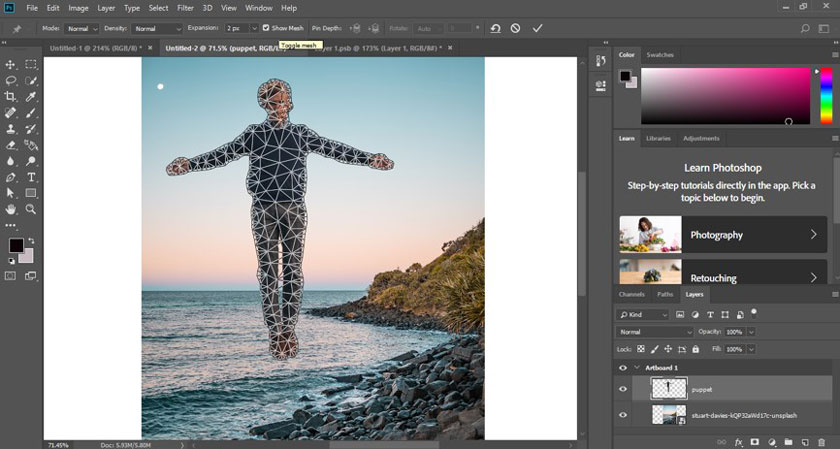
Step 3: Make the following settings on the options toolbar:
- Mode: Determines the elasticity of the mesh. Doing the distortion will give you a super-stretch net, while Rigid will do the opposite.
- Density: To specify the distance of the mesh. If there are more points, it will help increase accuracy, but it will take more time to process, and if there are few points, vice versa.
- Expansion: Extends or shrinks the outer edges of the mesh.
- Show Mesh (show mesh): Unchecking Show only adjustment pins will display the adjustment pins.
- To temporarily hide the adjustment foot, you choose to press the H key.
Step 4: In the image window, click to add a pin to the area you want to modify and the area you want to keep.
Step 5: If you want to reposition or remove the Battery, you need to do the following:
– Drag the Pin at the grid position. Be sure to click Pin Depth on the options toolbar to reveal the mesh area you’ve overlapped with.
– If you want to remove the selected Pins, press Delete. When you want to remove other Pins, you need to place the cursor directly on these Pins, press Alt for Windows and Option for Mac OS. When the scissors icon appears, click on it.
Select Remove All Pins on the toolbar. When you want to select multiple Pins, press Shift or select Select All at the Context Menu.
Step 6: To rotate the battery grid, proceed in the following basic ways:
Press the Alt key for Windows or Option for Mac OS to perform a fixed mesh rotation.
When a circle appears, drag the outer part to rotate the mesh. The degree of rotation will appear on the options bar.
If you want to rotate the grid automatically, you need to pay attention to use the Mode option, on the Rotate Menu, you need to select Auto.
Once you’re done with your edits, press Enter or Return. That’s it, you’re done with your photo edits.
Video on How to fix distortion in Photoshop
Hopefully, with the ways to perform image distortion correction in Photoshop that we have guided above, will help users successfully apply to the photo you want to edit.