How to Create a Digital Signature Photoshop. In this post, Theartcult is going to be showing you how to create a digital signature in Photoshop. It’s pretty easy, and looks really good. Check it out below.

I. How to Create a Digital Signature Photoshop with a font
1. Quick Guide
- Find font: Go to Google Fonts > Type “script” in the search bar > Choose the font you like > Download.
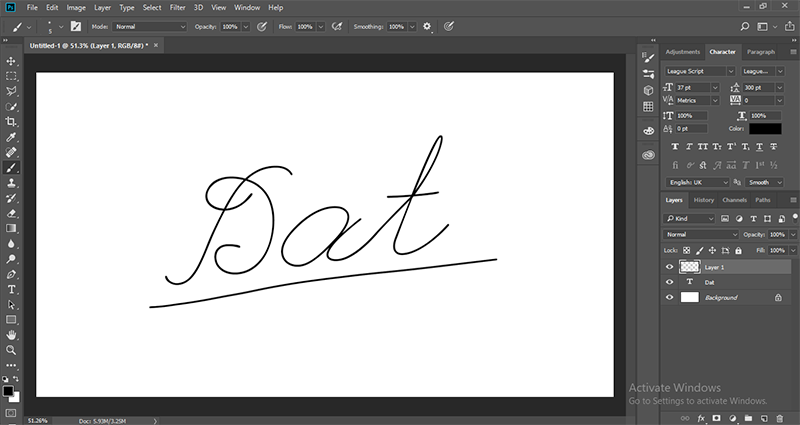
- Create a signature: Open Photoshop > Choose Create new > Customize the size , background color and other parameters of the canvas > Select Create > Select the Horizontal Type tool on the toolbar > Open the Character window > Select the downloaded font > Choose a color black for text > Enter signature.
- Customize the signature: Customize the parameters of the signature in the Character window > Select the Brush tool on the toolbar > Press Ctrl + T to rotate the signature to the angle you want > Create a layer above the signature > Adjust the size, The opacity, flow, smoothing of the brush is similar to the stroke > Draw an underline for the signature > Click the eye icon of the background layer to hide it > Save the file as PNG .
2. Detailed instructions
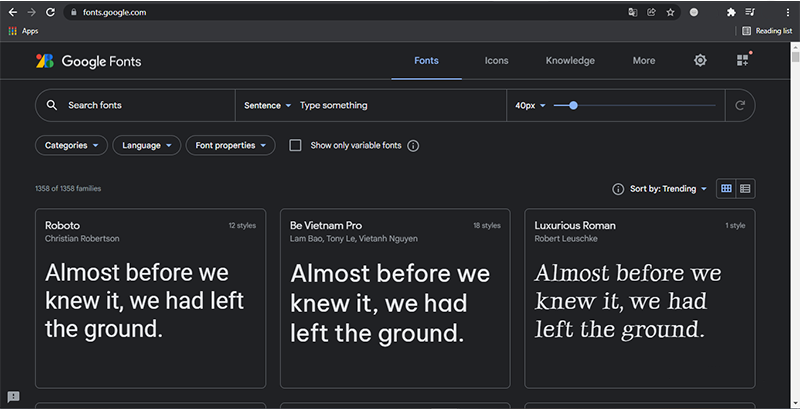
Step 1: Visit the Google Fonts website.
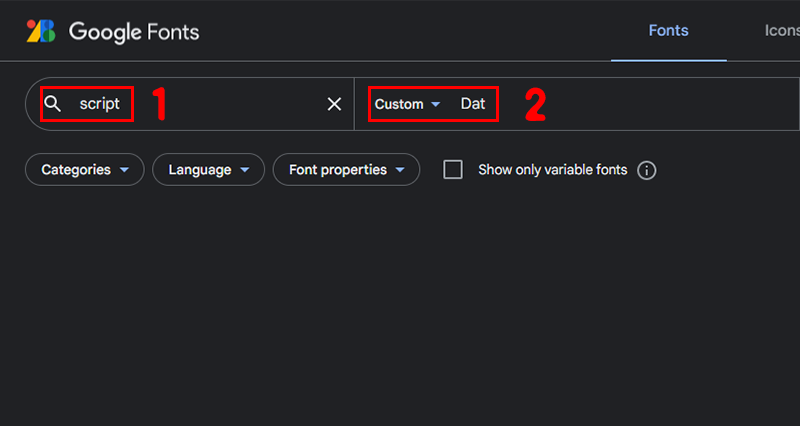
Step 2: Enter “script” in the search bar, you can enter “your name” in the box next to it to see an example > Choose the font you like and download.
Step 3: Open Photoshop > Select Create new.

Type “script” in the search bar, you can enter “your name” in the box next to it to see an example
Step 4: Customize the size, background color and other parameters of the canvas > Select Create.
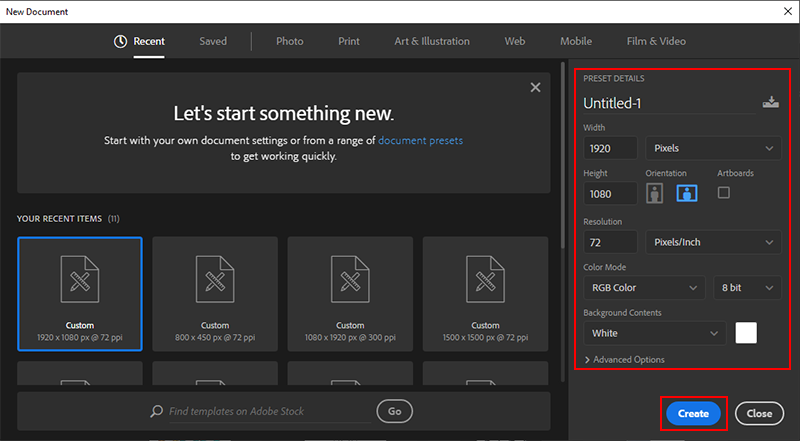
Customize the size, background color and other parameters of the canvas > Select Create
Step 5: Select the Horizontal Type tool on the toolbar (Shortcut: T ).
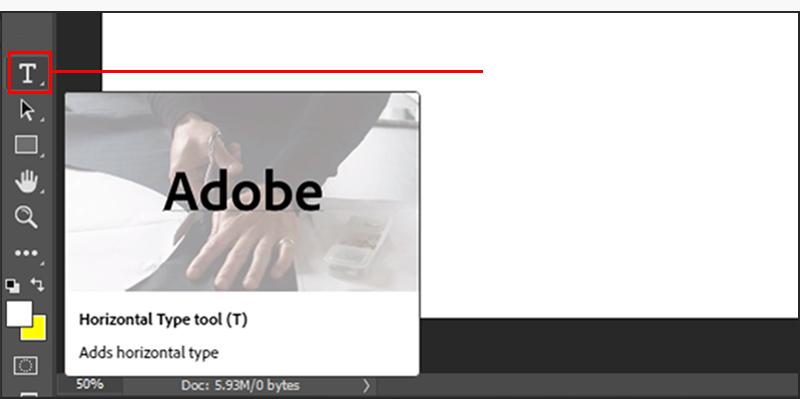
Select the Horizontal Type tool on the toolbar (Shortcut: T)
Step 6: Open the Character window > Select the font you just downloaded > Choose black for the text.

Step 7: Enter the signature > Customize the signature’s parameters in the Character window .

Enter a signature > Customize the parameters of the signature in the Character window
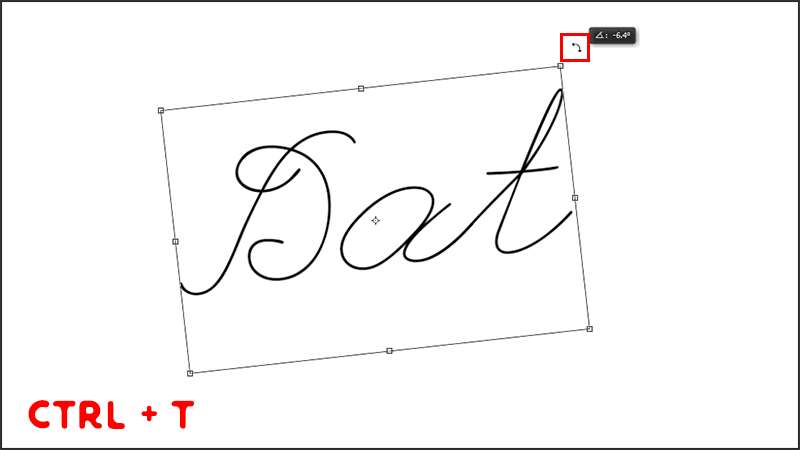
Step 8: Press Ctrl + T to rotate the signature to the angle you want.
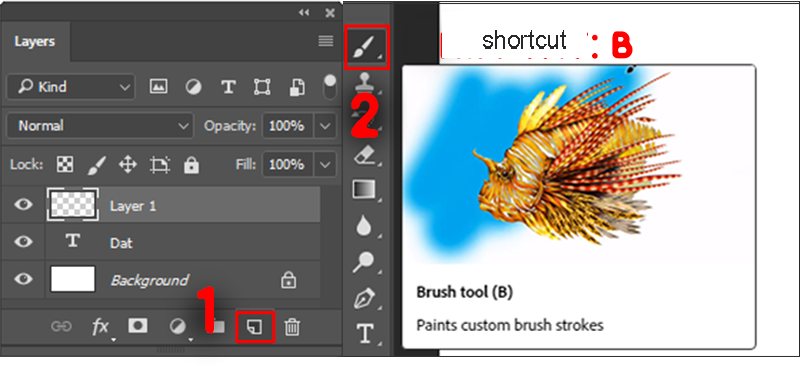
Step 9: Create a layer above the signature > Select the Brush tool on the toolbar (Shortcut: B ).
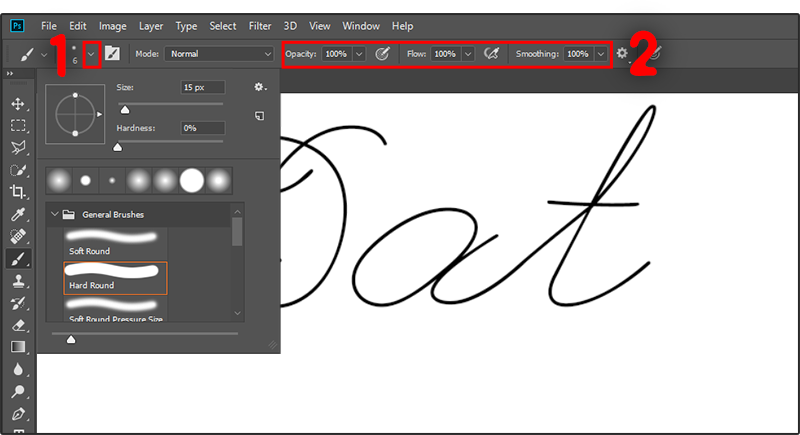
Step 10: Adjust the brush ‘s size, opacity, flow, and smoothing to match the stroke.
Step 11: Draw an underline for the signature.
Step 12: Click the eye icon of the background layer to hide > Save the file in PNG format > Done
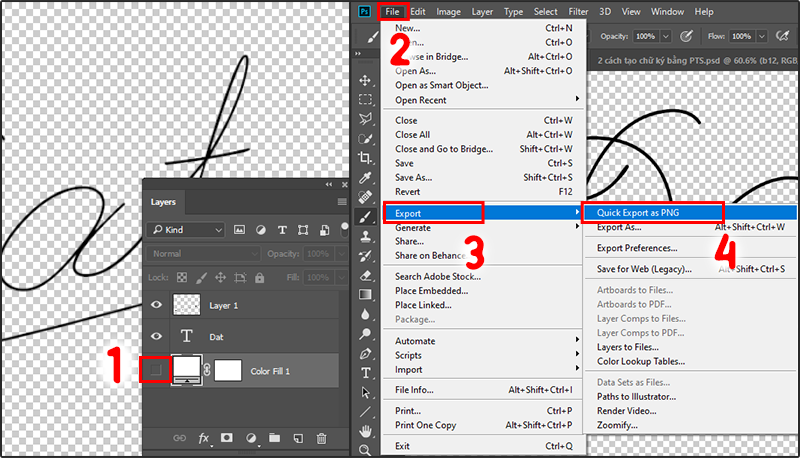
Click the eye icon of the background layer to hide it > Save the file as PNG > Done
II. How to Create a Digital Signature Photoshop with the Magic Wand Tool
1. Quick Guide
- Sign a blank sheet of paper > Take or scan again.
- Open Photoshop > Open the signature image file > Select Image > Select Auto contrast > Use the Zoom in tool to enlarge the signature > Select the Magic Wand tool > Click on the signature stroke > Select Select > Select Similar > Select Select > Select Select and Mask > Select OK > Select the Layer mask icon > Save the file in PNG format .
2. Detailed instructions
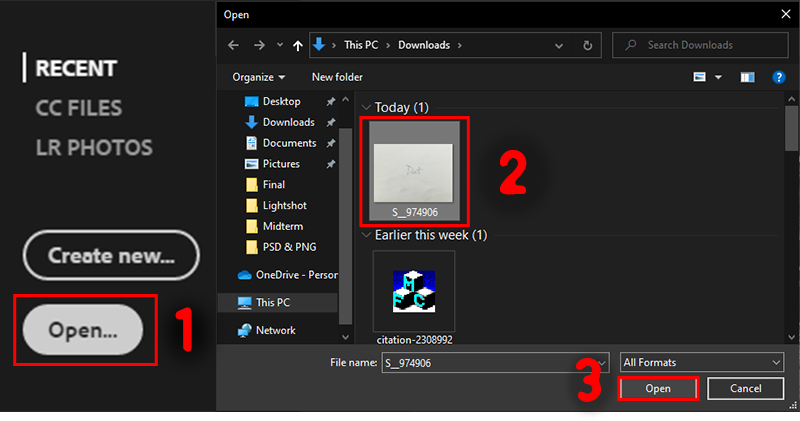
Step 1: Sign on a blank sheet of paper (paper without lines) > Take or scan again (as close and clear as possible).

Step 2: Open Photoshop > Open the signature image file.
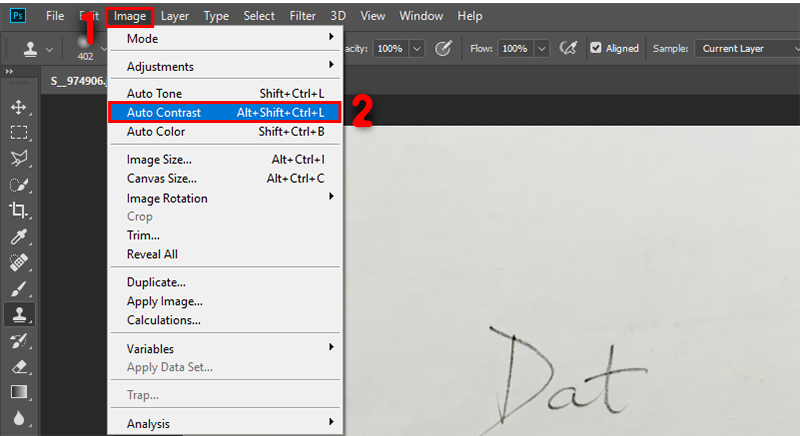
Step 3: Select Image > Select Auto contrast (to increase the clarity between the signature and the background).
Step 4: Use the Zoom in tool to zoom in on the signature > Select Magic Wand tool .
Step 5: Click on the signature stroke > Select Select > Select Similar.
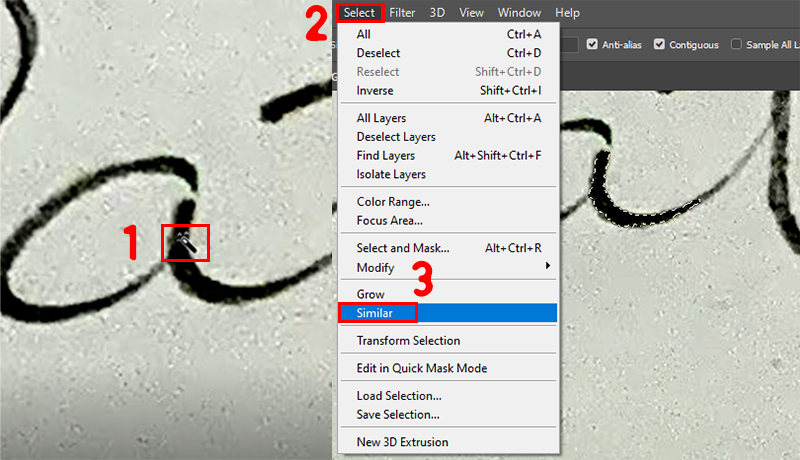
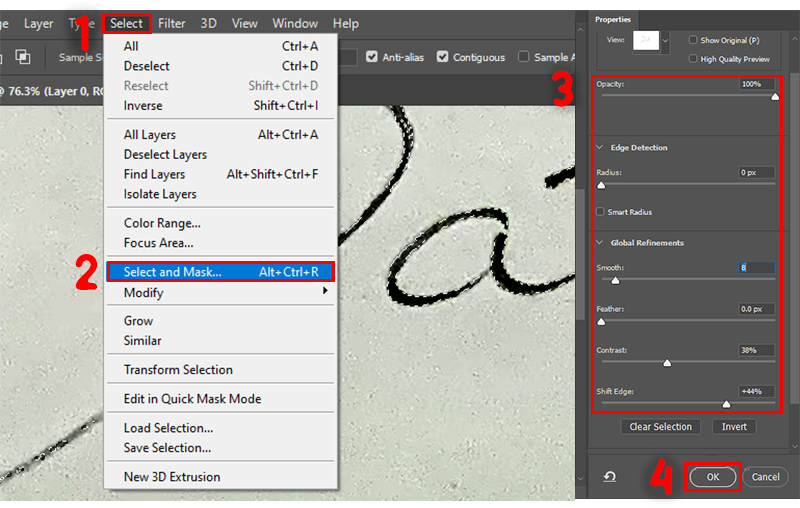
Step 6: Select Select > Select Select and Mask (to edit the selection, make sure all signature strokes are selected) > Select OK .
Step 7: Select the Layer mask icon (to separate the background of the signature).
Step 8: Save the file in PNG format > Done.

III. How to add signature in Photoshop
In Photoshop there is a tool called Clipping Mask that allows you to insert your signature on an image easily. To do this, you can follow these steps:
1. Select an image
To get started, you need to select the image that you want to insert the signature on. Photoshop does not limit the number of characters in the signature, however, to ensure aesthetics, as well as not affect the image content, it is best to limit the number of characters to the minimum, the shorter. the better.
Note: When choosing the color of the text, you can choose a color that is separate from the image or a color that is close to the background of the image so that your signature can blend in with the entire image.
2. Integrating images into text
Create a new Photoshop file from the File > New menu. You can choose any size and background color you want.
Paste the image you want to use into this file as a separate layer. You can find the photo on Google, right-click on it, select Copy Image, then press Ctrl + V to paste the image into Photoshop.
Next, you use the typing tool (shortcut T) to type the letter you want. To make the effect look more clear and beautiful, you should bold the text. If the characters are too thin, the effect will not be obvious and the work you create will not be beautiful.
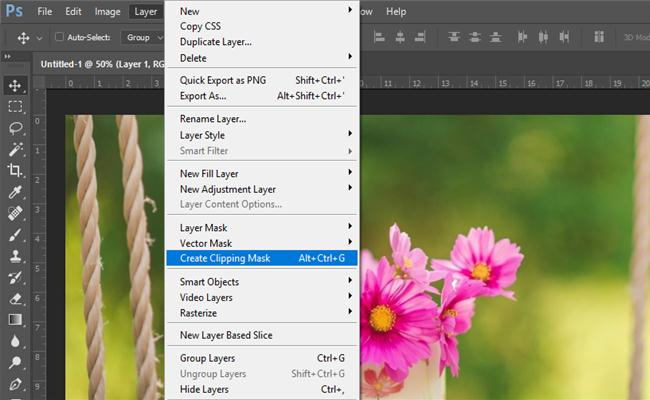
Now that you have the two basic layers you need, the image layer and the text layer, it’s time to create the Clipping Mask.
First, you drag the image layer above the text layer, which means the text will be hidden below the image. Next, select the image layer and then choose the menu Layer > Create Clipping Mask.
If the text after dubbing, the image does not stand out from the background, you should add a stroke around it to make it stand out more.
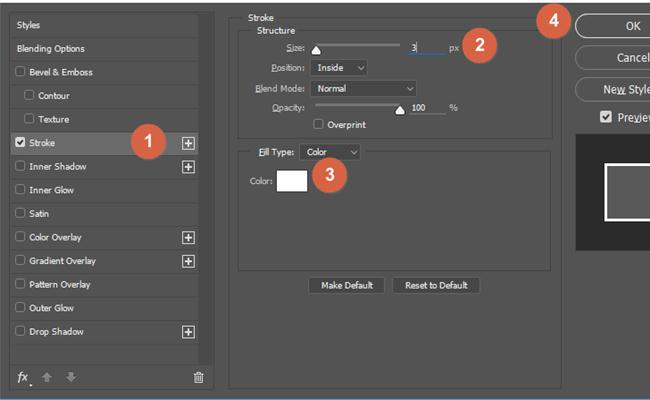
 To do this, select the text layer, click the fx button at the bottom and then choose Stroke.
 At the Layer Style dialog box, you choose the color, border size and finally click the OK button.
 If the crop of the image is not suitable, select the image layer, select the Move tool (shortcut V) and then click and hold the mouse on the image to move it until it is satisfactory.
 In addition, you can resize the image you insert into the text at any time by using the Transform tool (Ctrl + T).
Above are 2 ways to create a signature using Photoshop super simple and effective. Just follow the instructions above and you already own a “signature 4.0”, what are you waiting for, see this article right away!
Good luck!
Visit Macwintips.com to update the most practical and useful tips for Mac and Windows.