How to make a puddle reflection in Photoshop. At times, the photos we take may need a little twist to spur creativity. What we see in real life is not always conveyed through the camera. But luckily, editing software can help you create more interesting works of art. In this tutorial, Theartcult will show you How to make a puddle reflection in Photoshop.
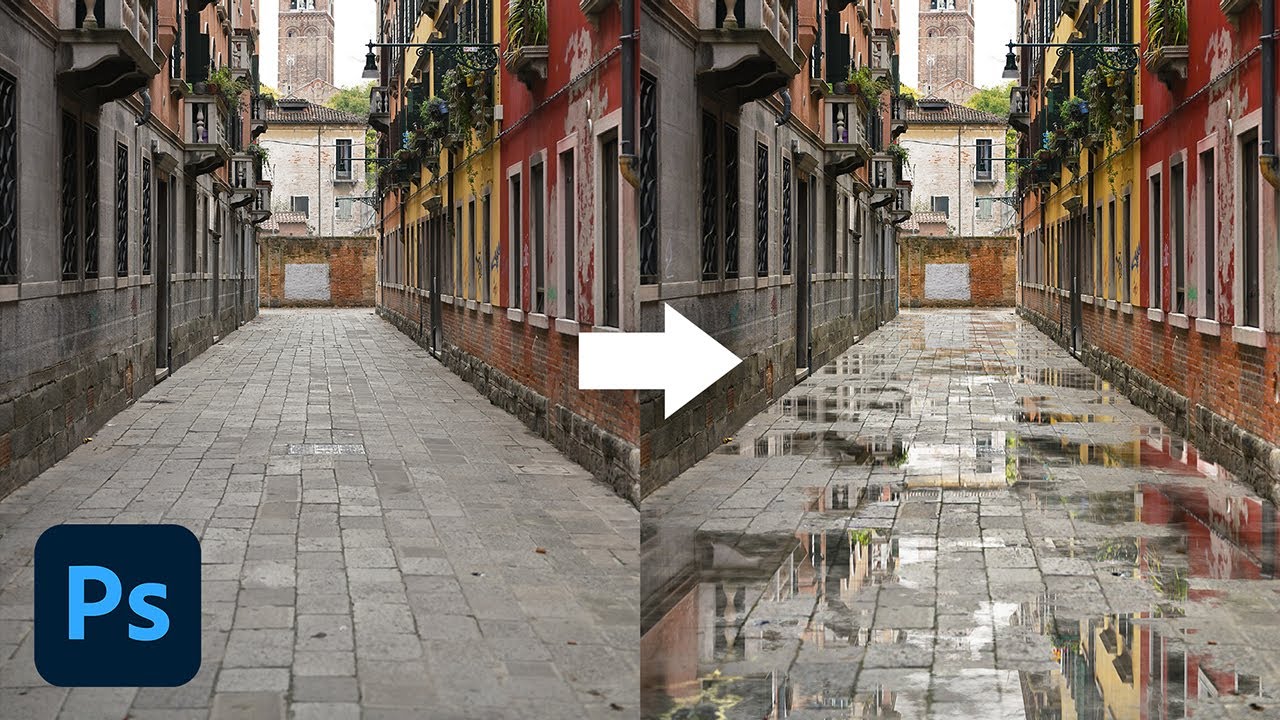
Where to download the puddle map?
To create a puddle in Photoshop from scratch, you need to search online for these 3D graphics assets. Fortunately, there are many options available online for free.
If you want to follow the instructions, you can download the puddle map that the article used at GraphicsCrate .
How to make a puddle reflection in Photoshop
Step 1: Create Vanishing Point
In the first step, you’ll create a Vanishing Point (the point where all parallel lines in a plane appear to (see) meet in perspective) in Photoshop to place the puddle map. You will then arrange multiple versions of the puddle map to fill most of the road in the main village image.
1. With the main image loaded into Photoshop, create a new layer.

2. Go to Filter > Vanishing Point .
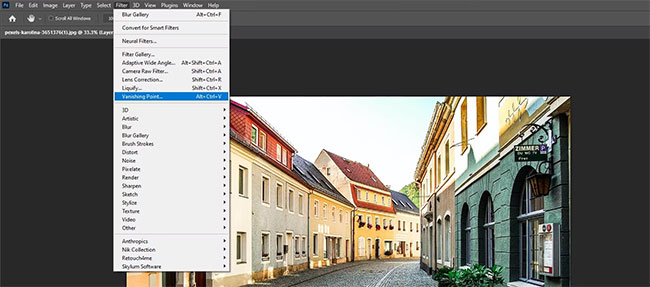
3. Select the Create Plane Tool (will be active by default).

4. Create 4 points that will act as a plane, as shown.
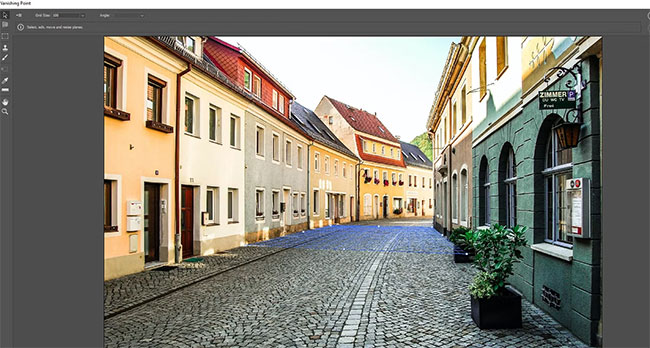
5. Adjust the points so that they cover the entire area of the path between the buildings. Click OK.
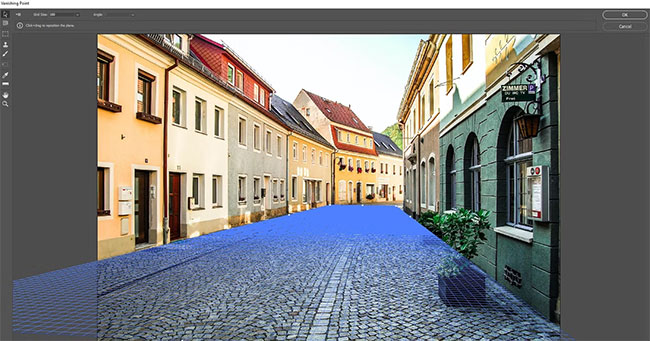
6. Go to the puddle map file. Press Ctrl + A to select the image. Then press Ctrl + C to copy it.
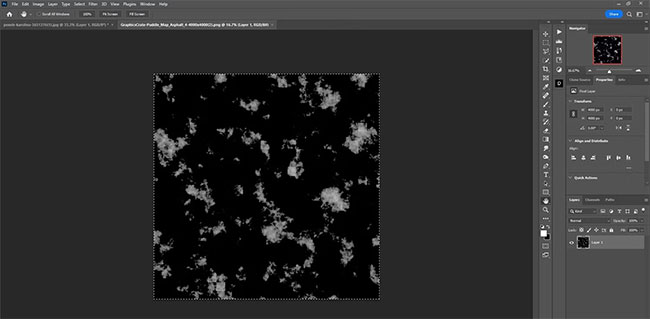
7. Return to the village image. Go to Filter > Vanishing Point. The same plane you created will appear.
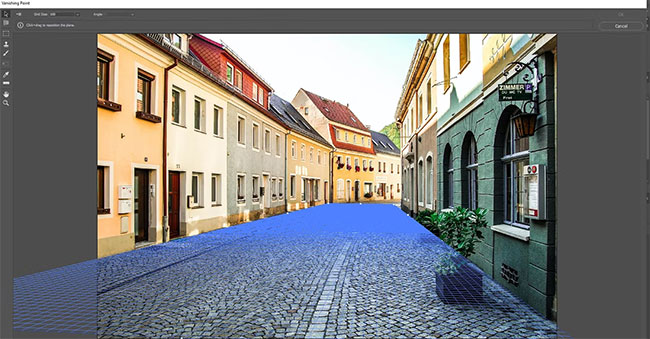
8. Press Ctrl + V to paste the puddle map into the grid area.
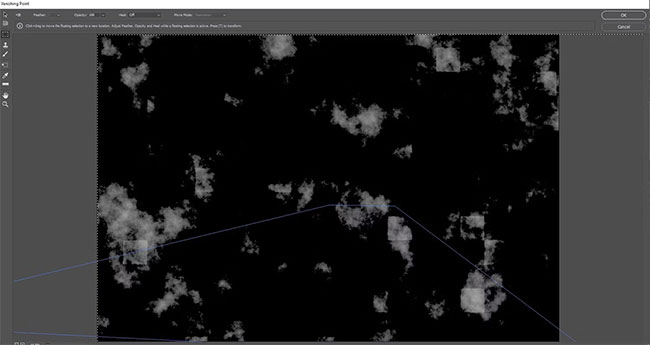
9. Drag the image with the mouse so that it fits the grid as shown. Doesn’t have to be exact.
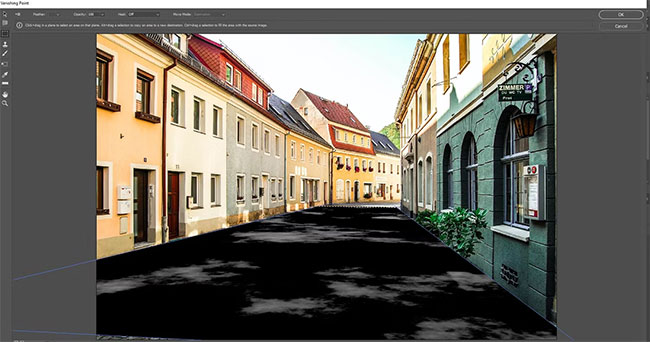
10. Press Ctrl + T to select the Transform tool. Using the handles, adjust the first map so that the puddles are the desired size. You can also drag the map to position it in the foreground, as shown.
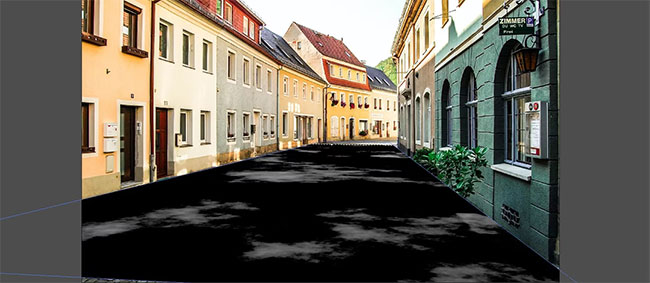
11. Press OK or Enter. You will be returned to the main screen in Photoshop.
Note that smaller puddle maps may require copying in step 10. If this is the case, you can simply press Alt to duplicate the puddle map and then you can arrange it anywhere anywhere on the 3D plane. This process can be repeated until the entire frame is full.
You can also shrink your puddle map and make multiple copies to make the puddles smaller. The end result depends on your creativity.
Step 2: Save the puddle map
In the second step, you will need to create a Solid Color adjustment layer of black color as well as a Curves layer to further enhance the look of the puddles. Then create an Alpha Map in Channels to save the puddle map as a selection for later use in the next step.
1. With the Background layer selected, create a Solid Color adjustment layer .
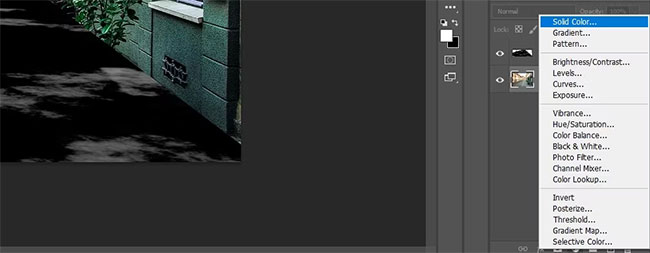
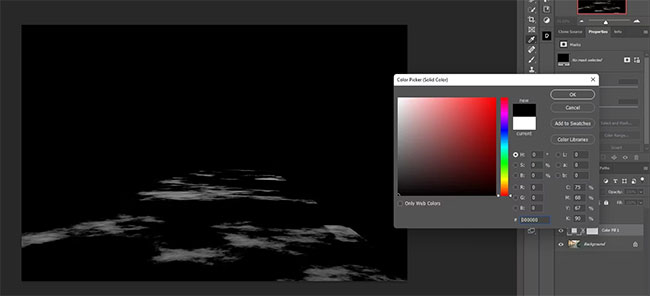
2. Select black in the Color Picker menu and press OK.
3. With the top layer selected, create a Curves adjustment layer.
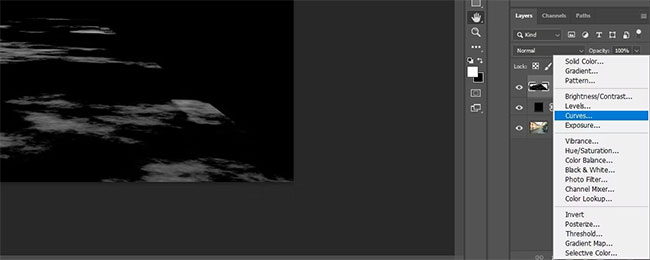
4. Move the White slider to the left until the puddles are almost white. Use Histogram as a reference.
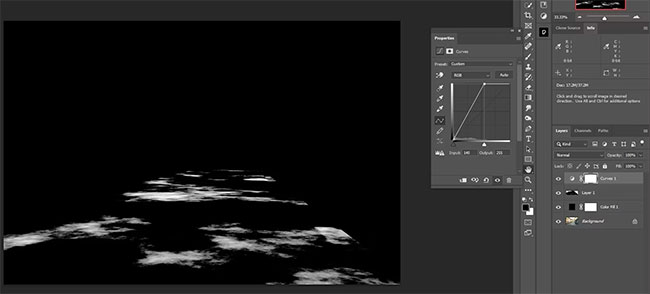
5. Select the top layer and click on the Color Fill layer to select the top 3 layers. Press Ctrl + G to group them into a folder.

6. Double click on the Folder layer name and rename it Map.

7. Go to the Channels tab.

8. Press Ctrl + Click the RGB channel to make a selection. This will be used to select the brightest areas of the puddle map.
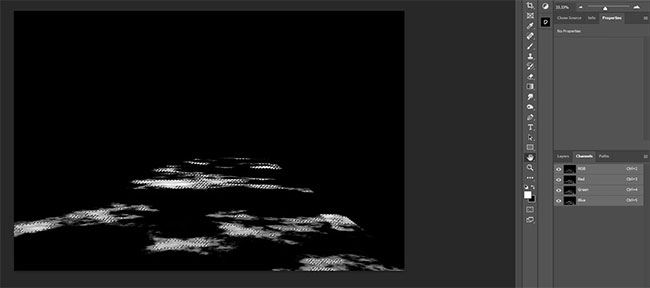
9. Click the Mask icon in the bottom right corner of Photoshop to create an Alpha Mask.

10. Select the Layers tab.
11. Press Ctrl + D to deselect the puddle map.
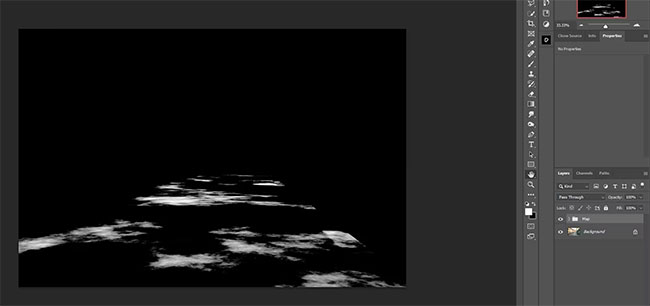
12. Turn off Map folder to show only the original image.
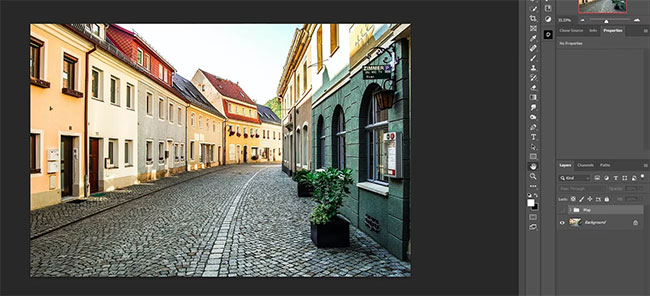
Now you are ready to move on to creating real puddles.
Step 3: Create a puddle
In this step, we will quickly select the path again using the Polygonal Lasso tool. Then duplicate the Background layer, invert it to create puddles and reflections from the buildings. Then load the previously saved Alpha map selection and create a mask with it.
1. Select the Polygonal Lasso tool.
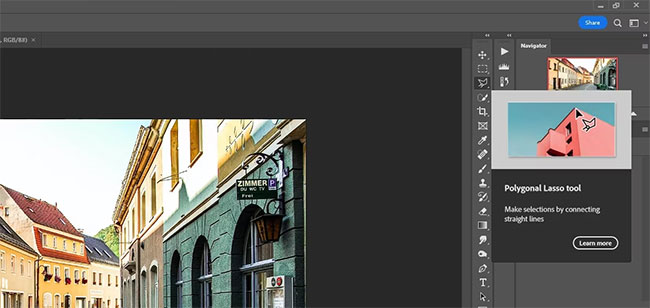
2. Create points around the entire path to make a selection for it. Make sure to close the selection by clicking the first point at the end.
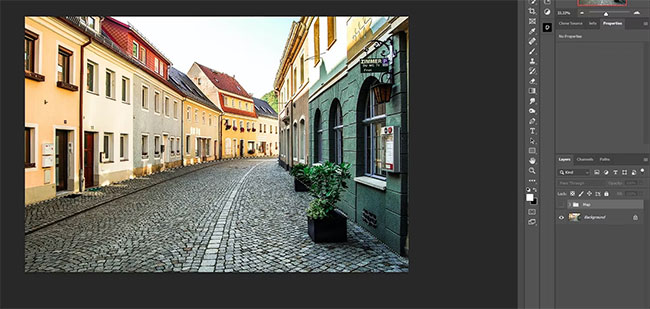
3. Duplicate the Background layer and its selection by dragging it down to the Create New layer (+) icon .

4. Click the Mask icon in the bottom right corner in Photoshop.

5. Double-click the Background copy name . Name the duplicate layer Reflection.

6. Click the chain icon to unlink the Reflection layer’s mask.

7. Press Ctrl + T to select the Transform tool.
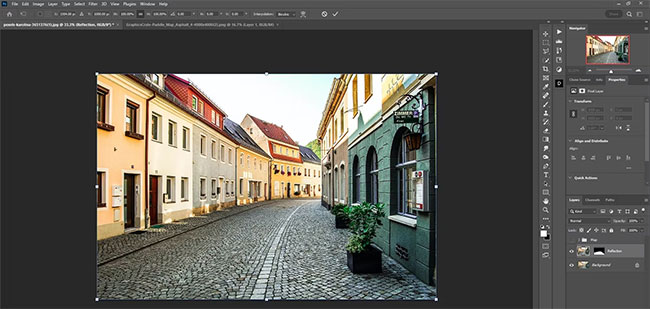
8. Right click on the image and choose Flip Vertical.
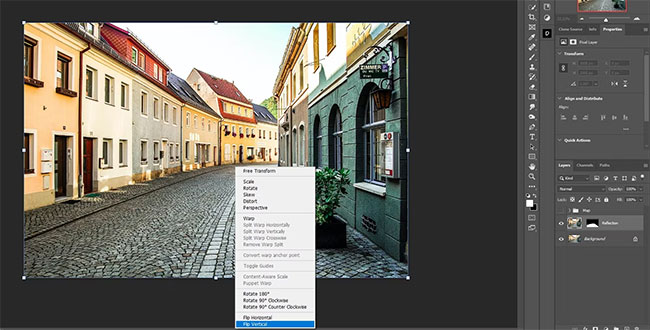
9. Use the mouse to adjust the image so that the far doors mirror each other. Then press Enter or the check mark at the top.
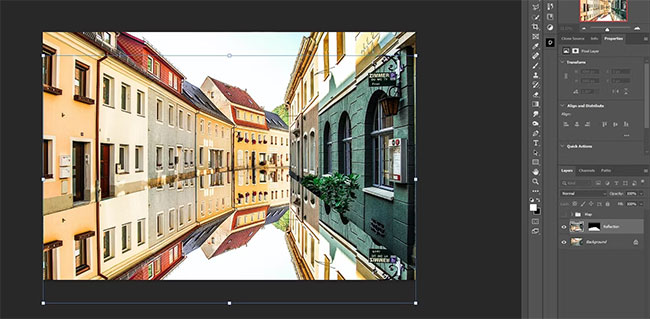
10. With the Reflection layer selected, press Ctrl + G to group the layer.
11. Go to Select > Load Selection.
12. Select Alpha 1 and press OK.
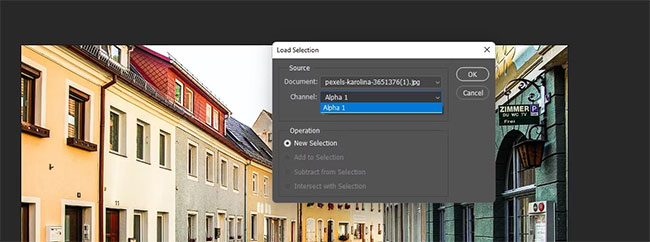
13. Click the Mask icon.
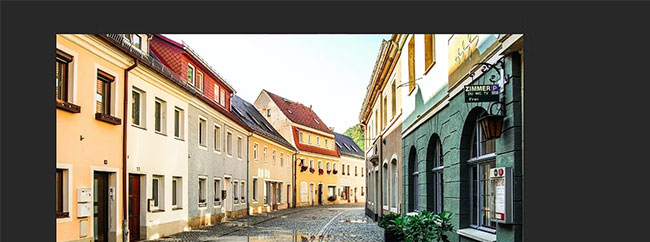
14. Name the new folder Puddles.

We just created the basic puddles. You will notice that there are a few overlapping puddles accompanied by some plants and other areas where you may not want that puddle. We will hide these trouble areas in the next step.
Step 4: Refine the puddles
At first glance, the puddles appear to be close enough to be fine. But in this step we will add a Gradient Map so that the reflected colors have some of the same color properties as the ground. We’ll also add a blur to the puddles, lighten them, and add some Vibrance to bring out the colors a bit more.
1. Open the Puddles Folder and select the Reflection layer. Create a Gradient Map adjustment layer.
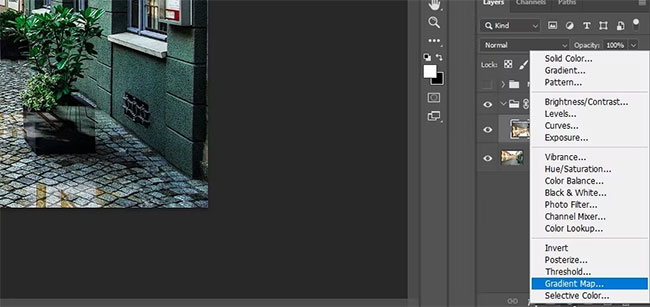
2. Double-click the Gradient Map to open the Gradient editor.
3. Click the box on the right and choose Color. Then choose a lighter part of the sidewalk. Then press OK.
4. Repeat the process for the left box. But this time, choose a darker part of the sidewalk. Click OK to close the dialog boxes.
5. Lower the Opacity to add a little color back to the puddles. The example reduced it to 20%.
6. With the Gradient Map selected, create another Curves adjustment layer .
7. Move the right handle to the left to lighten the puddles as shown.
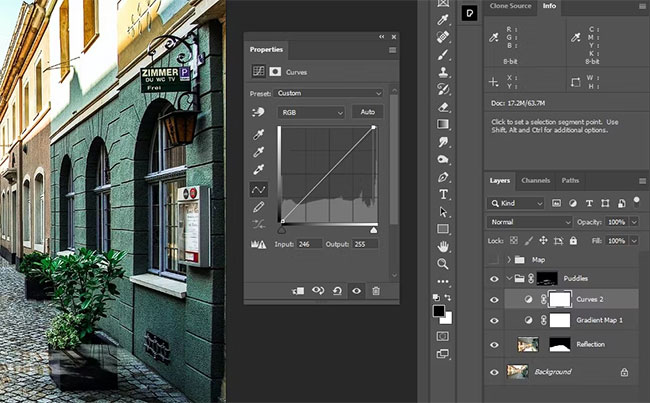
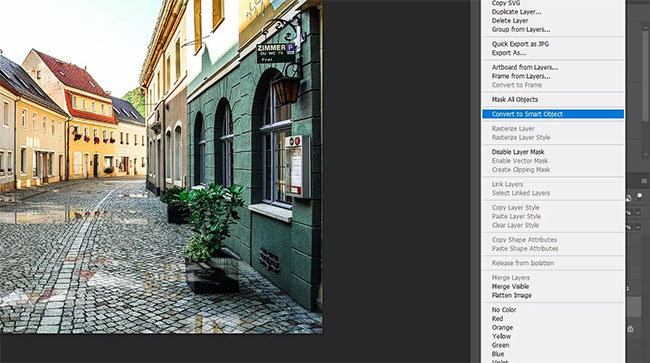
8. Select layer Reflections layer. Right click and select Convert to Smart Object.
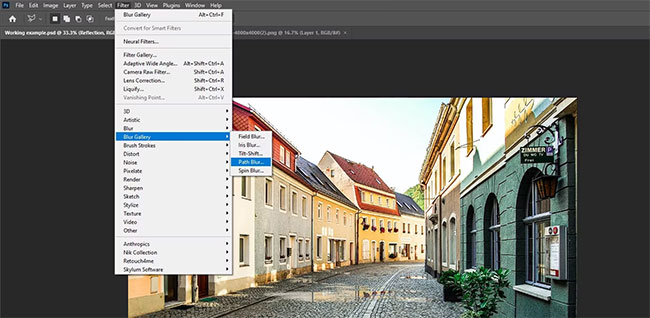
9. Go to Filter > Blur Gallery > Path Blur.
10. Drag the arrow so that it points down as shown.
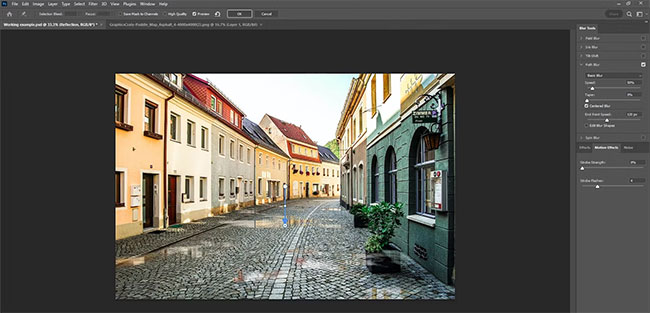
11. Change Speed to 100% and Taper to 20%. Click OK.

12. Select the Curves layer in the Puddles Folder. Create a Vibrance adjustment layer.
13. Increase Vibrance to bring out the colors in the puddles. Selected example +85.
14. Click on the Puddles layer mask.
15. Press B for the Brush tool. Then choose a soft round brush from the brush menu at the top.
16. Toggle the D and X keys to make the Foreground color black.
17. Wipe out puddles on trees and other unnatural looking areas. If you’re not familiar, Quantrimang.com has a beginner’s guide to the Brush tool .
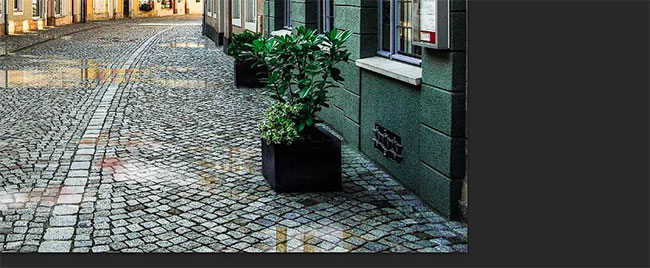
The article made some adjustments to refine the look of the puddles. Naturally, there are plenty of other options in Photoshop if you want to take the creative steps even further.
Hopefully you’ve found the joy of creating puddles from scratch in Photoshop.
Although this is one of the more advanced tutorials, you will find that with a little practice, these steps are completely doable in a short amount of time to make a puddle reflection in Photoshop. Try with one of your own pictures!
Good luck!


