How to check DNS speed using cmd
What is DNS?
The Domain Name System translates human-readable website names into IP addresses. When entering a website name in the browser address bar, the browser sends that name to the DNS server. The DNS server helps to route the request to the appropriate IP address of that website.
Every website has an IP address, but the IP address of each website is a long string of numbers, and unless you have a great memory, you won’t be able to remember the IP addresses of every website you want to visit.
When the network provider configures the Internet connection, they usually set it to use their default DNS. Your Internet service provider’s default DNS settings aren’t bad, but there are some connectivity issues and occasional DNS Resolution issues. Furthermore, you are free to use one of the free DNS alternatives.
You want to use fast and stable DNS. There are some DNS that provide extra security and privacy features. To find the fastest DNS option, try one of the following free DNS speed test tools. And if you choose a service you like, you can change DNS.
1. NameBench
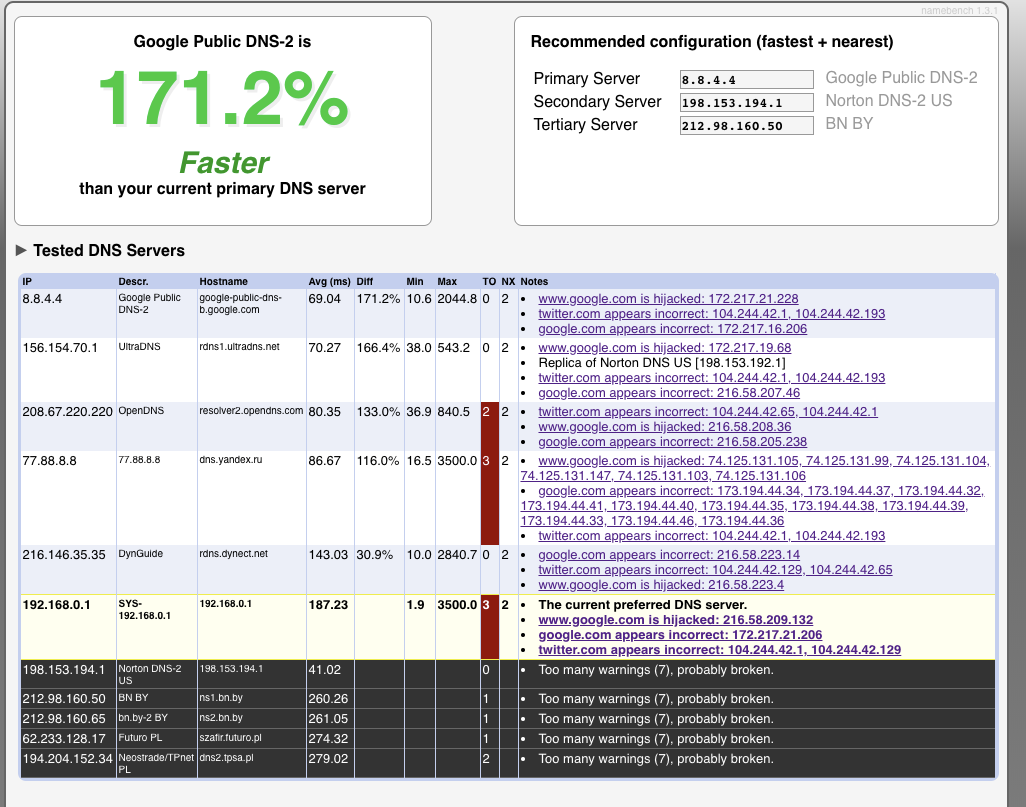
NameBench is an open source portable application (no installation required, you can run it from USB flash ) that works on Windows, macOS and Linux distributions. It runs a DNS benchmark test on a computer using Internet browser history or a standardized test dataset. The NameBench DNS test then returns the fastest DNS settings for your current location and connection.
Go to the NameBench code repository and download the latest version of the tool for your operating system. Note, NameBench stopped developing in 2010, so the release date is correct.
How to use NameBench
Before running NameBench, close all applications that use the Internet connection. Closing programs that use an active connection can falsify DNS NameBench test results.
Open and extract NameBench. The name servers you see are the DNS servers you are using. Leave the default NameBench setting, then click Start Benchmark. DNS NameBench check will take 10 to 20 minutes.
After completing the DNS NameBench speed test, your browser will launch to display the results. The box at the top left shows the fastest DNS server for your current connection. You can also scroll down the results page to see a DNS speed comparison chart.
2. GRC Domain Name Speed Benchmark
https://www.grc.com/files/DNSBench.exe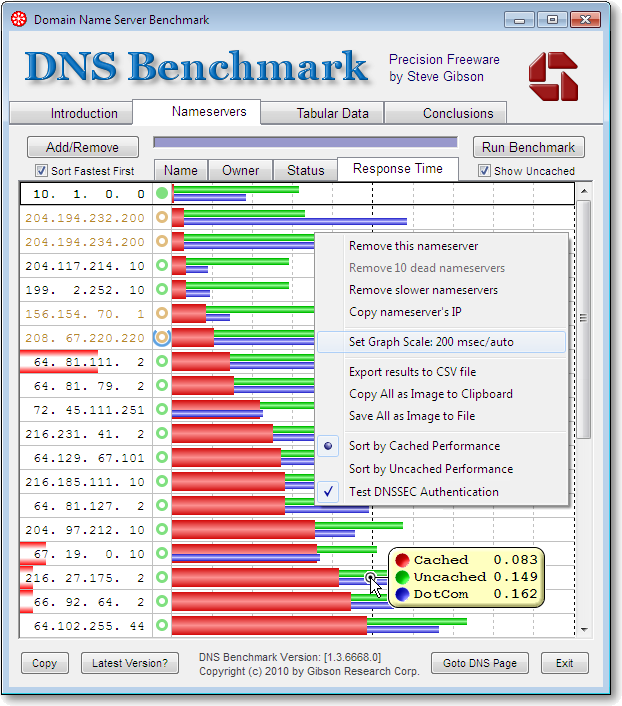
The Gibson Research Corporation Domain Name Speed Benchmark tool provides a detailed analysis of the optimal DNS settings for your connection. Like NameBench, you can run DNS Benchmark from USB flash without installation. It is only available for Windows, but has no support for macOS or Linux.
How to use DNS Benchmark
One thing that users love about DNS Benchmark is the constantly updated DNS list. When testing DNS speed, you will see the server with the fastest speed will be at the top of the list.
Download and open the DNS Benchmark, then select the Nameservers tab. Let the DNS Benchmark update the list, then select Run Benchmark . The first run only takes a few minutes. However, at the end of the first DNS speed test, DNS Benchmark advises you to create a custom DNS benchmark list for DNS test results that accurately reflect your system and connection.
Building the custom list took about 37 minutes. But the result gives a clearer picture of the fastest DNS for your system.
3. DNS Jumper
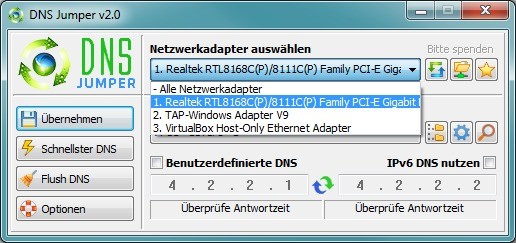
At first glance, DNS Jumper seems to be a more basic DNS speed test tool. However, once you start using DNS Jumper, you will get it with many of the same features as NameBench and DNS Benchmark. For example, DNS Jumper completes the fastest DNS check and is also portable.
Regarding DNS speed, DNS Jumper has the option to scan and choose the fastest DNS. Once the DNS speed test is over, you can choose an option, then use the built-in Apply DNS button to use those settings. The DNS Jumper Checklist has some limitations and favors US-based DNS providers.
How to use DNS Jumper
First, select your network adapter from the drop-down list. If you don’t know which network adapter to choose, in the Start menu search bar, enter view network status and select the most appropriate result. Select Change adapter settings from the left column. One of the network adapters will have your current connection’s name under the adapter type. Make a note of the name and select the corresponding hardware in the DNS Jumper drop-down list.
Once the hardware is configured correctly, select Fastest DNS. On the new window that appears, you will see several DNS speed tests, select all then click Start DNS Test. DNS Jumper doesn’t take long to check, when it’s done, you can use DNS Jumper to update the settings for your connection automatically.
Using one of the DNS speed test tools above will help you find the best DNS settings for your connection. NameBench and GRC DNS Benchmark provide the most thorough tests and will give you the most accurate answer about DNS speed.
How to check speed of DNS server
Test DNS Speed with nslookup command
The best way to test DNS speed is using nslookup command. It performs a name resolution against a DNS server. This command is available on Linux and Windows systems. It can display the time it takes for the name resolution with Windows’ powershell.![]()
powershell “Measure-Command { nslookup www.google.com }”
Now, this outputs on my system.
Non-authoritative answer:
Days : 0
Hours : 0
Minutes : 0
Seconds : 0
Milliseconds : 31
Ticks : 317898
TotalDays : 3,679375E-07
TotalHours : 8,8305E-06
TotalMinutes : 0,00052983
TotalSeconds : 0,0317898
TotalMilliseconds : 31,7898
If we need to specify the DNS server like 8.8.8.8, we can use this command powershell “Measure-Command { nslookup www.google.com 8.8.8.8 }”
On Linux, we can run this command time nslookup www.google.com get the DNS resolution time.
time nslookup www.google.com
Server: 64.104.76.247
Address: 64.104.76.247#53
Non-authoritative answer:
Name: www.google.com
Address: 142.250.4.147
Name: www.google.com
Address: 142.250.4.106
nslookup www.google.com 0.00s user 0.03s system 5% cpu 0.571 total
Test DNS Speed with Dig command
The command dig is a tool for querying DNS nameservers for information about host addresses, mail exchanges, nameservers, and related information. This tool can be used from any Linux (Unix) or Macintosh OS X operating system. The most typical use of dig is to simply query a single host.
To use a specific DNS server for the query, use the @ option. For example, the following dig command performs a DNS lookup on the example.com domain using an OpenDNS server (which has IP address 208.67.222.222):
dig @208.67.222.222 example.com
By default, dig displays the A record for a domain. To look up a different DNS record, add it to the end of the command. For example, to look up the MX (mail exchanger) record for the example.com domain, type the following command:
dig example.com MX
Query time shows how long it took to get the DNS response back from the server, which is listed on the next line.
Dig displays a QUESTION SECTION (the request) and an ANSWER SECTION (what the DNS server sends in response to the request). In this case, we used the default options for dig, which simply looks up the A record for a domain. From this, we can see that example.com currently points to IP address 93.184.216.119.
user@localhost:~$ dig example.com
; <<>> DiG 9.8.4-rpz2+rl005.12-P1 <<>> example.com
;; global options: +cmd
;; Got answer:
;; ->>HEADER<<- opcode: QUERY, status: NOERROR, id: 46803
;; flags: qr rd ra; QUERY: 1, ANSWER: 1, AUTHORITY: 0, ADDITIONAL: 0
;; QUESTION SECTION:
;example.com. IN A
;; ANSWER SECTION:
example.com. 2424 IN A 93.184.216.119
;; Query time: 12 msec
;; SERVER: 192.168.0.1#53(192.168.0.1)
;; WHEN: Thu Jan 9 16:07:09 2014
;; MSG SIZE rcvd: 45
$ dig @8.8.8.8 www.howtouselinux.com | grep “Query time:”
;; Query time: 15 msec
$ dig @4.2.2.1 www.howtouselinux.com | grep “Query time:”
;; Query time: 289 msec


