How to Record Windows 10 Screen Without Software. You are using a Windows 10 laptop, and you want to record videos of your computer screen to make tutorial clips, and share videos of classic scenes when playing games without taking too much time to set up. TheArtCult will show you 5 effective and simple ways to record Windows 10 computer screens. In addition to the guide to recording laptop screens without software, we will introduce more professional video recording software that can capture sound.
How to Record Windows 10 Screen Without Software
Step 1:
Would you like to record your computer screen without downloading more software? Rest assured, because Windows 10 has already supported you with the very convenient Game Bar tool to fulfill the above requirements. In any window, press Windows + G to open Xbox Game Bar tool.
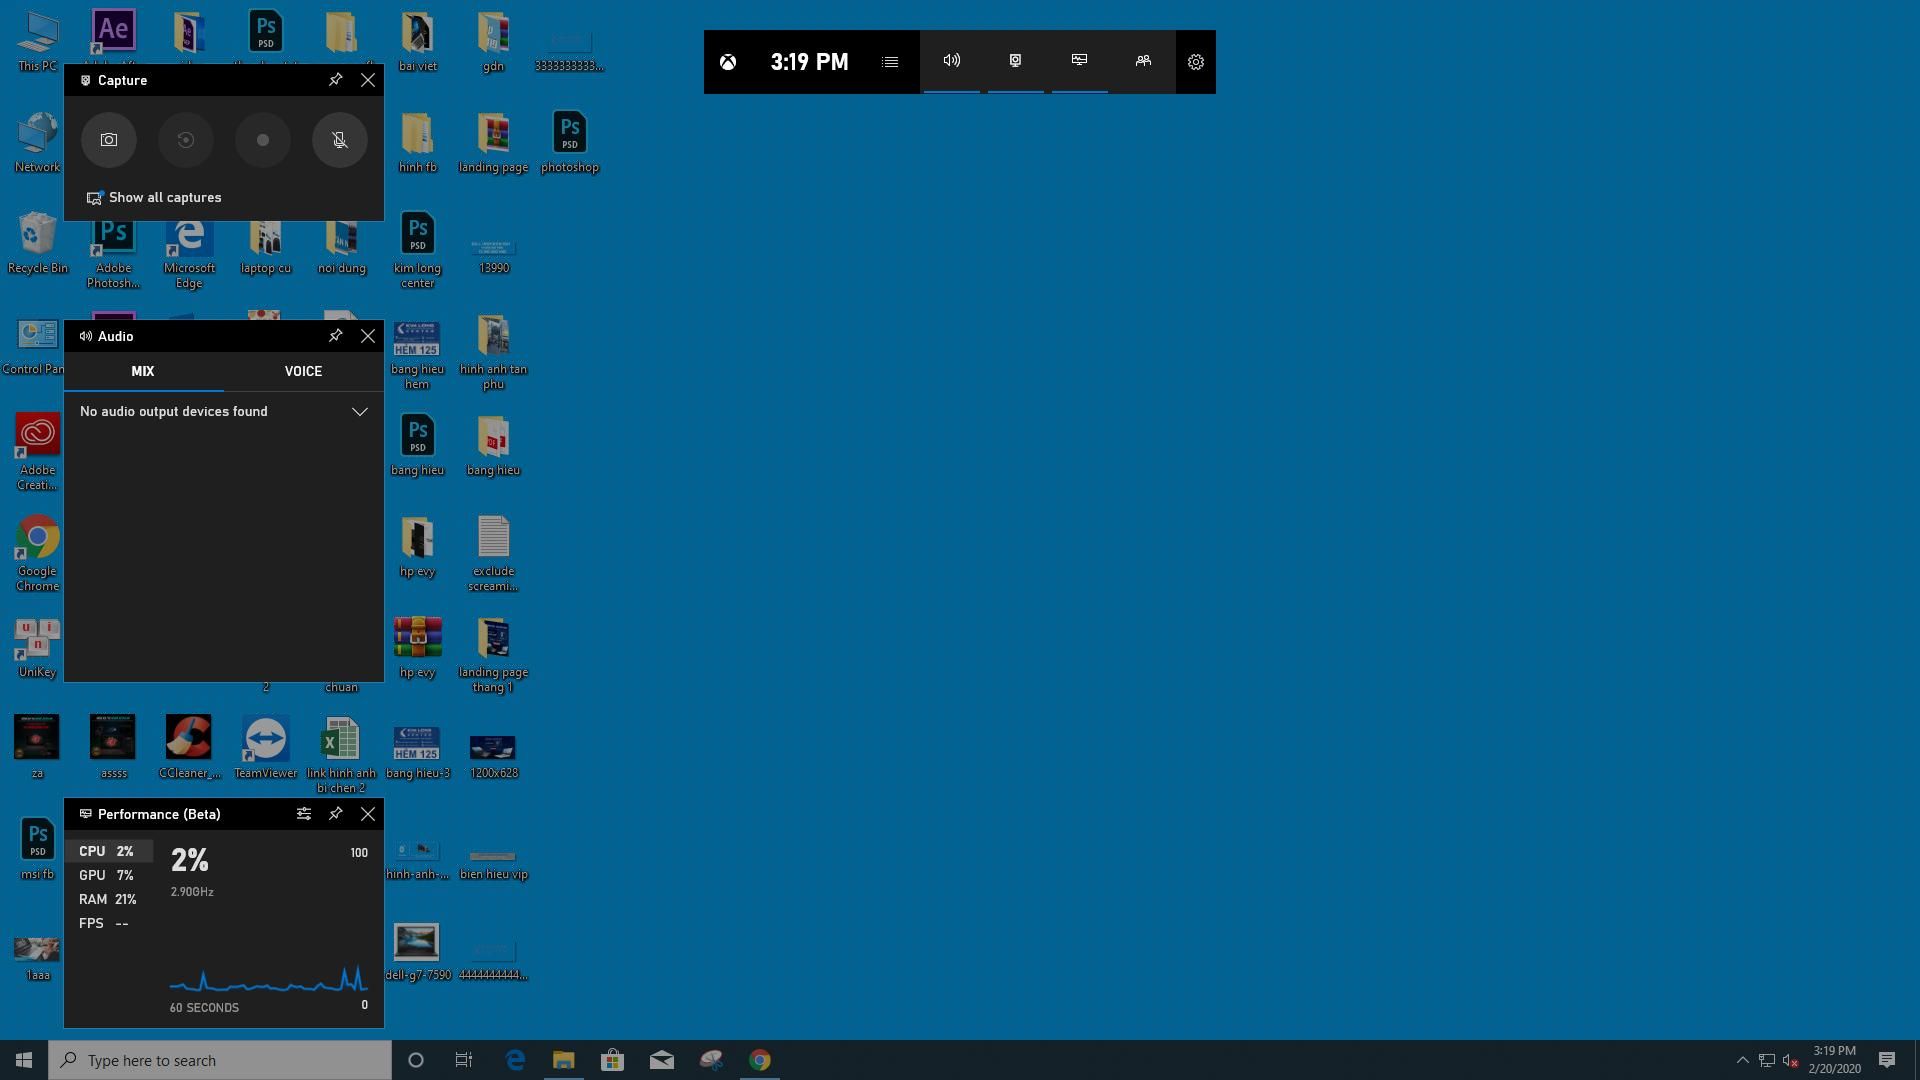
Game Bar on Windows 10
In the upper left corner of the screen, you will see a toolbar like this:
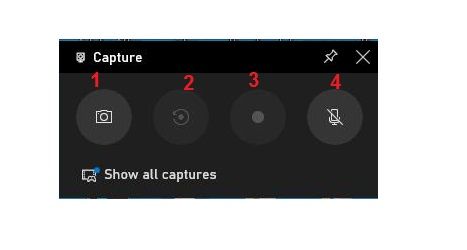
Screen recording support buttons
Inside:
1: Take a screenshot of the device.
2: Export the video back to the previous 30s screen.
3: Return to the device screen.
4: Turn on / off the microphone while recording the screen
** Quick rotation: Press the Windows + G combination> Click the dot icon to record> Click the square button if recording is finished or want to stop recording.
Step 2:
Edit some settings in Settings (can be omitted if not needed).
Click the cog icon to enter the Settings section.
Under General, click on “Edit more preferences in Windows Settings”
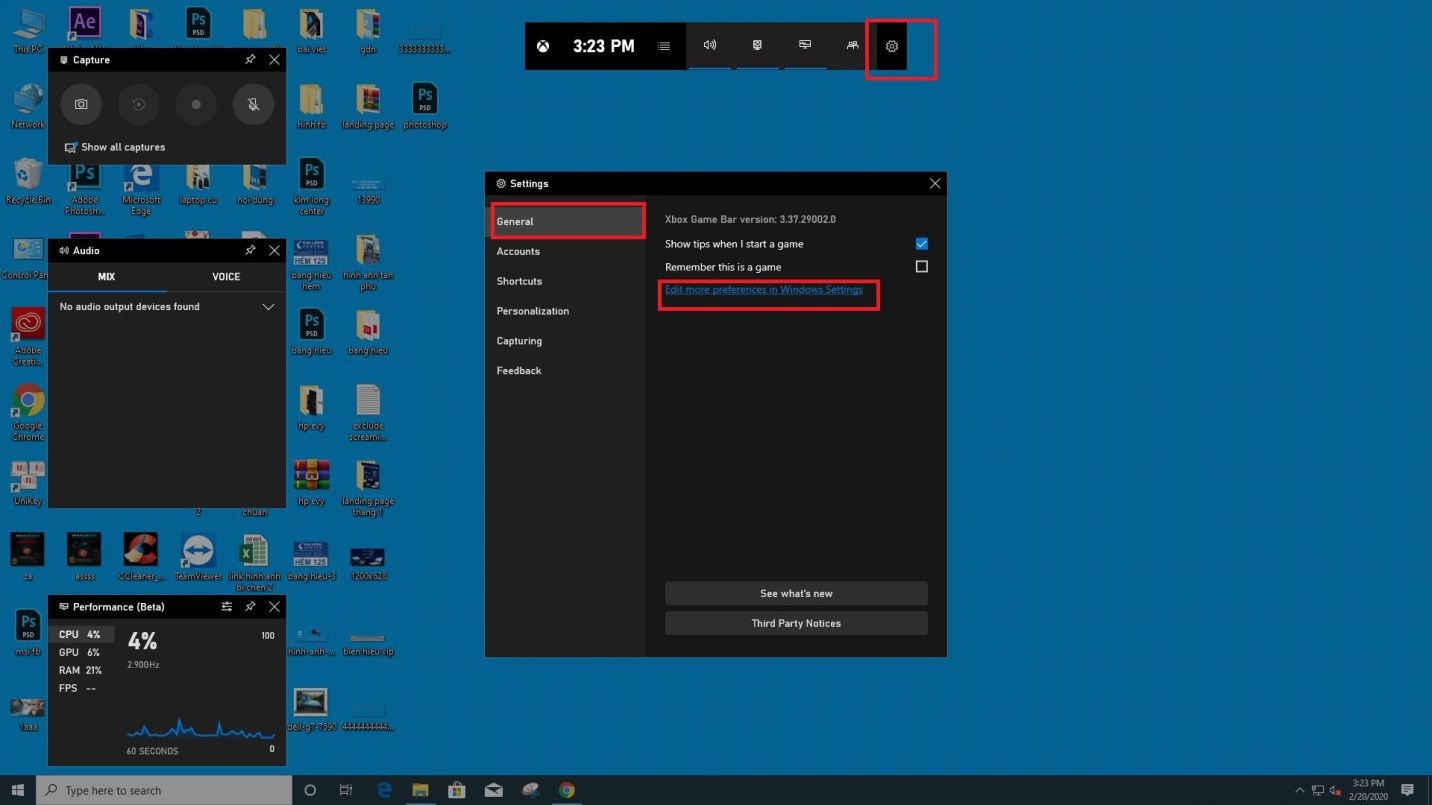
Click on Settings
A new window will appear as follows:
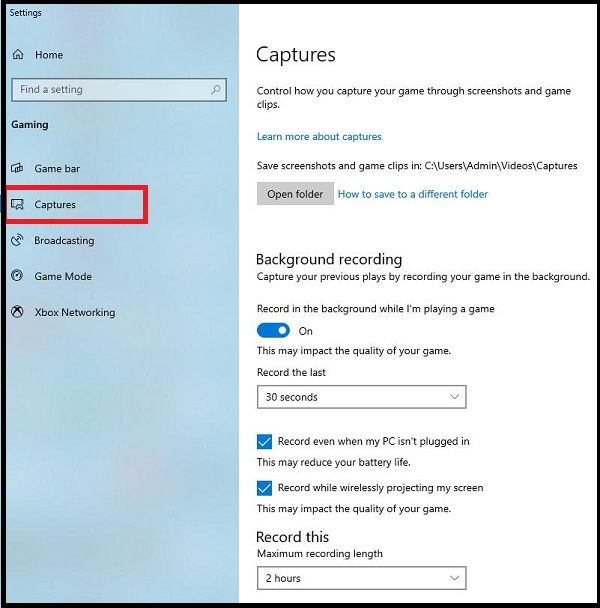
Adjust screen recording time, quality, …
Here you can adjust the maximum time when recording a video of the computer screen win 10, turn on / off the sound while recording the screen as well as choose the sound quality.
Step 3:
View / customize keyboard shortcuts (can be omitted if not needed).
In the Shortcut section , you will see default shortcuts for many different operations. Here you can also change the shortcut to suit your usage habits (or you can customize it in Xbox).
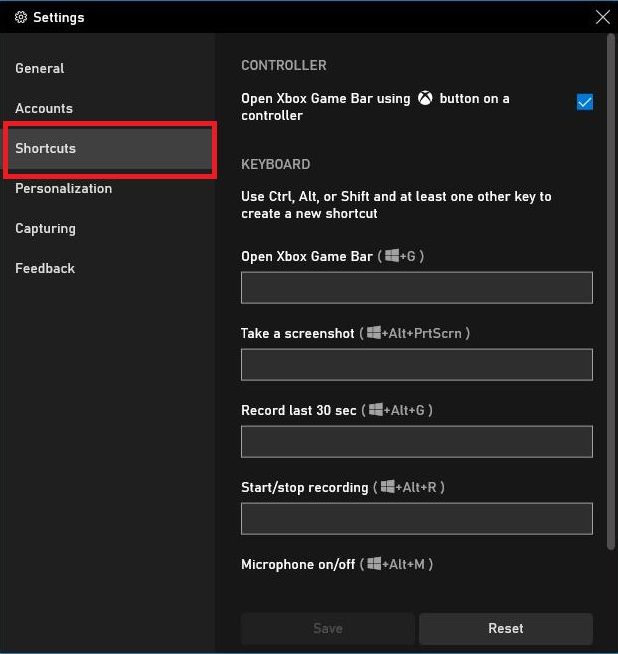
View or adjust keyboard shortcuts
Step 4:
How to record the computer screen Win 10
To return to the Windows 10 computer screen, just click on the 3rd icon of the first frame.
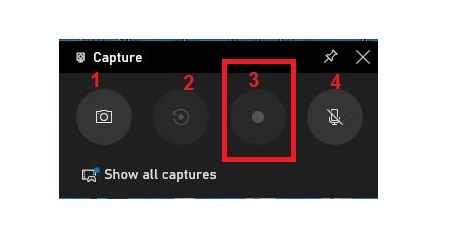
Computer screen recording
Or use the key combination Windows + ALT + R. If you want to finish, just press this key combination again and you’re done.
When the recording is completed, the system will automatically save your video to the folder in the C drive with the following path: C: UsersAdminVideosCaptures.
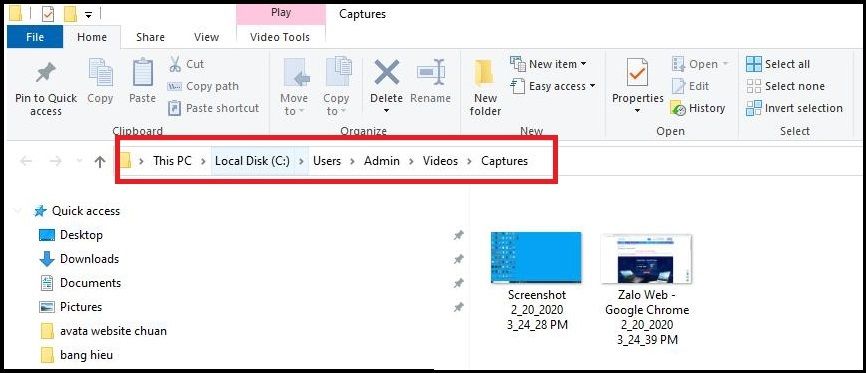
Path to save video screen recording Windows 10
To see the recorded pictures and videos quickly, you can click on “Show all my pictures” to view them again.
To see more details in the root directory, click on the folder icon as shown below:
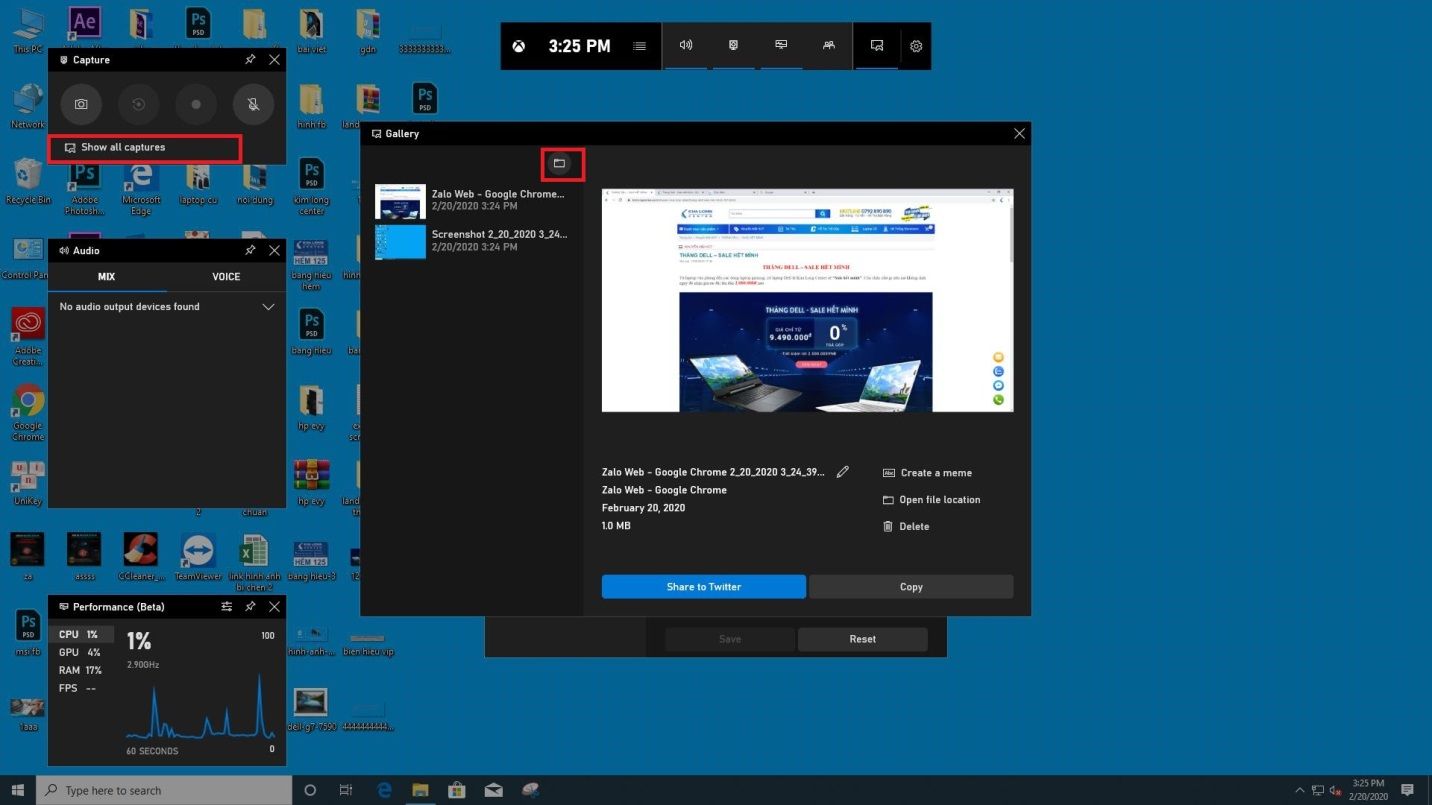
The root directory
We have just introduced to you the very simple guide to Record Windows 10 Screen Without any Software. Hopefully, with the above details, you can record your Window 10 computer screen for your work.
The advantages and disadvantages of the above screen recording method
This is a way that has many advantages, but it also has certain disadvantages. And this way is suitable for basic computer screen recording needs without editing.
Advantages:
- No need to install any additional screen recording software.
- The operation of recording and stopping the recording is very simple, just the Windows + ALT + R key combination.
- The video quality is good, corresponding to the resolution of the screen.
- Apply on any computer with Windows 10, Win 11, laptop or desktop.
Defect:
- Video editing features are not integrated, if you want to edit, you must use other software.
- Only one application window can be recorded.
- If you return to the laptop screen, the application will stop recording.
SEE MORE: https://theartcult.net/could-not-use-move-tool-because-the-target-channels-is-hidden/
How to add Google Drive to File Explorer navigation pane in Windows 10


