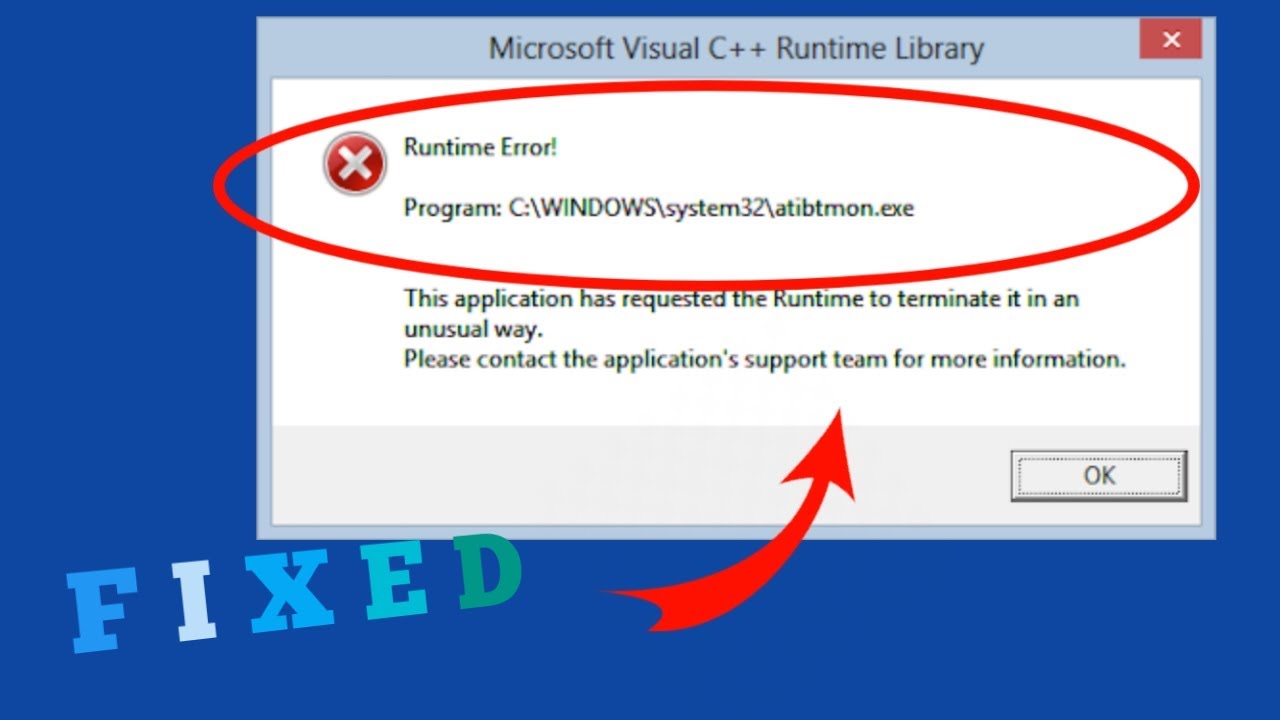
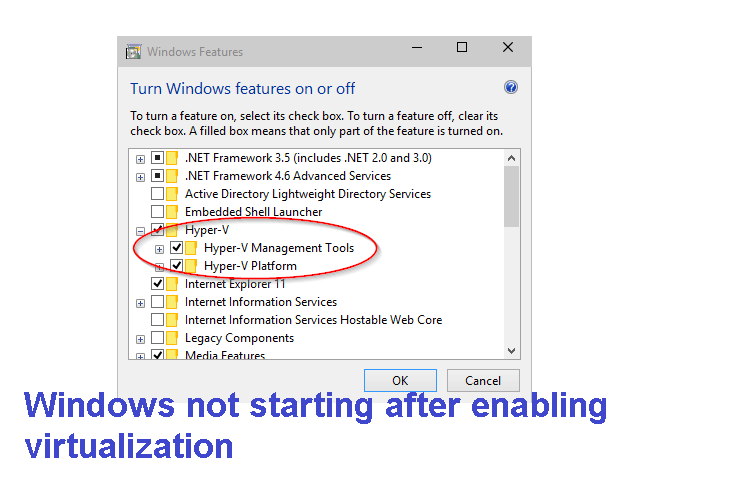
Windows not starting after enabling virtualization. Hyper-V helps you run virtual machines on Windows. However, after enabling Hyper-V, you cannot start Windows 11 again? Here’s how to Fix Windows not starting after enabling virtualization.
Reasons for Windows not starting after enabling virtualization
Windows 11 may fail to start after enabling Hyper-V for a variety of reasons. Some common causes for Windows not starting after enabling virtualization are as follows:
- A third-party application may prevent Windows 11 from starting if Hyper-V is active.
- The Hyper-V system file is missing or has been corrupted.
- You haven’t updated Windows 11 in a while.
How to fix Windows not starting after enabling virtualization
Since you can’t boot to the desktop anymore, you’ll need to use the Windows 11 Repair tool. You will have to create Windows 11 bootable installation media on a flash drive (USB). Furthermore, you need to use a different system for this process. For more details, see the instructions on how to create a bootable USB to install Windows .
1. Uninstall conflicting apps
IBM Trusteer Rapport is a well-known application that causes problems when enabling virtualization. Many people prefer to use Trusteer Rapport to protect their systems from malware and phishing attacks related to the financial sector. However, you will have to uninstall it and let Windows 11 boot normally with Hyper-V enabled.
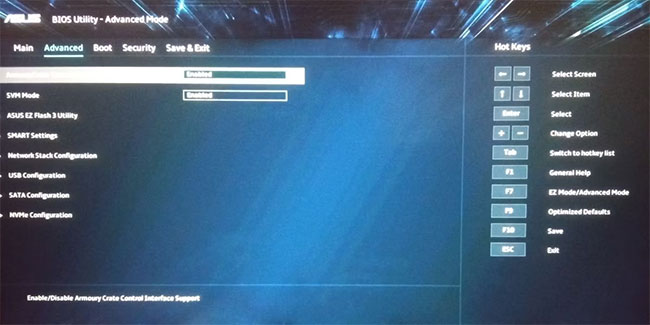
Step 1: Insert Windows 11 boot media into your computer. Power on the system and press the specified key to enter the BIOS Setup screen, usually the F12 key , but may be different in your system.
Step 2: Now, press Tab key to go to Advanced Settings. Find the Virtualization setting and disable it. Press F10 to save the changes and then reboot the system .
Step 3: After the system successfully boots to the desktop, press the Win key and search for Control Panel.
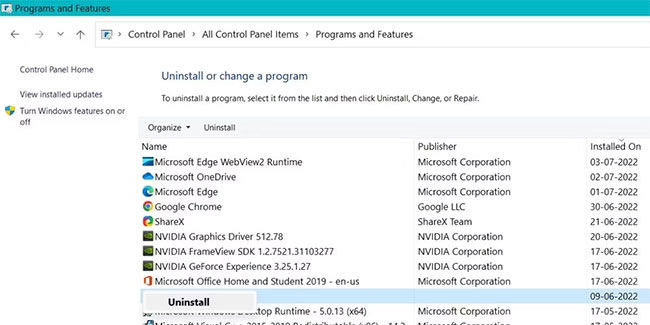
Step 4: Click on the first search result and launch Control Panel . Find the Uninstall a Program feature located under Programs and Features .
Step 5: Then, find the IBM Trusteer Rapport application in the list of installed programs.
Step 6: Right click on it, then click Uninstall/Change option. UAC will appear and confirm your decision.
Step 7: Click OK and then proceed to uninstall. Follow the on-screen prompts to completely remove the program from the system.
Step 8: Reboot the system and press F12 or the specified key to enter the BIOS Setup section. Turn the Virtualization settings back on and save the changes by pressing the F10 key.
Step 9: Now, reboot the system and it will boot to Windows 11 lock screen without any problem.
2. Tweak Startup Settings
Another option is to use the installation media to change the Startup Settings. Using the Command Prompt , you will need to disable an important flag in the BCD. This flag is known to cause Boot Repair Loop errors. After that, the system should boot without problems. To adjust startup settings, do the following:
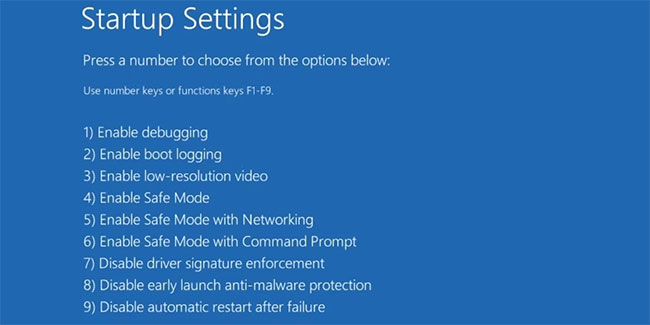
Step 1: Reboot the system and press the designated F key to enter the boot menu. Boot using the installation media and then click on the Repair your computer option.
Step 2: Then select the Troubleshoot option on the next page. Click the Startup Repair option under Advanced Settings.

Step 3: After your system reboots, press F5 to enter Safe Mode with Networking . Then press Win + R to launch the Run command box and type cmd.
Step 4: Press the Enter key and enter the following command into the Command Prompt window:
BCDedit /set hypervisorlaunchtype OffStep 5: Press Enter key. Close the CMD window after the command executes successfully.
Step 6: After that, reboot the system to check if the boot loop problem still occurs.
3. Revert to an older system restore point
If disabling the hypervisorlaunchtype flag in BCD doesn’t fix the problem, try a system restore. This feature allows you to restore Windows to a working time without any problems. Remember that your system must have one or more restore points to perform a system restore .
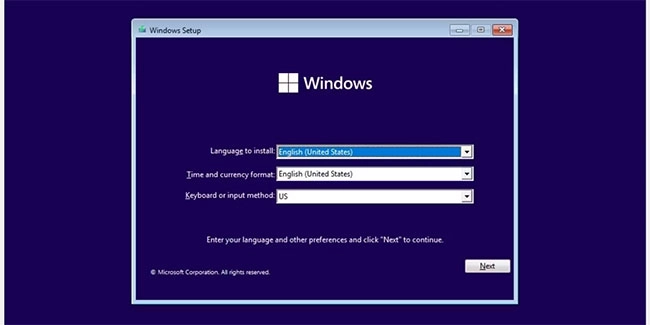
4. Reinstall Windows 11
The last resort is to reinstall Windows 11. The article understands that you may have important documents stored in the C drive. So you can choose the type of upgrade installation. It preserves your files and documents, and replaces Windows files.
To reinstall Windows 11, do the following:
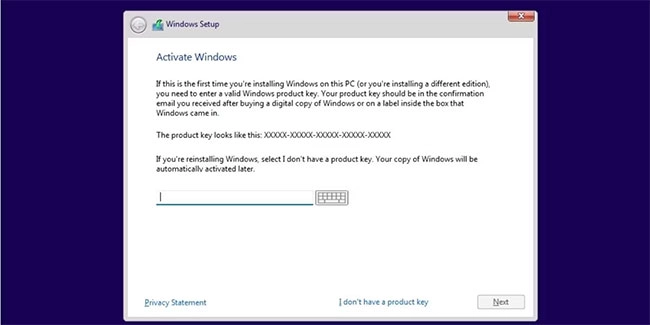
Step 1: Power on your system and press the designated F key to open the boot menu. Select the Windows 11 installation media and press the Enter key.
Step 2: Click the Next button in the Windows 11 setup window. Then click the Install Now button.
Step 3: Enter the product key if you have one. Otherwise, click the I don’t have product key option. Then, select your preferred operating system version (Home, Pro, Enterprise, etc.) and click the Next button.
Step 4: Accept the EULA and click Next. Select the Upgrade option to keep all your files. Then format drive C and select that drive to install Windows 11.
Step 5: Wait for the installation to complete. Your system will reboot several times. Then follow the on-screen prompts and configure Windows settings. You can then access your old system and files.
The most likely cause of the boot loop error is a third party app. Uninstalling it will solve the boot problem in many cases. If that doesn’t work, tweaking the startup settings usually does. Otherwise, system restore or reinstall Windows 11 are the remaining two possible options that you can do.
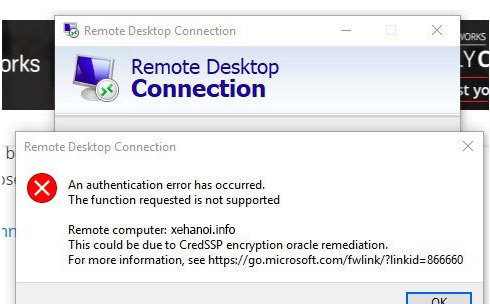
Cannot boot into windows after turning on Intel Virtualization Technology
There might be some conflicting files on your computer which causes the Bluescreen error when you turn on Intel Virtualization Technology. Please follow the steps below and check if it will resolve the issue.
Try to boot your computer in safe mode. Please click on the link below to learn how to boot your computer in safe mode.
https://support.microsoft.com/en-us/windows/sta…
Once in safe mode, Run a system file checker to verify the integrity of windows system files on your computer making sure that there are no corrupted files on your windows.
Perform SFC Scan and Repair Windows Image
-This process will perform scan for any corrupted system files or integrity violation and will attempt to repair it along with the Windows Image.
1. Open command prompt with administrator access
2. Type each command below and wait until scan is completed.
* sfc /scannow
* DISM /Online /Cleanup-Image /CheckHealth
* DISM /Online /Cleanup-Image /ScanHealth
* DISM /Online /Cleanup-Image /RestoreHealth
Quick note: While the command is running, it’s expected to see the process stuck at 20 or 40 percent. After a few minutes, the process will complete successfully.
Once you complete the steps, the Deployment Image Servicing and Management tool will connect to the Windows Update servers to download and replace any damaged files in the local image for Windows 10 as necessary.
3. Close the command prompt.
Perform Clean Boot
– This process will eliminate 3rd party application running in the background of your computer along with services that are not needed to run windows. If there’s any conflicting 3rd party application that causes the issue on your computer, this process will stop it.
1. Open the run box by pressing the Windows Key + R and type msconfig
2. System Configuration Utility box will open and by default you are on general tab.
3. On the General tab, click the selective startup and make sure that load system service and load startup items both have checked mark.
4. Click on services tab
5. Put a check mark on Hide All Microsoft Services > This is a very important part as if you miss to click on this, computer might not boot properly or permanently and will end up on clean installation.
6. Once Hide all Microsoft Services have checked mark on it, click on Disable All
7. Click on the Startup Tab and click open task manager. This will open another window which contains all your startup applications on the administrator account.
8. Disable all application that you’re not using. You can simply just click on them and select disable.
9. Click OK , Apply and close the configuration utility
Restart your computer and check if it will allow you to boot your computer normally.
If the computer won’t boot to safe mode with networking, you can try and perform system restore. This process will take your computer settings back to an earlier point in time where computer is working fine. If there’s any changes made on your computer that removes the service, system restore should be able to fix the issue for you. To perform system restore please follow the steps below:
On the Advanced Options, select
Troubleshoot > Advance Options > Command Prompt
Once windows opens command prompt, type the below command and press enter
rstrui.exe
1. Once system restore windows open, normally it will suggest a restore point (sometimes it doesn’t) if it does, select the 2nd option and hit next
2. Select your desired restore point date and time and hit next and finish.
Windows will going to restart your computer to initiate system restore. System restore might take several minutes to complete depending on the current speed of your computer and the changes it will made. Applications and updates that was installed on the computer prior to the date selected will be removed. It is important that when system restore starts, process must not be interrupted.
DISCLAIMER:
System Restore is a recovery tool for Windows that allows you to reverse certain kinds of changes made to the operating system. System Restore is used to return important Windows files and settings—like drivers, registry keys, system files, installed programs, and more—back to previous versions and settings. Being said all applications and changes made prior to the date selected will be removed and needs to be re-installed if its needed.
TheArtCult hopes it will be useful for you and solves your problem “Windows not starting after enabling virtualization”.