Fix Processor not compatible with Windows 11. Microsoft seems to be turning a blind eye to a “flaw” that allows users to install Windows 11 on incompatible hardware systems. In recent times, there have been many documented reports of Windows 11 still running (unofficially) on systems that do not meet the hardware requirements from Microsoft.
But of course things can’t go so smoothly. Windows developers have just issued a warning that Windows 11 users on unsupported systems may not be entitled to periodic, or otherwise unsupported, security updates from Microsoft.
Since officially announcing Windows 11, Microsoft has emphasized the necessary requirements that a system must strictly adhere to in order to install a new operating system. However, the main problem lies in the requirements for TPM 2.0 processors and new generation CPUs. This leaves a large number of Windows 10 users on hardware systems that are not too old, but still stuck, unable to upgrade to Windows 11, unless they accept to spend quite a bit more money to upgrade hardware (related to Windows 10). related to CPU and mainboard).
As a simple example, this list of hardware incompatible with Windows includes devices using Intel 7th Gen CPUs and AMD Zen 1. The only exception is the 7th Gen Intel Core 7820HQ CPU, which is the processor used on Microsoft Surface Studio 2 devices. These are obviously hardware components that are not too old, and are still in common use.
In response to a rather harsh response from the user community, Microsoft recently announced that users of older hardware systems can completely bypass the TPM 2.0 requirement by performing a clean install of Windows 11 using the Media Creation Tool. or ISO file.

Check if you can install Microsoft Windows 11 with an unsupported processor
Every PC is different, and the reasons for incompatibility with Windows 11 can vary from system to system. You can even upgrade your Windows 7 PC if it meets all the hardware compatibility requirements.
However, the most common reason why your system doesn’t meet the “minimum system requirements to run Windows 11” is an incompatible processor. Check the list of supported Intel processors from Microsoft and processors list, to see if yours is enabled.
You can verify this by opening Windows Settings and selecting Windows Update in the left menu.
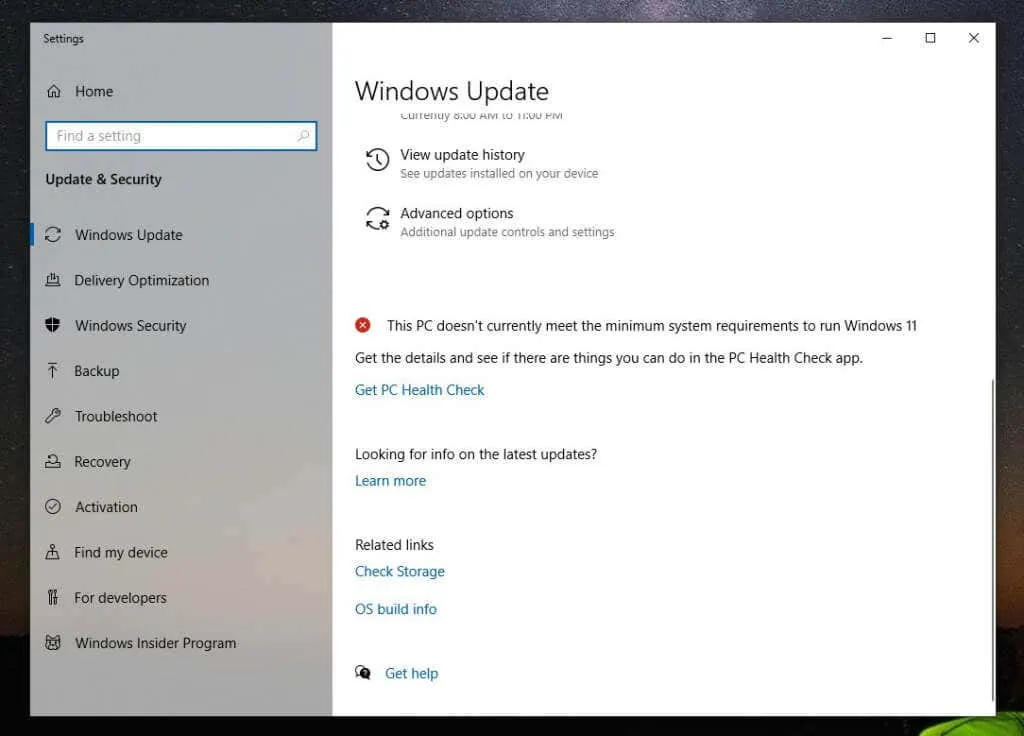
You’ll most likely see a red X next to the message “This PC does not currently meet the minimum system requirements to run Windows 11”.
Run the PC Health Checker Tool
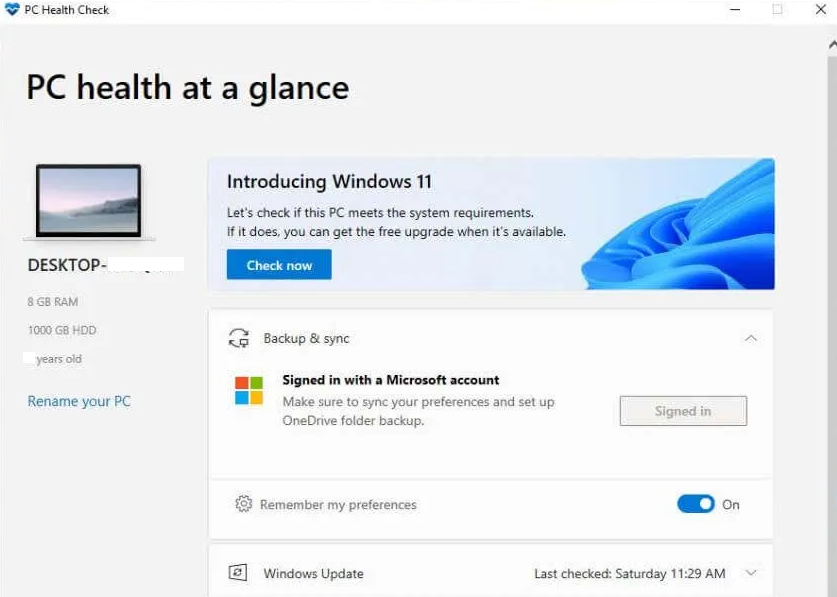
Below it, you’ll see a link to access the PC Health Check app. This tool will scan your PC and tell you the specific reason why your PC is not compatible with Windows 11.
When you launch the tool for the first time, click the “Check Now” button to start scanning.
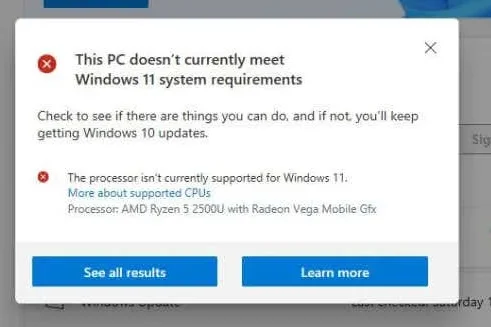
Once done, you will again see a message that your system does not meet the minimum hardware requirements. But this time, it will list the root cause of your system incompatibility.
The root cause of your system could be “The processor is not currently supported for Windows 11”.
If you select See all results, you will see other reasons why your system might not be compatible with Windows 11. This could include TPM 2.0, available RAM, Secure Boot or your CPU. friend.
You can enable secure boot options in the BIOS by changing your PC’s boot mode from Legacy BIOS to UEFI/BIOS. Note that this only happens if your BIOS has this feature.
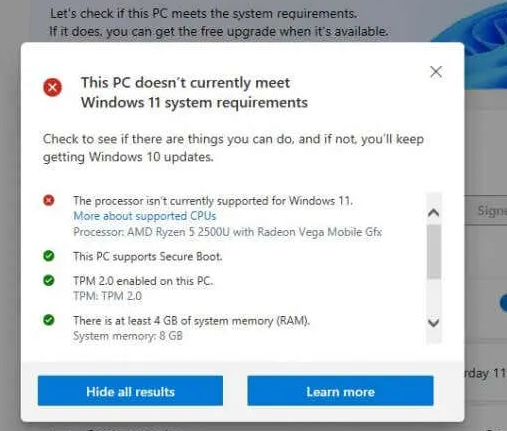
You will also see where your system is compatible. Let’s hope the only reason your system isn’t compatible is the processor and nothing else. Ideally, your system should have at least TPM 2.0 enabled. However, even if you don’t, you can still install Windows 11 if you want.
Record . Most importantly, you will need at least 4 GB of RAM otherwise you won’t be able to install Windows 11 using the solution described in this article.
Should you install Windows 11 on an incompatible PC?
If your system is not compatible with Windows 11 solely because of the processor and no other unsupported hardware, you have the lowest risk of problems upgrading to Windows 11. However, the risk is not is not.
According to Microsoft, anyone who installs Windows 11 on an unsupported PC will not receive the necessary Windows 11 updates.
In addition to this Microsoft states that:
“Installing Windows 11 on this PC is not recommended and may result in compatibility issues. If you continue to install Windows 11, your PC will no longer be supported and will not be able to receive updates. Damage to your PC due to incompatibility is not covered by the manufacturer’s warranty. “
These “damages” could mean a higher chance of a new Blue Screen of Death (BSOD) error or your computer crashing or hanging.
What about TPM 2.0?
If you notice in the list of incompatibilities one of which is the lack of Trusted Platform Modules (TPM) 2.0, you can still install Windows 11. However, you will incur some problems. additional security risks.

The TPM is the physical chip in most modern computers that prevents malware (malware) from running. If TPM 2.0 is not enabled on your computer, this may not mean that your computer does not have this feature. You just need to enable it in the BIOS or buy a TPM module.
Should I still upgrade to Windows 11?
This means there’s nothing stopping you from upgrading to Windows 11 with this guide. However, you will do so at a certain level of risk if you upgrade to this new operating system. Your system may not receive new Windows updates and you may start seeing more BSoD errors.
Many PCs running Windows 10 can start having problems getting new security updates. For example, this author encountered an endless update loop where Windows 10 updates would fail and had to be uninstalled every time the computer was restarted.
In that case, you really have nothing to lose by upgrading to this new version of Windows on an incompatible device and using all the new features. At the very least, it will prevent you from buying a new computer for another year or two.
How to Fix Processor not compatible with Windows 11
How to upgrade to Windows 11 on an incompatible PC
If you’ve decided to upgrade to Windows 11 despite all the warnings from Microsoft, the process is pretty straightforward.
Windows 11 ISO file download
The first step is to download the Windows 11 ISO file from the Microsoft website. Note that this setting is only for computers with 64-bit processors. Also, if you upgrade to a fully licensed Windows 10 PC, you won’t have to worry about any issues activating Windows 11.
- Go to the Microsoft website to download Windows 11. Scroll down to the Windows 11 Disk Image (ISO) Download section, select windows 11 in the drop-down list, and click “Download”.
- Below that, another section will appear to select the language. Select your language and click the Confirm button.
- You should finally see a 64-bit Download button. Select this option to download the Windows 11 ISO file to your hard drive.
Make a registry edit to install Windows 11
Next, you need to add a registry entry to install Windows 11 on an incompatible system.
- Select the start menu, type regedit and select “Registry Editor”.
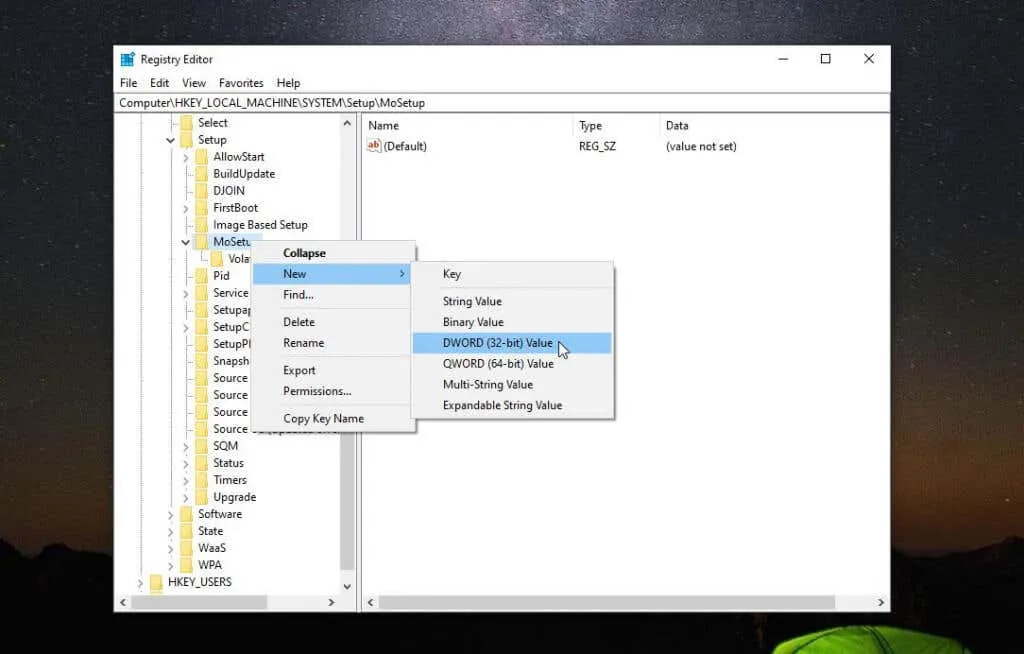
- When the editor opens, go to the Computer folder \ HKEY_LOCAL_MACHINE \ SYSTEM \ Setup \ MoSetup .
- Right click on the MoSetup folder and select “creative »>« DWORD (32-bit) value‘.
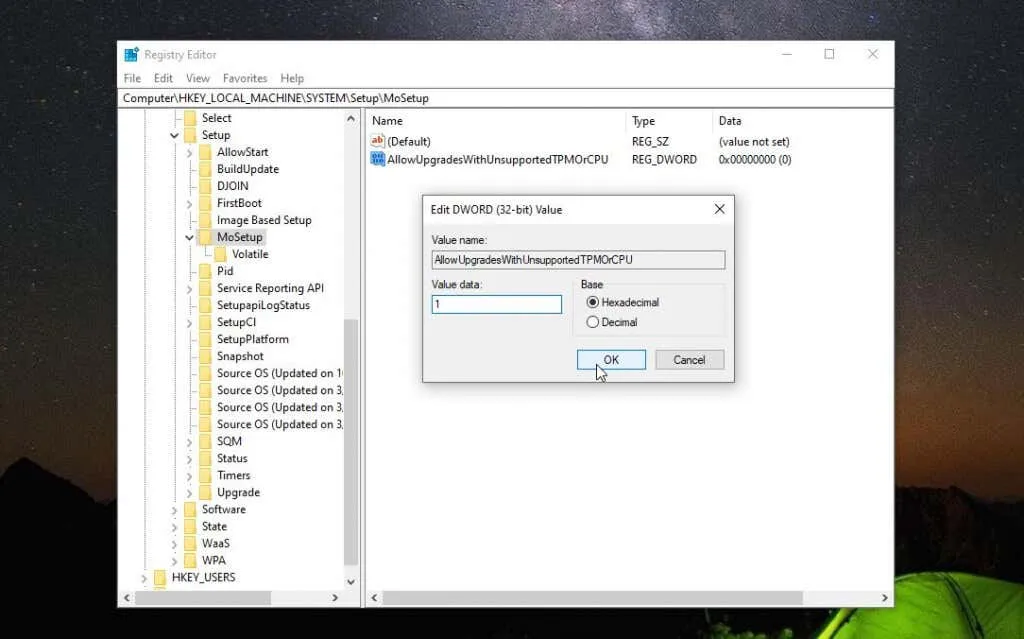
- Name this value AllowUpgradesWithUnsupportedTPMOrCPU. Double-click this new value and enter 1 in the “Value” field. Please select OK when finished.
At this point, you can close the Registry Editor. You are now ready to upgrade to Windows 11.
Install Windows 11 using an ISO file
Once the ISO file is fully downloaded on your computer, follow the procedure below to upgrade to Windows 11.
- Right click on the ISO file and select ‘Connect‘.
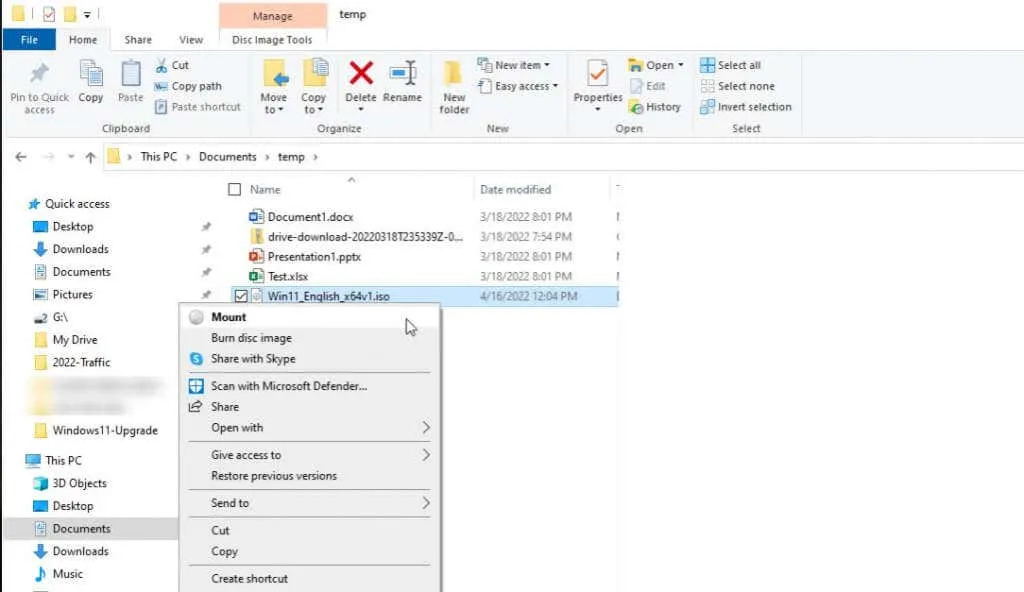
- This will mount the new drive in File Explorer. Select this drive and double-click the setup.exe file .
- This will launch the Windows 11 setup wizard. On the first screen, select Next, to continue.
- Scroll through the notices and license terms and select Accept.
- The wizard will start checking for the latest updates. This may take some time, so be patient.
- You may see a warning message that your computer does not meet the minimum requirements. Since you already know about it, just choose ‘Accept‘.
- The wizard can repeat again to check for updates. Finally, you will see the Ready to Install screen. Just select “Download“, to continue.
- The final phase of the Windows 11 update takes a long time. Finally, the screen will go full screen and the Windows 11 installation will show the percentage complete. The entire installation process can take several hours, so leave your computer turned on and plugged in to keep it powered throughout the process.
Theartcult hopes you can fix the problem with the above guides! Good luck!