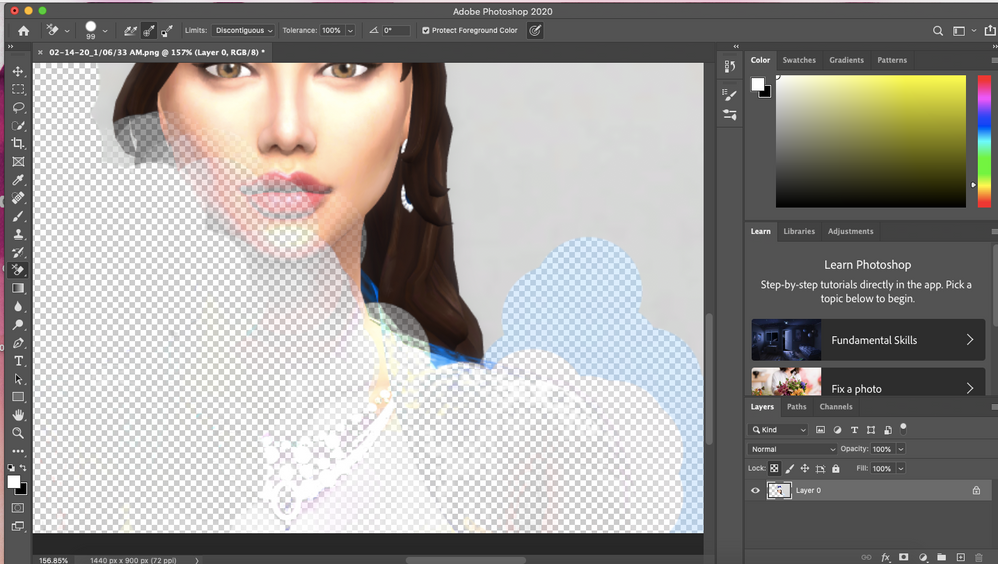
How to smooth edges in Photoshop CS6. One of the first image editing that you want to master is stitching two images together . So you will have to learn how to select an image, remove the background , as well as smooth the hard edges of that selection to make the image look more natural.
Photoshop CC helps with this with the improved Select and Mask feature. Here’s how Select and Mask can help quickly select and smooth the edges of a selection in Photoshop.
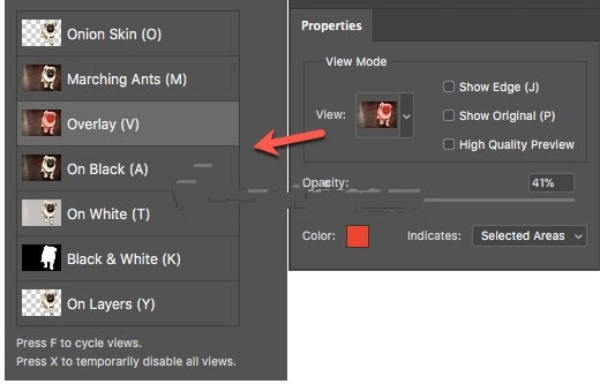
How to extract images with Select and Mask
The new Select and Mask option in the menu takes you to a separate workspace and provides controls to perfect any selection. The workspace also replaces the Refine Edge dialog box in earlier versions of Photoshop:
1. Open the image in Photoshop CC 2018.
2. Go to Select > Select And Mask.
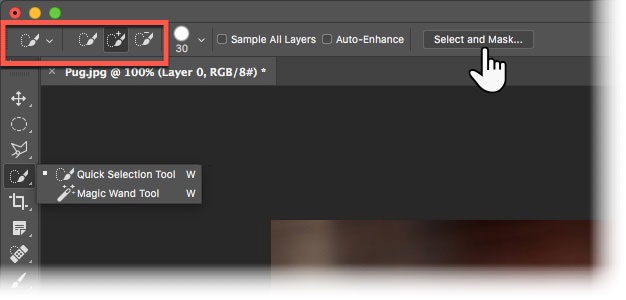
You can also use Ctrl + Alt + R (Windows) or Cmd + Option + R (Mac) as keyboard shortcuts. Or choose a Selection tool like Quick Selection Tool, Magic Wand or Lasso, then click Select And Mask in the Options bar at the top.
3. Now, the Select and Mask user interface will help create precise selections with the tools on the left. The Properties panel on the right will help refine that selection even further.
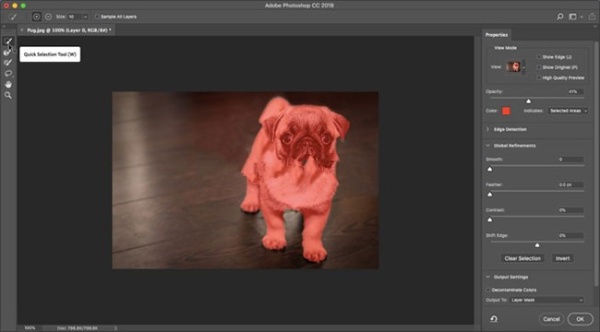
4. View mode options (eg Onion skin or Overlay) will help preview the selection and separate it from the background. Use the Opacity slider to see what to add or exclude from the selection.
5 Select the Quick Selection brush from the Tools panel and click and drag over the area you want to select (No need to be too precise as Refine Edge will take care of the rest).
6. The Refine Edge Brush tool helps to cover blurred areas like hair or fur. Use the bracket keys [ ] to increase and decrease the brush size when making selections.
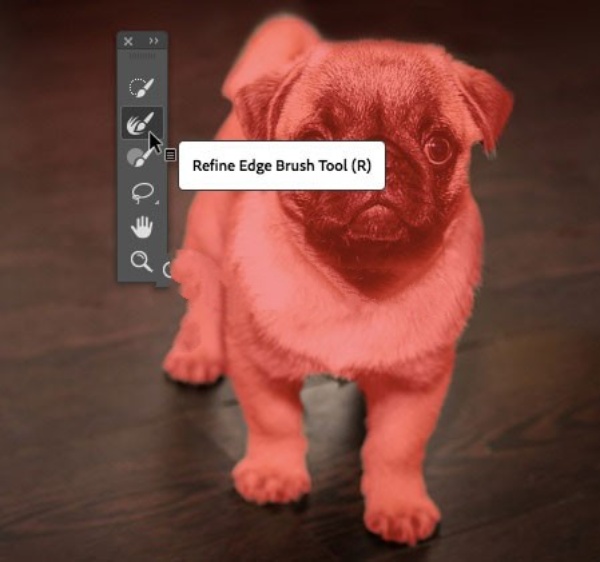
7. Use the Brush tool to improve the selection. Add and Subtract mode allows you to control what you want to select or ignore.
For more pictures, you can stop here. But the 4 Global Refinement settings can also do wonders and make the selection a better quality. Try these 4 sliders to smooth the edges of the image:
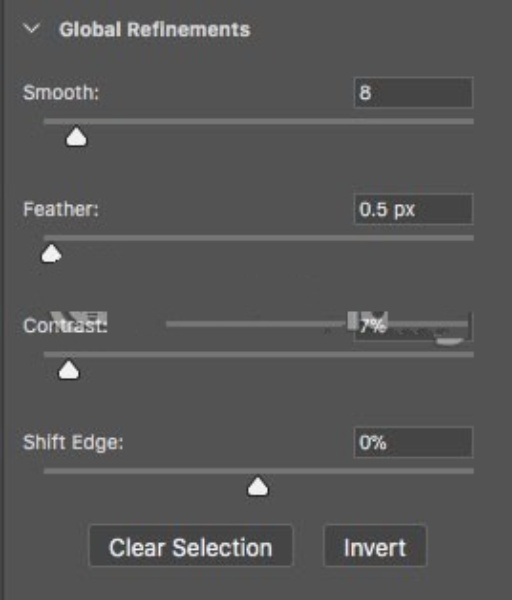
- Smooth: Displays a smoother outline for the selection.
- Feather: Softens the transition between the selection and the background.
- Contrast: As this slider is increased, the soft edge transition becomes sharper.
- Shift Edge: Move the soft selection edge inward or outward to remove unwanted pixels.
Once done, go to Output to. Click the appropriate option for the selection. Click OK and Photoshop returns you to the main workspace.
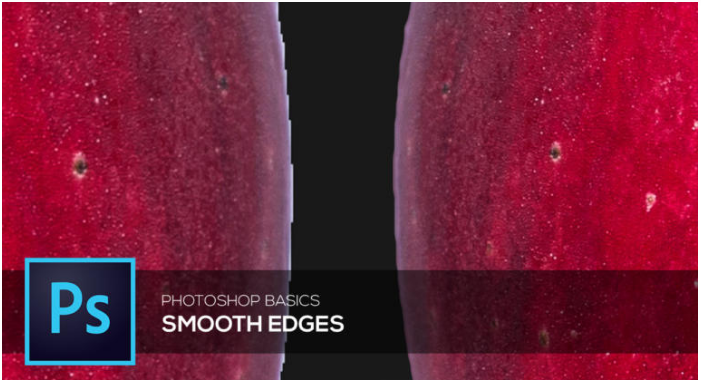
How to smooth edges in Photoshop CS6 by anti-aliasing
You can smooth the hard edges of a selection by anti-aliasing or feathering. Anti-aliasing smoothes the jagged edges of a selection by softening the color transition between edge pixels and background pixels. Because only the edge pixels change, no detail is lost. Anti-aliasing is useful when cutting, copying, and pasting selections to create composite images.
You can select anti-aliasing with the Lasso, Polygonal Lasso, Magnetic Lasso, Elliptical Marquee, and Magic Wand tools. To anti-alias, you must select the Anti-Alias option before making the selection; you cannot add anti-aliasing to an existing selection.
-
In the Edit workspace, select the Lasso, Polygonal Lasso, Magnetic Lasso, Elliptical Marquee, or Magic Wand tool.
-
Select Anti-aliased in the options bar.
-
Make a selection in the image window.
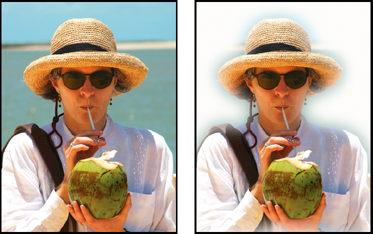
How to smooth edges in Photoshop CS6 by feathering
-
You can smooth the hard edges of a selection by feathering. Feathering blurs edges by building a transition between the selection and surrounding pixels. This blurring can cause some loss of detail at the edge of the selection.
You can create a feathered selection with the Elliptical Marquee, Rectangular Marquee, Lasso, Polygonal Lasso, or Magnetic Lasso tool. You can also add feathering to an existing selection by using the Select menu. Feathering effects are apparent when you move, cut, copy, or fill the selection.

How to smooth edges in Photoshop CS6 by feathering Original image (left), and after making a feathered selection, applying the Inverse command, and filling with white (right)
Define a feathered edge for a selection tool
-
In the Edit workspace, do one of the following:
-
Select any of the lasso or marquee tools from the toolbox, and enter a Feather value in the options bar to define the width of the feathering. The feathering begins at the selection border.
-
Select the Selection Brush tool, and select a soft-edged brush from the brushes pop‑up panel in the options bar.
-
-
Make a selection in the image window.
Define a feathered edge for an existing selection
-
In the Edit workspace, use a selection tool from the toolbox to make a selection.
-
Choose Select > Feather.
-
Type a value between .2 and 250 in the Feather Radius text box, and click OK. The feather radius defines the width of the feathered edge.
TheArtCult hopes this article will help you to smooth edges in Photoshop CS6. Good luck!