How to fix Premiere Pro 2022 crashing. Does Adobe Premiere Pro keep crashing on your Windows PC/laptop? You’re not alone. Although it is very annoying, the new good thing is that you have come to the right place and after reading this article you will be able to fix Premiere Pro problems easily on your own. While the cause of this problem varies, here we have compiled some fixes that have been proven to work for many Windows Premiere Pro users. Whether Premiere Pro crashes on startup or crashes while it’s displaying media, you can find a fix to try in this article.
Most Premiere pro problems are caused by software errors. In other cases it’s most likely still the error, but some other causes could be an outdated operating system driver, an outdated GPU driver, or your computer no longer meeting the requirements. system requirements for the latest Premiere Pro build. It can be briefly understood here that the error is caused by the software because it has not been fully optimized. But in fact, if it is more clear, it can be an error related to many different parts such as: the operating system is old and has not been updated, the GPU driver is outdated or your computer configuration is no longer compatible with the latest version of Premiere Pro and so on, and a whole lot more.
But to be fair, Adobe has done its best to keep Premiere Pro software running as smoothly as possible with each update. However, many errors will still arise, even with other editing software other than Premiere.
If you’re trying to edit a feature-length project in 4K on a sub-par laptop, you’re solving the problem yourself. This is not a blow to Adobe , hardly any company can prevent crashes and errors on the software with the depth that Premiere Pro has.
In some cases, Premiere Pro may not crash, it just runs very slowly. This can be frustrating for users.
2. How to fix Premiere Pro 2022 crashing
One of the most frequent troubleshooting measures Adobe recommends is resetting your Premiere Pro preferences. (Sometimes called “trash” your preferences.) This will reset your preferences to their original defaults. To do this, just hold Alt as you click to launch Premiere Pro. (Keep preferences for Mac.) This opens a pop-up asking if you want to reset your preferences.
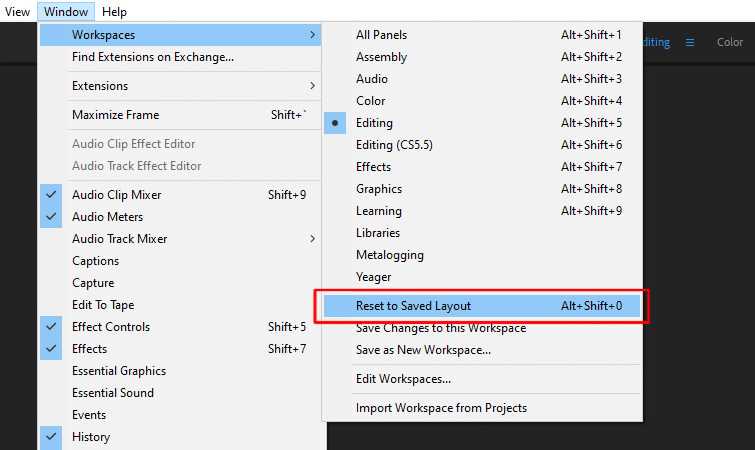
- Reset workspace to saved layout
If you don’t want to factory reset all your options, just try resetting your current workspace. (We recommend using one of the default Premiere Pro layouts .) Navigate to Window > Workspaces > Reset to Saved Layout.

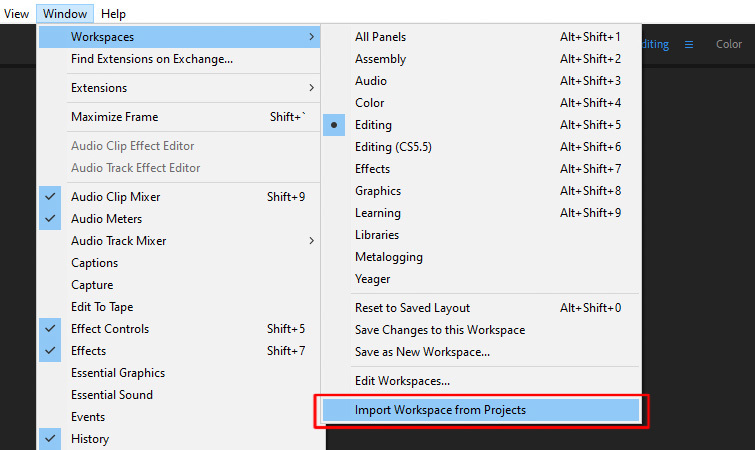
- Turn off the imported workspace
You should also disable workspaces imported from previous projects. (Because custom workspaces can cause errors.) Navigate to Window > Workspaces > Import Workspace from Project. Make sure it is not selected.
Directly opening older projects from earlier Premiere Pro builds can sometimes be a problem. An easy job for this is to simply create a brand new project, then import your old project into the new project. To do this, navigate to File > Import.
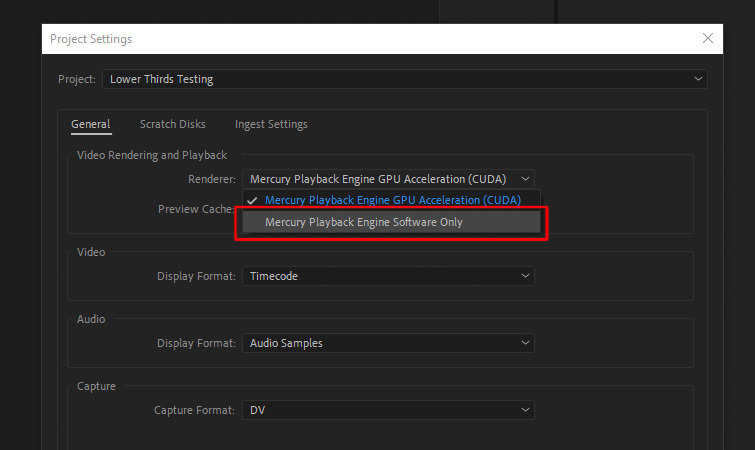
- GPU Acceleration
Another setting to try is to disable GPU Acceleration. Navigate to File > Project Settings > General. You will then see Renderer options. Set it to the option that says Software Only.
- Clear media cache
Clearing the Media Cache is another good option, as these files can sometimes get corrupted. Navigate to Edit > Preferences > Media Cache. You will then see the Delete media cached files setting where you can delete them. Older versions of Premiere Pro don’t have this button, so just navigate to the folder you set for Media Cache and delete the files manually. (You should be able to see the location of this folder in Media Cache preferences.)
- Effects and Third Party Plugins
Some effects in Premiere Pro can cause problems. Many users report having problems using Warp Stabilizer. If that’s the case, you could try rendering your clip with the Warp Stabilizer in After Effects, and then re-import it into Premiere Pro. Alternatively, you can also Dynamically Link your clips with After Effects. Just right click on the clip and choose Replace with After Effects Composition.

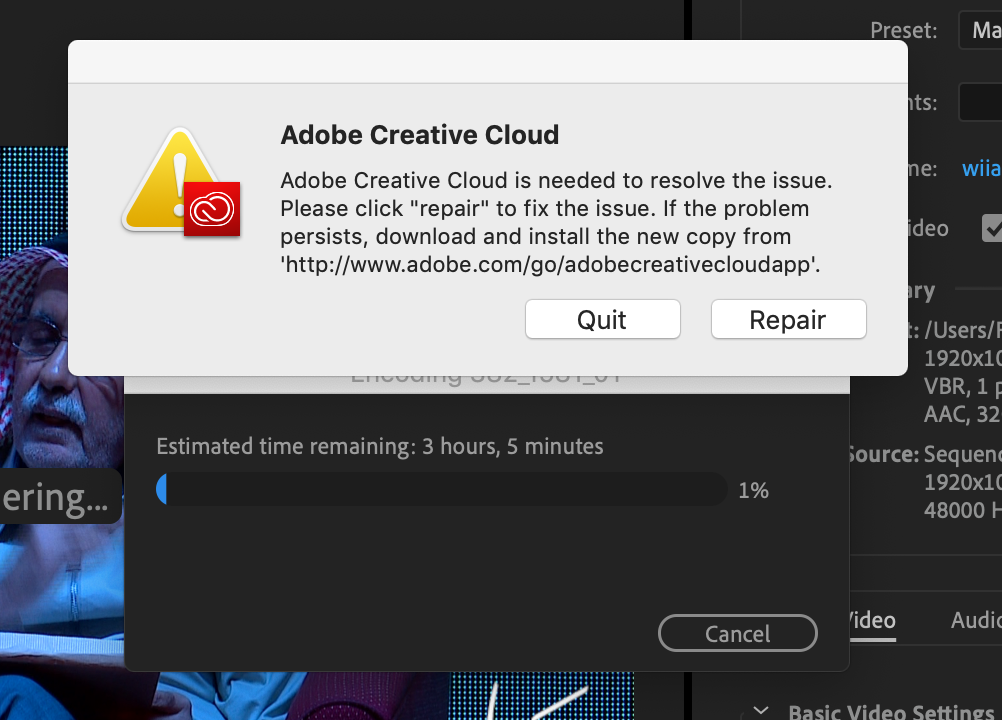
- Invalid installation: Adobe Creative Cloud Cleaner Tool
Sometimes the only option is to completely uninstall and reinstall Premiere Pro. Fortunately, there is the Adobe Creative Cloud Cleaner Tool, which can help you remove corrupted installations. If nothing else works and you suspect it might be an installation problem, you can try. However, you will want to be computer savvy, as Adobe recommends only experienced users to use this tool.
3. Best practices to avoid crashes
Besides the errors that can cause Premiere Pro to crash, here are the best practices that you can try to ensure a better experience when using Premiere Adobe.
- Update driver
Update your operating system and graphics card drivers regularly. This is something that can often cause problems with Premiere Pro. Here are instructions for updating your Mac OS and Windows OS. For your GPU you can check AMD Drivers and NVIDIA Drivers websites.
- No immediate build update
Never immediately update to a new version of Premiere Pro if you are currently working on a project. Especially if your current version is working smoothly. You should treat the latest release as if it were a beta. Allow some time for errors to work before you start immediately and use it on a project you need urgently.
- Keep previous works installed
Keep previous versions of Premiere Pro installed on your computer. (Especially if you have a stable build.) These versions work as a good backup if the latest release is particularly buggy. Sure, it may not have the latest features released, but at least it works! Past builds are also ideal for older projects that may have been originally edited with them.
- Minimum system requirements
Always make sure your system meets the minimum requirements for the latest version of Premiere Pro before upgrading. Currently, recommended specs are 7th Gen Intel CPU (or equivalent), 16 GB RAM for HD media, and 4 GB graphics card. If your system meets these requirements, always check Premiere Pro ‘s System Requirements page before upgrading.
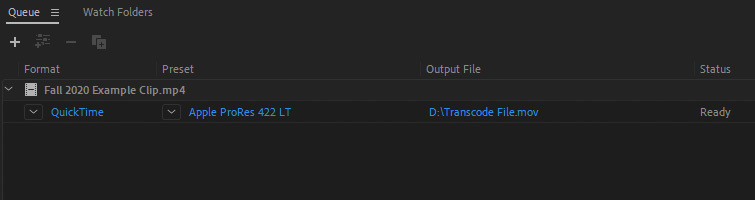
- Transcoding snippet for editing
Another best practice is to transcode your footage into a format that’s easier to work with for Premiere Pro. Highly compressed codecs like H.264 are not optimal for verbose edits. Use Media Encoder to transcode all your clips to an edit-friendly codec like ProRes LT.
In most cases, keeping Premier Pro, Windows OS, and drivers up to date will eliminate most program crashes. If the common fixes in this article don’t help you fix Premiere crashes, you can also try investigating the Windows crash log to analyze and fix the cause of the problem. Theartcult hopes that this article has helped you troubleshoot Premier Pro crashes. If you have any questions or suggestions on this topic, don’t hesitate to leave us a comment below. Thanks for reading!