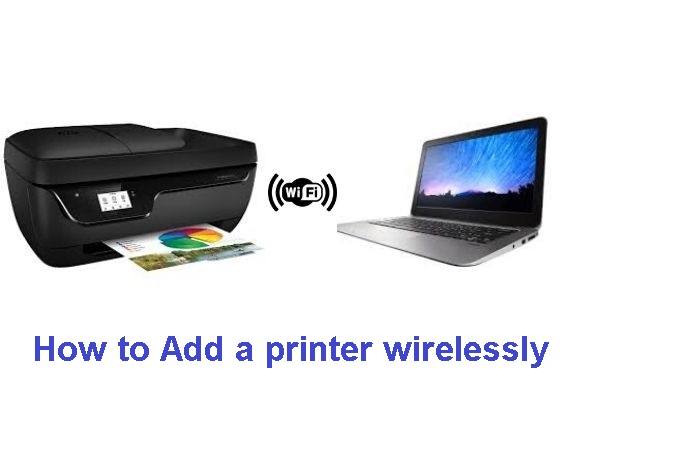
How to Add a printer wirelessly? How to connect printer to computer wirelessly? Wireless printers don’t have to be set up like before, newer printers are really easy to set up and configure, and Windows 11 makes it easier to add printers connected to your Wi-Fi network.
In this guide, you’ll learn the steps to add a wireless printer to Windows 11 devices. However, you can also use the same instructions to set up a printer connected to a network using an Ethernet connection.
How to Add a printer wirelessly
First, make sure your printer is powered on and plugged in if it’s a traditional wired printer. For WiFi printers, make sure the device is connected to the same network as your computer.
Windows 11 automatically downloads the software your printer needs to work.
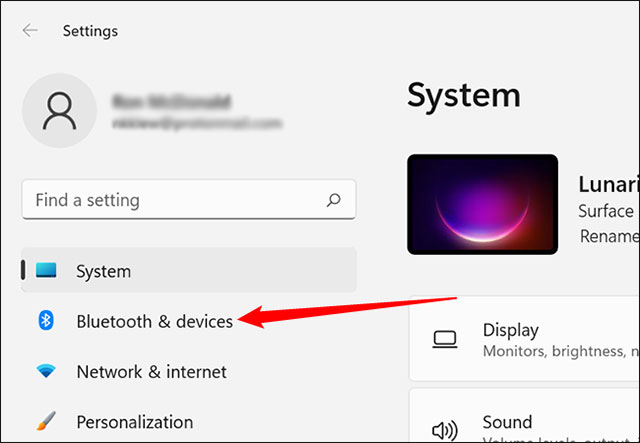
To add a printer to your Windows 11 system, first, click the Start button, enter the keyword “Settings” in the search bar, and press Enter. Alternatively, you can also press Windows + i to open the Settings app. On the left side of the Settings menu that opens, click on the “Bluetooth & devices” item.
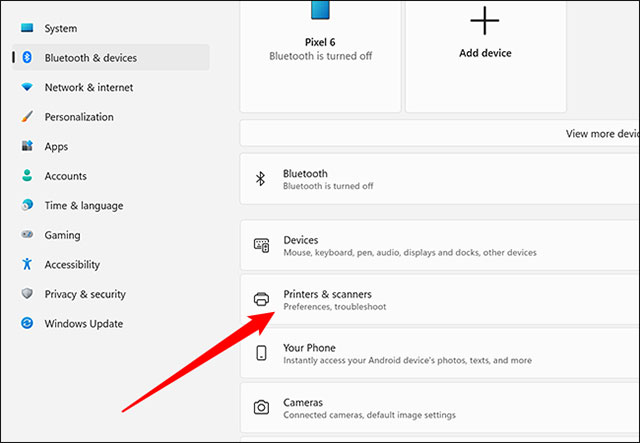
On the next page, click “Printers & scanners”.
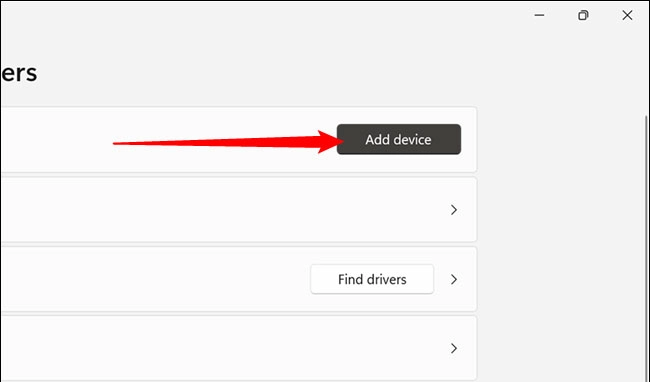
On the Printers & scanners page, click the “Add device” button near the top right. It will take some time for Windows to try to detect your printer.
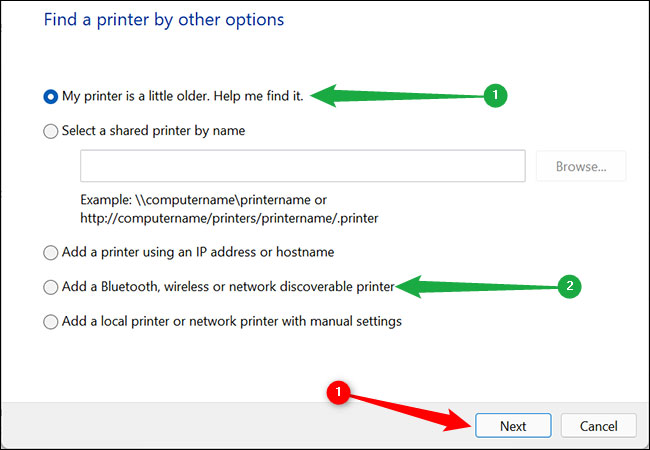
If your printer does not appear, click “Add manually”. A pop-up window will show you a few options.
Click on “My printer is a little older. Help me find it” if you plug the printer into your computer. In case it is a wireless printer, select “Add a Bluetooth, wireless or network discoverable printer”.
Once you have made your selection, click “Next”.
If Windows 11 detects the printer, simply follow the suggestions displayed on the screen to establish the connection.
Printer Troubleshooting
If unfortunately you are having trouble connecting the printer to your Windows PC, here are some remedies you can try.
Restart your Windows 11 PC
In some situations, you can restart your Windows 11 PC to fix problems, install updates, complete the installation process, or perform some other necessary tasks. If your printer is not detected or detected but not working correctly, restarting your PC may help resolve the issue.
Double check the instructions
Today’s modern printer models often come with a lot of convenient extras, but they also come with problems that can occur during setup. Make sure that any setup instructions that came with the printer are followed closely, and that all connections to your computer are correct.
Manufacturer’s driver
If your printer has advanced functions, or Windows 11 does not install the correct printer driver, you may need to manually download driver packages from the manufacturer. Use the installation disc that came in the printer’s box, or visit the manufacturer’s website to download the driver.
How to set up a wireless printer by IP address
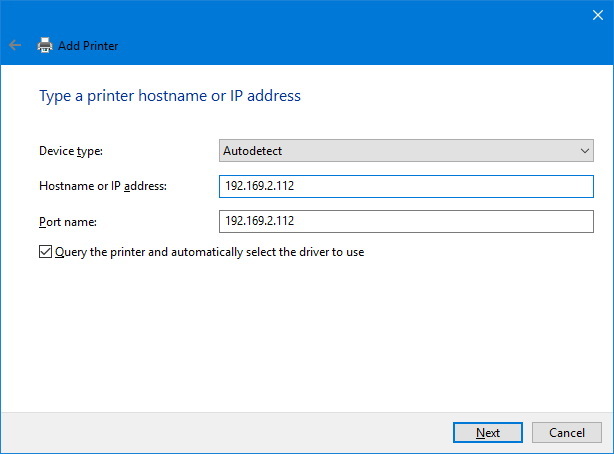
If you don’t see your wireless printer listed, click The printer that I want isn’t listed to open the Add Printer wizard, and then do the following:
-
Select Add a printer using a TCP/IP address or hostname .
Add Printer wizard -
Click Next .
-
Enter the printer’s IP address (for example, 192.168.2.122).
-
Set Device type to Autodetect and make sure Query the printer and automatically select the driver to use is checked.

Add printer name or IP address -
Click Next wireless printer.
-
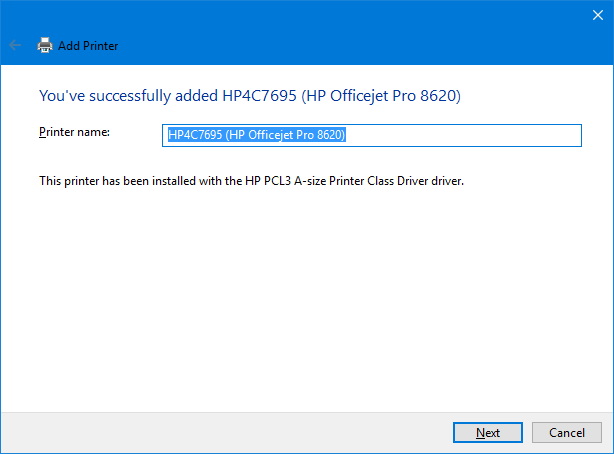
Once your printer is added, Windows 10 will automatically name your printer, but you can change the name in this step.
Rename printer during setup -
Click Next.
-
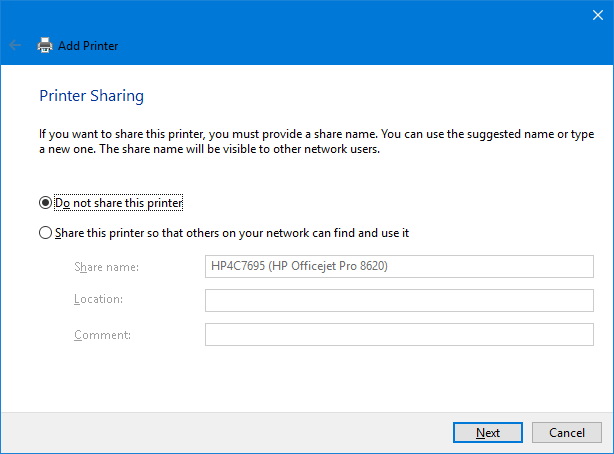
Select Do not share this printer.
Printer sharing option -
Click Next.
-
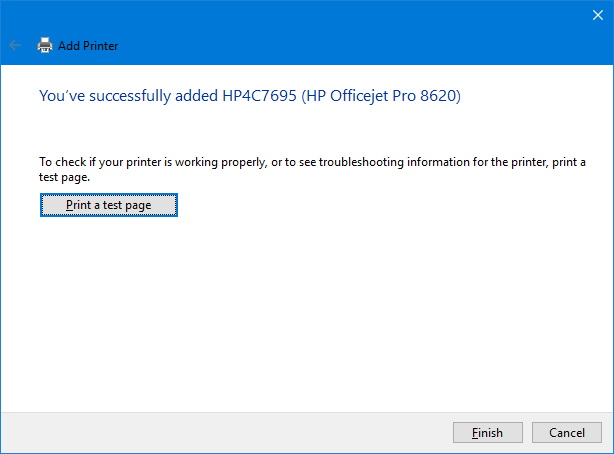
If you want to make sure everything is working correctly, click Print a test page to test your printer.
Print the test page and finish adding the printer -
Click Finish to complete the task.
How to remove wireless printer
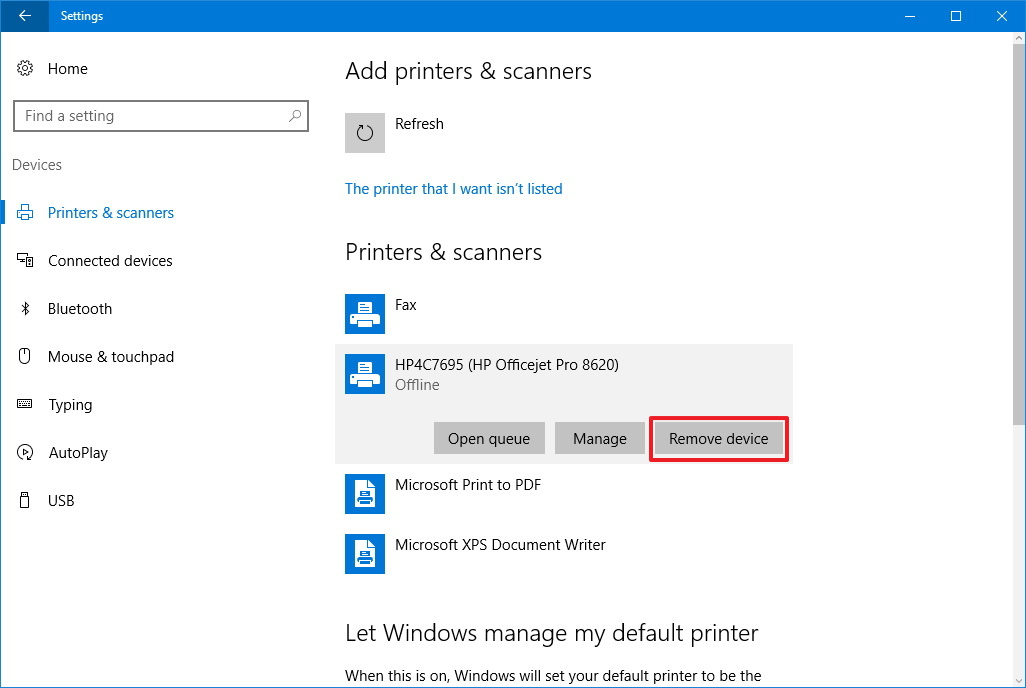
When you no longer need the printer, you can use the following steps to remove the wireless printer from Windows 10.
-
Open Settings.
-
Click Devices.
-
Click Printers & scanners.
-
Under Printers & scanners, select the wireless printer.
-
Click Remove device.

Remove wireless printer - Click Yes.
Installing the printer using the Setup application will only install the driver to allow you to print. If you have a printer with additional features, you will need to install the software that came with your computer.
TheArtCult hopes the instructions on How to Add a printer wirelessly will be useful for you! Good luck!